How to use your mower, Cord connection – Craftsman 247.370320 User Manual
Page 8
Attention! The text in this document has been recognized automatically. To view the original document, you can use the "Original mode".
HOW TO USE YOUR MOWER
MOTOR/BLADE CONTROL
A
WARNING: THE MOTOR/BLADE CON
TROL ON THIS MOWER IS INSTALLED TO
MINIMIZE THE RISK OF BLADE CONTACT
INJURY AND IS REQUIRED BY FEDERAL
REGULATIONS. DO NOT UNDER ANY CIR
CUMSTANCES ATTEMPT TO DEFEAT THE
FUNCTION OF THE MOTOR/BLADE
CONTROL.
The motor/blade control requires the operator to be
behind the handle to start and run the mower. When
the operator releases the control lever, the motor will
stop and an internal brake helps the blade to stop
quickly.
When the operator leaves the operating position to
remove the grass catcher, change the cutting height,
pick up sticks or other objects in the way, the motor
will stop automatically when the motor/blade control
lever is released.
CUTTING HEIGHT ADJUSTMENT
WARNING: TURN OFF MOTOR AND
DISCONNECT POWER CORD BEFORE AD
JUSTING THE CUTTING HEIGHT.
A
The height adjustment knob is located on the left side
of the deck. Turn the knob clockwise to lower cutting
height; turn it counterclockwise to raise the cutting
height. See figure 5.
The cutting height range is approximately 1" to 3-1/2".
The heights are measured from the ground to the blade
tip with the motor not running. These heights are ap
proximate and may vary depending upon soil condi
tions, height of grass and types of grass being mowed.
The average lawn should be cut approximately 1-1/2"
to 2" during the cool season and over 2" during hot
months. For healthier and better looking lawns, mow
often and after moderate growth.
Height
Adjustment
Knob
CORD CONNECTION
A
WARNING: USE ONLY UL APPROVED
OUTDOOR EXTENSION CORD (MINIMUM
16 GAUGE RECOMMENDED).
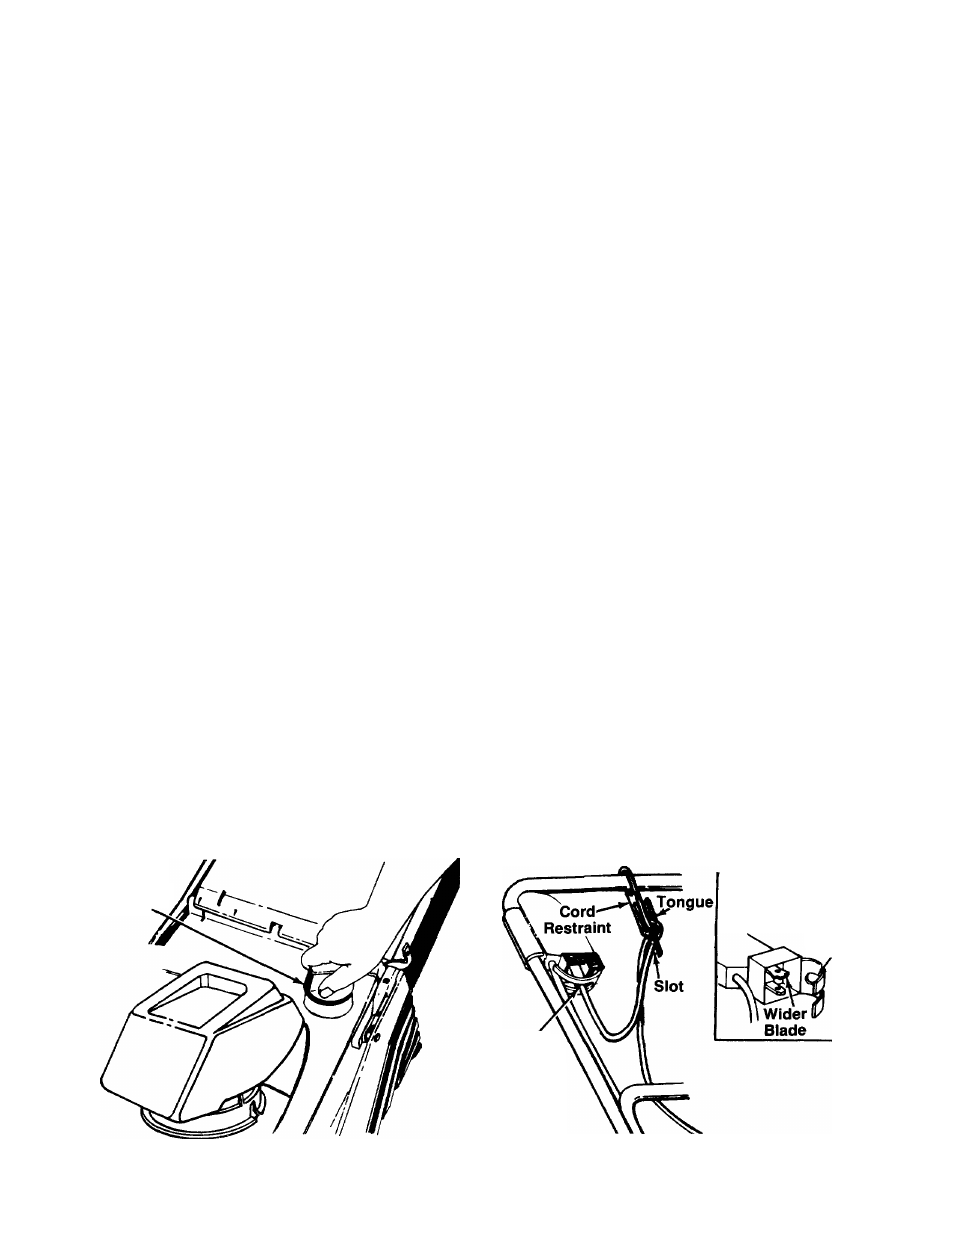
CORD RESTRAINT
Attach extension cord (not provided with unit) to the
cord restraint as follows. Form a small loop in the ex
tension cord. Ailow enough excess cord to make the
connection to the motor/blade control (approximately
20 inches). Slip the ioop through the slot on the bot
tom of the cord restraint, and up over the tab, to pre
vent disconnection from the motor/blade control during
operation. Keep the cord restraint as close to the
motor/blade control as possible. See figure 6.
CONNECTION TO THE MOTOR/BLADE CONTROL
A
WARNING: MAKE CERTAIN MOTOR/
BLADE CONTROL LEVER IS IN OFF
(RELEASED) POSITION.
To attach extension cord to the mower, swing open the
spring-ioaded
plug
retainer
located
beneath
the
motor/blade control. Connect the plug on the extension
cord fully onto the plug on the mower. The mower is
equipped with a polarized AC power plug (one blade
of the plug is wider than the other), which will fit into
the plug on the extension cord only one way. See figure
6, inset. If unable to make a full connection, try revers
ing the plug on the extension cord. Should the plugs
still fail to fit, contact your service dealer for assistance.
Do not defeat the safety purpose of the polarized plug.
CONNECTION TO THE ELECTRIC POWER SOURCE
Plug the extension cord into any convenient 110-120
volt 60 cycle A.C. outlet or receptacle for your source
of power. This outlet may be located either out-of-doors
or indoors. If an inside receptacle is used, the exten
sion cord can be taken out either through the doorway
or a window. To avoid blowing fuses, pick an outlet that
is not overloaded. Your mower will operate satisfactorily
on a circuit that is fused for 15 amperes. Do not use
oversize fuses without consulting your power company.
Polarized Plug
Plug
Retainer
(Open
Position)
Plug
Retainer
FIGURE 5.
FIGURE 6.