Testing the scanner and the connection – AGFA 1200 User Manual
Page 33
Chapter 2: Installing the Scanner
33
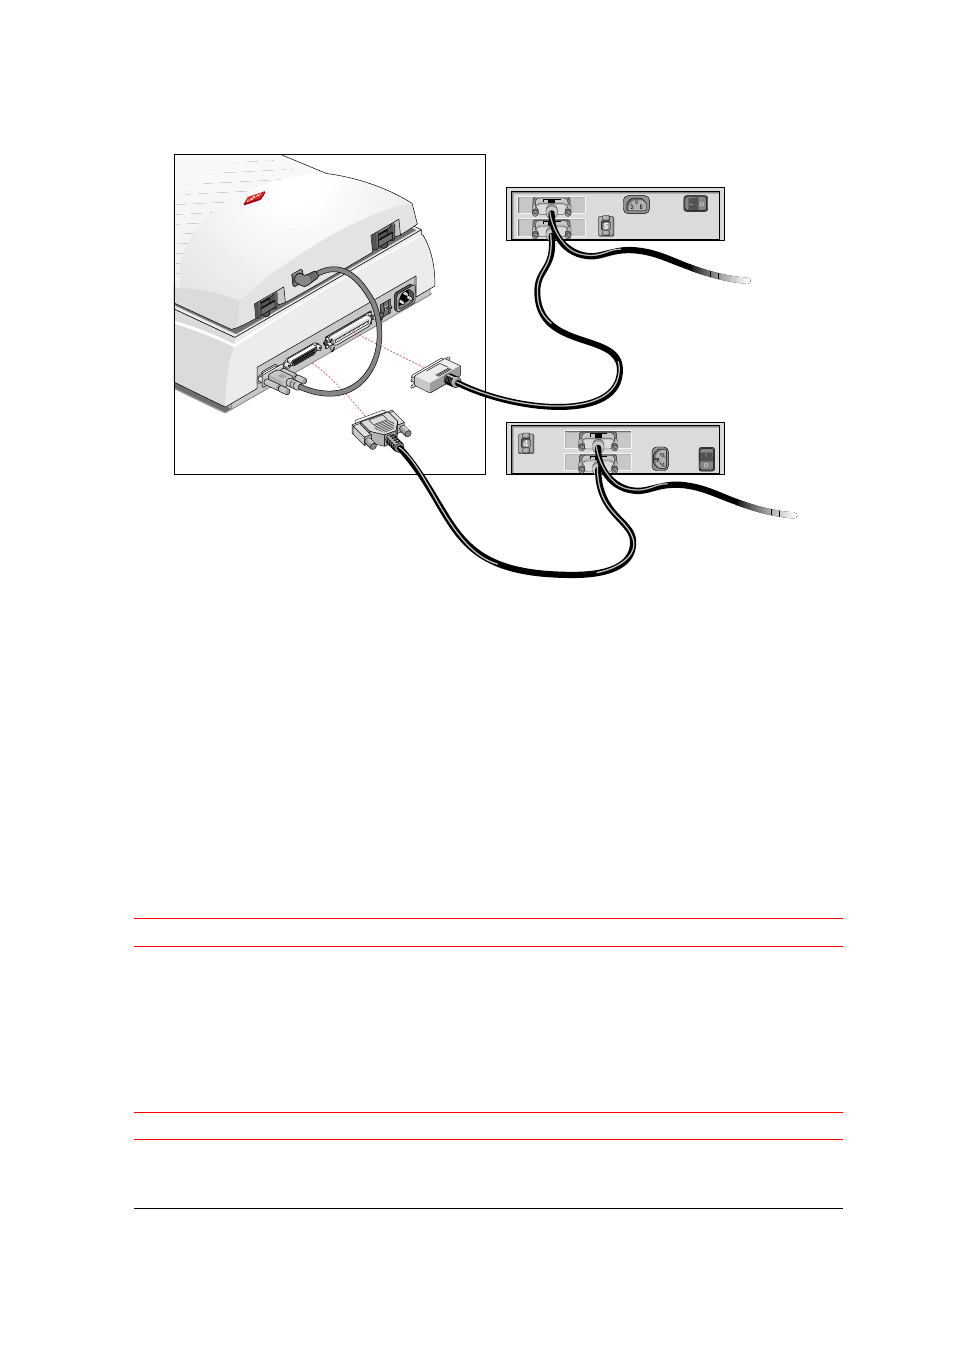
If you install the scanner between two other external SCSI devices
1
Set the scanner to an unused SCSI ID number between 0 and 6.
For more information, see
2
Disconnect the SCSI cable from one of these two SCSI devices.
3
Connect the free end of this SCSI cable to the scanner.
4
Connect the 50-pin end of the SCSI cable (the one supplied with your scanner) to the other
adjacent SCSI device.
5
Snap the diamond shaped wire clips into the clip brackets to secure the connection.
6
Connect the 25-pin end of the SCSI cable (the one supplied with your scanner) to the scanner.
7
Tighten the connector screws to secure the connection.
8
Make sure that the last device in the chain is terminated.
Caution
: In this configuration you are not allowed to put the terminator on the scanner.
In case of problems, consult
Testing the Scanner and the Connection
You are now ready to check if the scanner is operating properly and if the devices are correctly
connected to your PC.
Caution
: Check if the scanner is properly unlocked.
1
Connect the power cord to the scanner.