Wiring connections, Machine wiring, Optional wireless remote alert light system – Power Soak 34453 PS-225/275 Installation Manual User Manual
Page 18: Optional chemical dispenser wiring
14
Wiring Connections
Machine Wiring
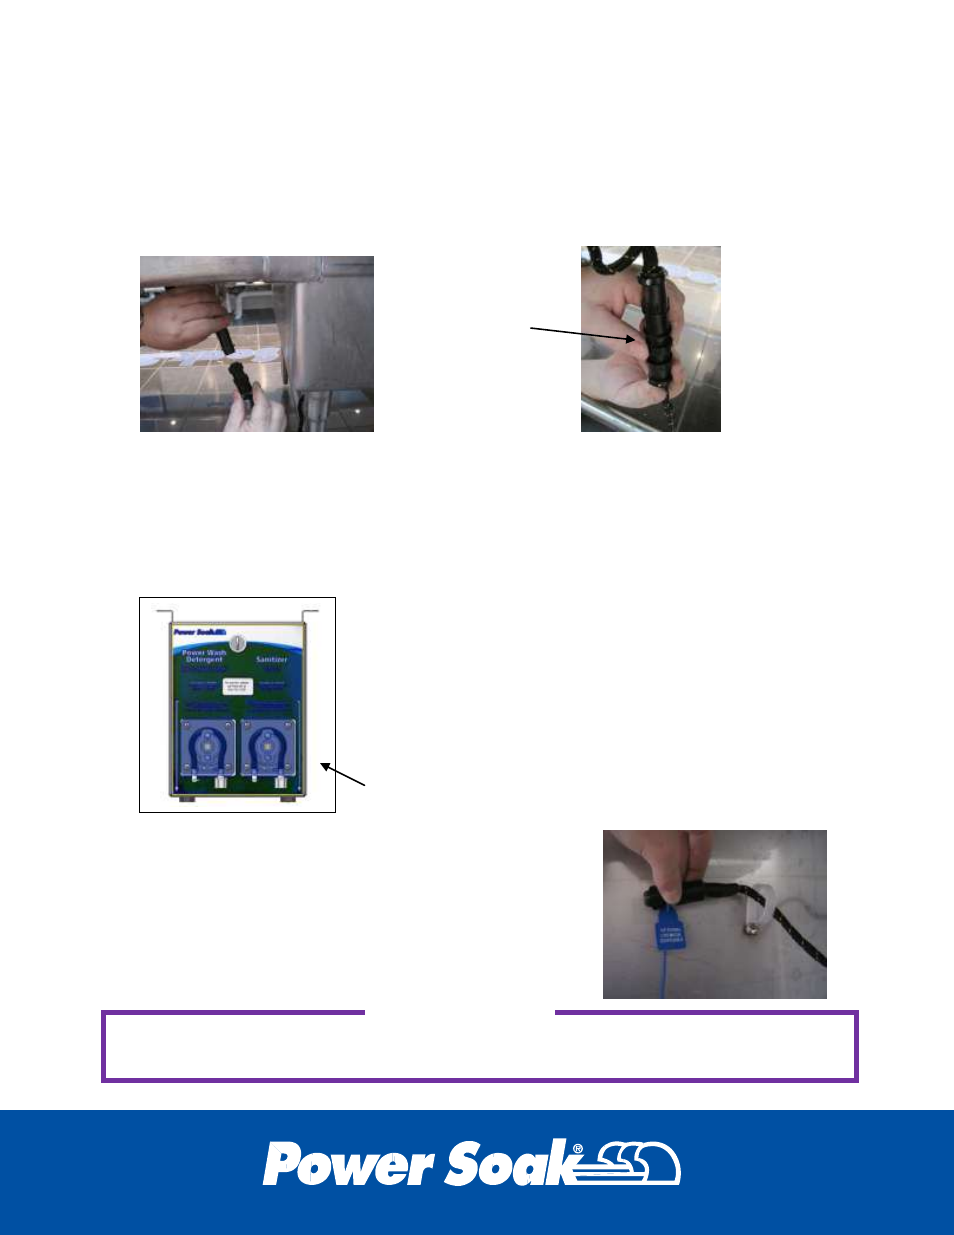
Locate the two halves of the wiring harness and inspect them to be sure
they are clean and not damaged. Insert the two halves together and hand
tighten the threaded collar.
Optional Wireless Remote Alert Light System
If the Power Soak unit was purchased with the Wireless Remote Alert Light
System, refer to the instructions provided with the light system to complete
the wiring for this devise.
Optional Chemical Dispenser Wiring
If installing any chemical dispensing system that
is
not
a Power Soak
®
brand chemical dispenser,
follow the manufacturer’s installation guide, and
skip this section.
If the unit being installed is supplied with the
optional Power Soak
®
brand chemical dispenser,
proceed with this section.
The Power Soak
®
chemical dispensing unit must be
bolted to the underside of the front rim and have the
electrical connector attached to the back of the
chemical dispenser enclosure. The chemical
delivery hoses must be installed from the dispenser
to the wash tank and sanitizer tank chemical
injectors. The hoses may follow along the wire
harness and loosely hung with zip-type wire ties.
HAND
TIGHTEN
THE COLLAR
Power Soak
®
brand chemical dispenser is
shown here
The chemical supplier must finalize the setup of the chemical dispensing system.
IMPORTANT