Power Soak 34453 PS-225/275 Installation Manual User Manual
Page 17
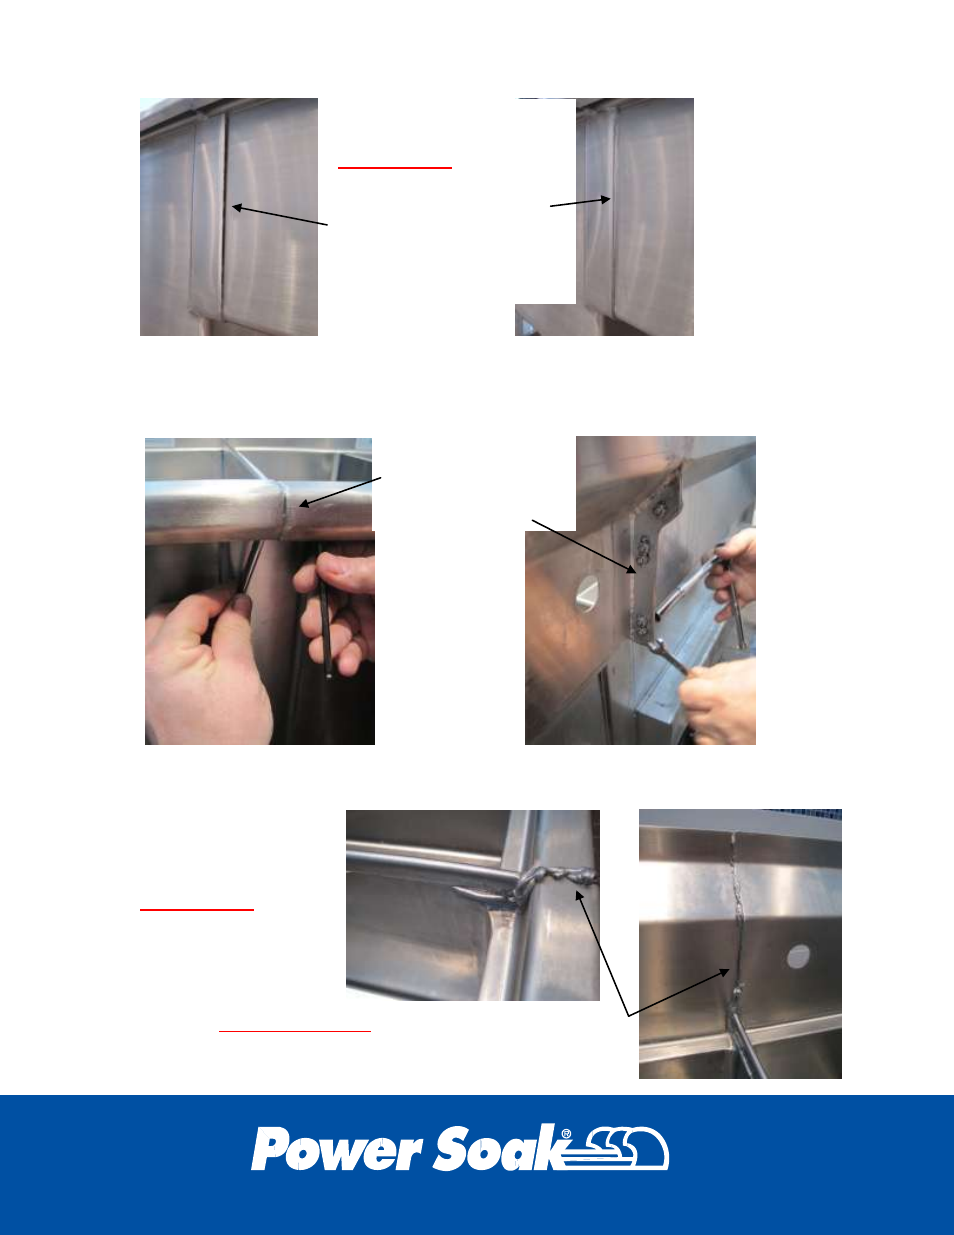
13
Bolt the channel rim and backsplash together using the nuts and bolts
provided with the unit.
Seal the backsplash,
channel rim, and all
the gaps between the
two sinks with the
grey-colored
NSF
approved sealant that
is supplied with the
unit.
Reassemble the two
sections. Apply a bead of
grey-colored
NSF
approved sealant (supplied
with the unit) in the gap
between the rinse sink and
the trim plate. Seal the
entire joint to keep liquids
from entering.
APPLY THE
GREY-COLORED
NSF APPROVED SEALANT
TO ALL THE SINK JOINTS AND WIPE THE EXCESS AWAY
LEAVING A SMOOTH SANITARY JOINT.
BOLT THE JOINT
TOGETHER UNDER
THE FRONT RIM
AND BEHIND THE
BACK SPLASH.