Power Soak 34453 PS-225/275 Installation Manual User Manual
Page 15
11
Leg Set and Sink
Insert the leg assembly into the sockets on the bottom of the sink. Insert
the leg set into the sanitizer sink (sanitizer sink is an option and may not be
included). Be sure that all the legs are seated in the bottom of the sockets.
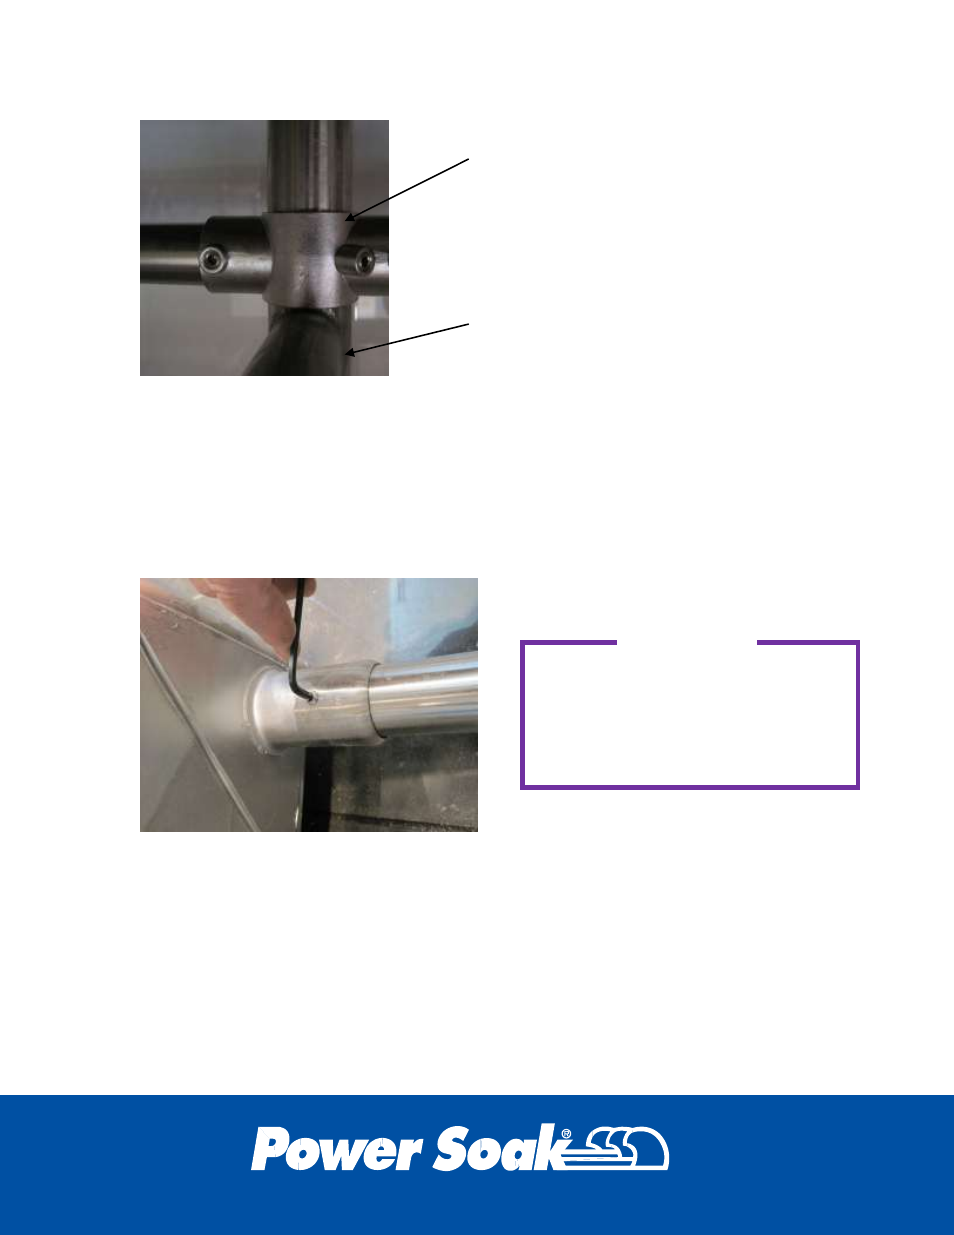
Use an allen wrench (5/32) to tighten the set screws in all of the sockets.
After tightening the set screws, apply silicone sealant (supplied with the
machine) to the set screw openings in order to seal the openings.
Adjusting the Feet
Use a tape measure and adjust the feet to the approximate height required.
Turn the hexagon foot clockwise to shorten the height of the sink or
counterclockwise to raise the height of the sink. Final adjustment of the
feet will be done after the sink is in the installed location. Set the sink and
leg assembly upright on its feet.
SET SCREWS ARE ORIENTED
TOWARD THE INTERIOR OF
THE SINK AND THE SOCKET IS
ON TOP OF THE WELDED
STRETCHER
WELDED STRETCHER
AFTER TIGHTENING THE SET
SCREWS, FILL THE OPENINGS
WITH THE SILICONE SEALANT
THAT IS SUPPLIED WITH THE
MACHINE
IMPORTANT