Audio screen, Frequency screen, Lock/unlock screen – Lectrosonics SMV User Manual
Page 9: Remote control operation, Configuring for power restore
Super-Minature Belt Pack Transmitter
Rio Rancho, NM
9
dB, and the low frequency roll-off from 35 to 150 Hz.
Repeatedly pressing the AUDIO button toggles back
and forth between the two displays. Press and hold the
AUDIO button and use the Up and Down arrows to
make adjustments.
Frequency Screen
The Frequency Screen
displays the operating
frequency in MHz or as a
two-digit hexadecimal
number that corresponds to
the equivalent Lectrosonics
Frequency Switch Setting.
Repeatedly pressing the
FREQ button toggles between the two displays. Press
and hold the FREQ button and use the Up and Down
arrows to select the frequency.
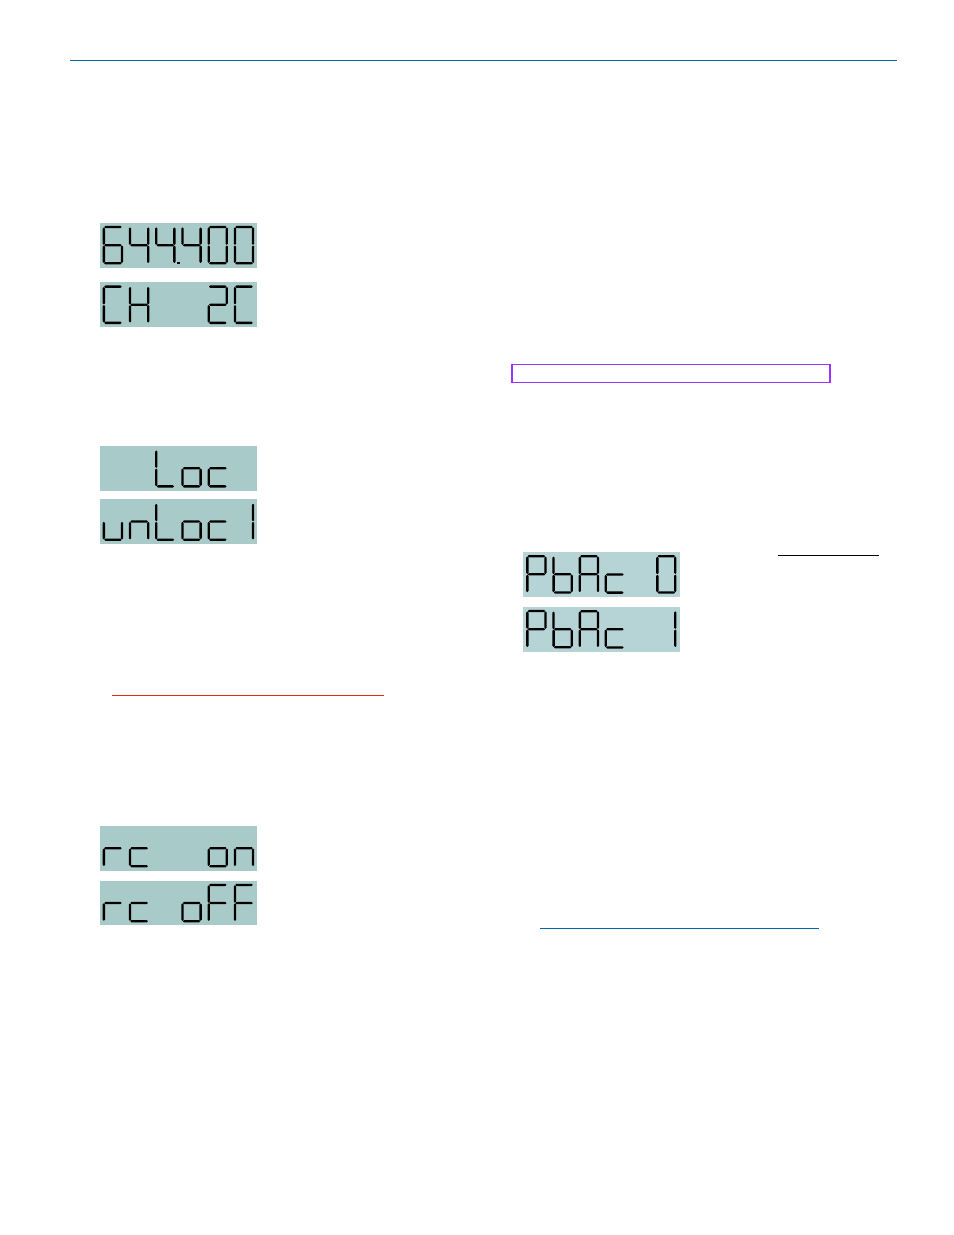
Lock/Unlock Screen
Simultaneously pressing
and holding both the Up and
Down arrow buttons during
normal operation starts the
Lock timer. The timer starts
at three and counts down to
zero. When the timer
reaches zero, the transmitter’s controls are locked.
With the controls locked, the AUDIO and FREQ buttons
can still be used to display current settings. Any attempt
to change a setting by pressing either the Up or Down
arrow button will result in an on-screen Loc reminder
that the controls are locked. Remove the batteries to
unlock the control panel.
Important: Once the transmitter is locked, it
cannot be unlocked or powered off using the
buttons. The only ways to unlock a locked
transmitter are to remove the battery or unlock it
via the RM remote control.
Remote Control Operation
Remote Control Screens
The transmitters can be
configured to respond to
signals from the RM remote
control unit or to ignore
them. This setting is ac-
cessed by holding down the
Down arrow button while
powering the transmitter on.
Use the arrow keys to tog- gle between “rc on” (remote
control on) and “rc oFF” (remote control off). The default
setting is “rc on.”
If a remote control signal is detected but the transmitter
is set to “rc oFF”, the message “rc oFF” will be dis-
played briefly on the transmitter’s LCD, to confirm that a
valid signal was received, but that the transmitter is not
configured to respond to it.
Functions available from the remote control are:
• Audio Level
• Frequency
• Lock/Unlock Buttons
• Sleep/Wake (power saving mode)
In sleep mode, the transmitter uses only 20% of the
normal amount of battery drain. Sleep mode can only be
invoked with the remote control, and can only be revoked
with the remote control or by removing the battery. When
in the sleep mode, the PWR LED blinks green every few
seconds to indicate that the transmitter is asleep and not
turned off.
The RM is not included with SM Series transmitters.
Several “Dweedle tones” can also be downloaded from
the web site at:
The dweedle tones can be played back through an MP3
player, PDA, etc., and in most cases, will even work with
walkie talkies. The tones will not work through the loud-
speakers of a sound system because the reflections
and reverberation in the room will alter the tones.
Configuring for Power Restore
Power Restore Screens
When using external power
source through a battery
eliminator, Power Restore will
return your transmitter to
settings it had before it was
powered off. This eliminates
the need to power on through
the unit itself.
1) Press and hold the Down Arrow Button then power
on the transmitter by pressing the
Audio and Freq buttons simultaneously.
2) The LCD will display the status, either “rc ON” or “rc
OFF.” Press “AUDIO” or “FREQ” key to scroll to the
“PbAc setup screen
• PbAc 1 for power restore ON
• PbAc 0 for power restore OFF
3
) When power restore is set to ON, the unit will turn
on whenever power is present at the battery termi-
nals until the power is manually turned off with the
control panel switches.
NOTE: The firmware “remembers” the power
status when a battery fails, so the transmitter will
be turned on automatically when the battery is
replaced and the previous settings will be enabled.
Power Up and Boot Sequence