Inst – United States Stove Company 1800GC User Manual
Page 19
INST
INST
INST
INST
INSTALLA
ALLA
ALLA
ALLA
ALLATION OF OPTIONAL EQ
TION OF OPTIONAL EQ
TION OF OPTIONAL EQ
TION OF OPTIONAL EQ
TION OF OPTIONAL EQUIPMENT
UIPMENT
UIPMENT
UIPMENT
UIPMENT
INSTALLING DOMESTIC HOT WATER COIL
INSTALLING DOMESTIC HOT WATER COIL
INSTALLING DOMESTIC HOT WATER COIL
INSTALLING DOMESTIC HOT WATER COIL
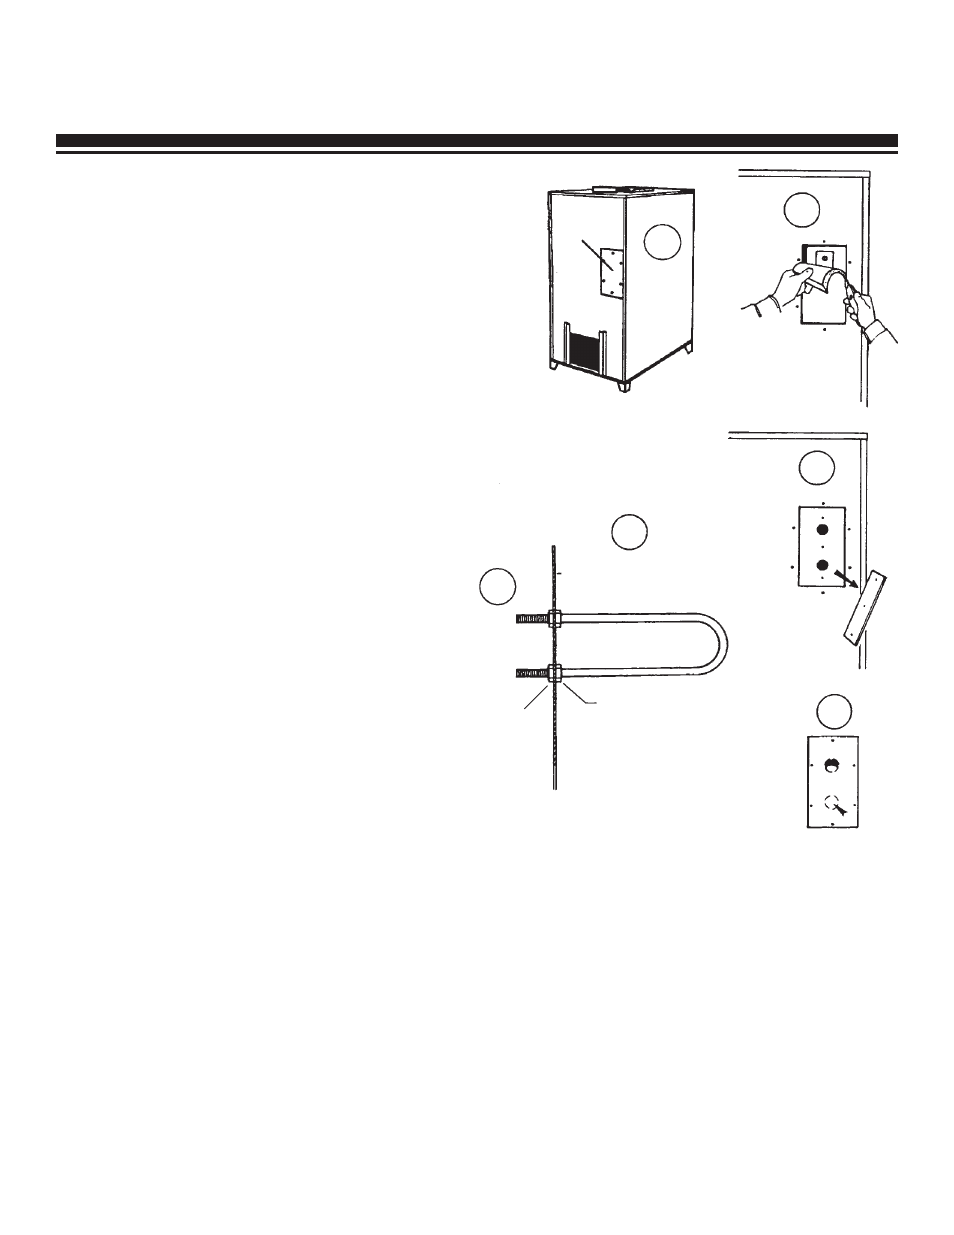
INSTALLING DOMESTIC HOT WATER COIL
1. Remove access panel at rear of enclosure.
2. With a utility knife cut out the section of fiberglass insulation
directly behind the access panel.
3. Remove cover plate from rear of firebox.
4. Place one nut on each end of the coil and thread each as
far as they will go.
5. Place the coil through the holes from the inside of the firebox
and run a washer and nut down each leg on the outside of the
stove. Before tightening the nuts down completely, wrap a
piece of hi-temp fiberglass rope gasket, provided with the kit,
around each threaded leg between the washer and the outisde
of the firebox. Tighten the nuts down securely to insure an air-
tight installation. The installation is now ready to be plumbed
to your existing domestic hot water system. Choose one of the
three methods described in the Hot Water Kit Installation
Instructions.
6. Remove knockouts from access panel and attach to furnace
enclosure.
7. Have a qualified plumber connect your domestic hot water
pipe to the coil with appropriate fittings.
ACCESS
PANEL
1
2
3
4
5
REAR WALL OF FIREBOX
DOMESTIC HOT
WATER COIL
TURN INSIDE NUTS UP
TO END OF THREADS
1. NUT
2. WASHER
3. GASKET
6
19