Figure 9 – GIGABYTE GA-MA790XT-UD4P User Manual
Page 83
Appendix
- 83 -
When finished, the new RAID array will be displayed in the RAID Disk Drive List block (Figure 8).
Figure 8
GIGABYTE Technology Corp. PCIE-to-SATAII/IDE RAID Controller BIOS v1.06.59
[ Main Menu ]
Create RAID Disk Drive
Delete RAID Disk Drive
Revert HDD to Non-RAID
Solve Mirror Conflict
Rebuild Mirror Drive
Save And Exit Setup
Exit Without Saving
[ RAID Disk Drive List ]
[TAB]-Switch Window
[]-Select ITEM
[ENTER]-Action
[ESC]-Exit
[ Hard Disk Drive List ]
Model Name
Capacity Type/Status
HDD0: ST3120026AS
120 GB
RAID Inside
HDD1: ST3120026AS
120 GB
RAID Inside
Model Name
RAID Level
Capacity Status
Members(HDDx)
RDD0: GRAID
0-Stripe
240 GB
Normal
01
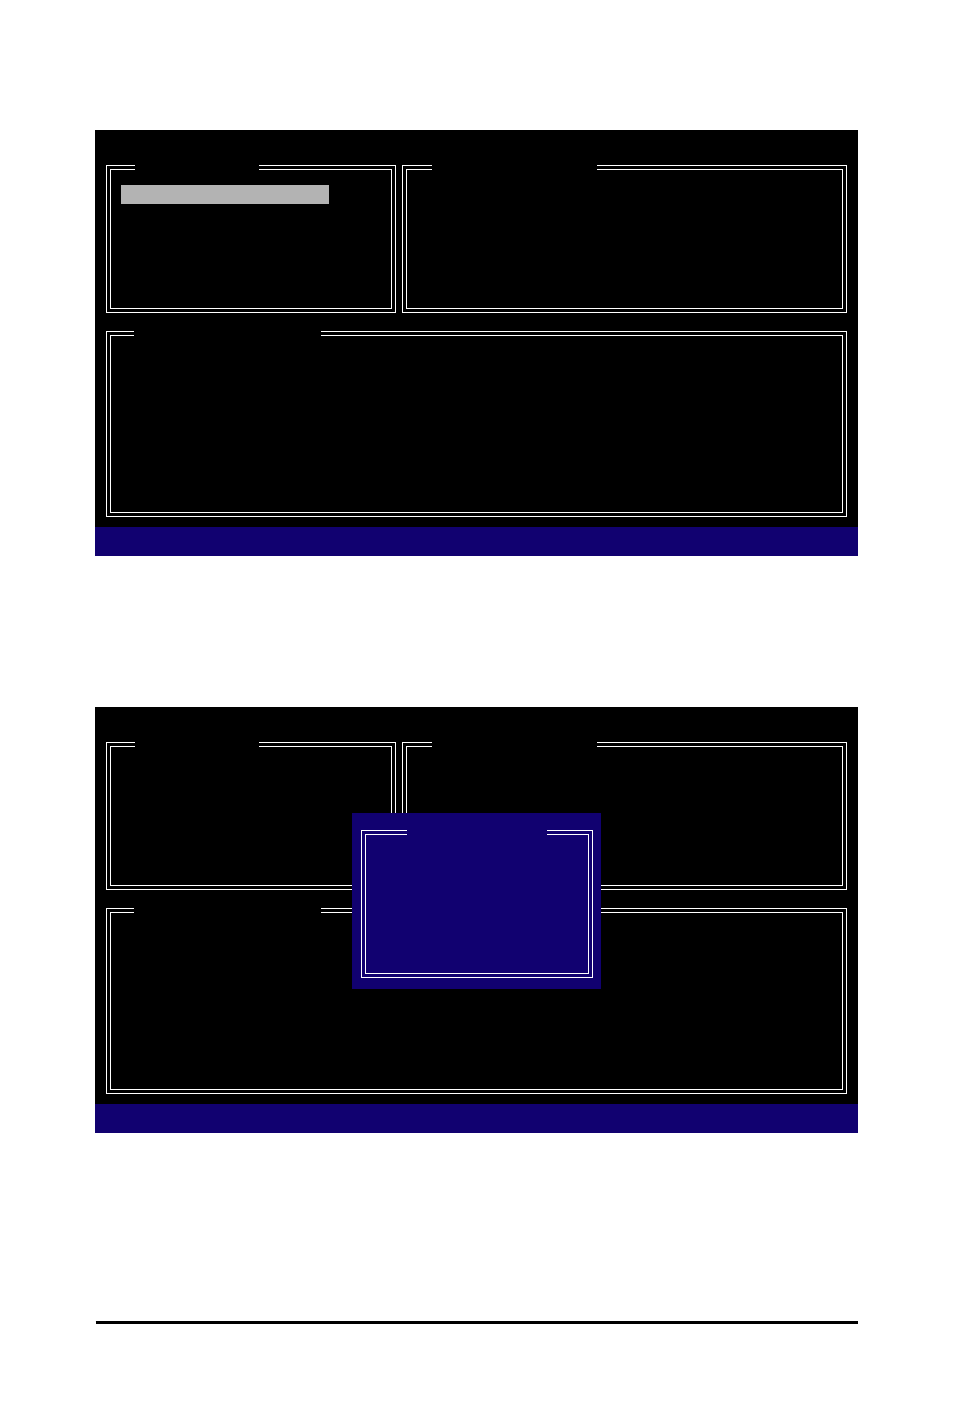
Figure 9
GIGABYTE Technology Corp. PCIE-to-SATAII/IDE RAID Controller BIOS v1.06.59
[ Main Menu ]
Create RAID Disk Drive
Delete RAID Disk Drive
Revert HDD to Non-RAID
Solve Mirror Conflict
Rebuild Mirror Drive
Save And Exit Setup
Exit Without Saving
[ RAID Disk Drive List ]
[TAB]-Switch Window
[]-Select RAID
[ENTER]-Detail
[ESC]-Exit
[ Hard Disk Drive List ]
Model Name
Capacity Type/Status
HDD0: ST3120026AS
120 GB
RAID Inside
HDD1: ST3120026AS
120 GB
RAID Inside
Model Name
RAID Level
Capacity Status
Members(HDDx)
RDD0: GRAID
0-Stripe
240 GB
Normal
01
[ RAID Information ]
Name: GRAID
Level: 0-Stripe
Block: 128KB
Capacity: 240GB
Members: HDD 01
Status: Normal
To check more detailed information about the array, use the
to move the selection bar to the RAID Disk Drive List block. Select the array and press
A small window displaying the array information will appear in the center of the screen (Figure 9).