Adding music to video, Music with picture), Adding music to video (music with picture) – Panasonic AG-VP300P User Manual
Page 53: Ot he rs, Common procedures
53
Ot
he
rs
Editing (continued)
Adding Music to Video
(MUSIC WITH PICTURE)
You can enjoy music fed from a disc while images taken by digital
cameras or video cameras are being played. The video and music
being played can be recorded on a video cassette.
Preparations
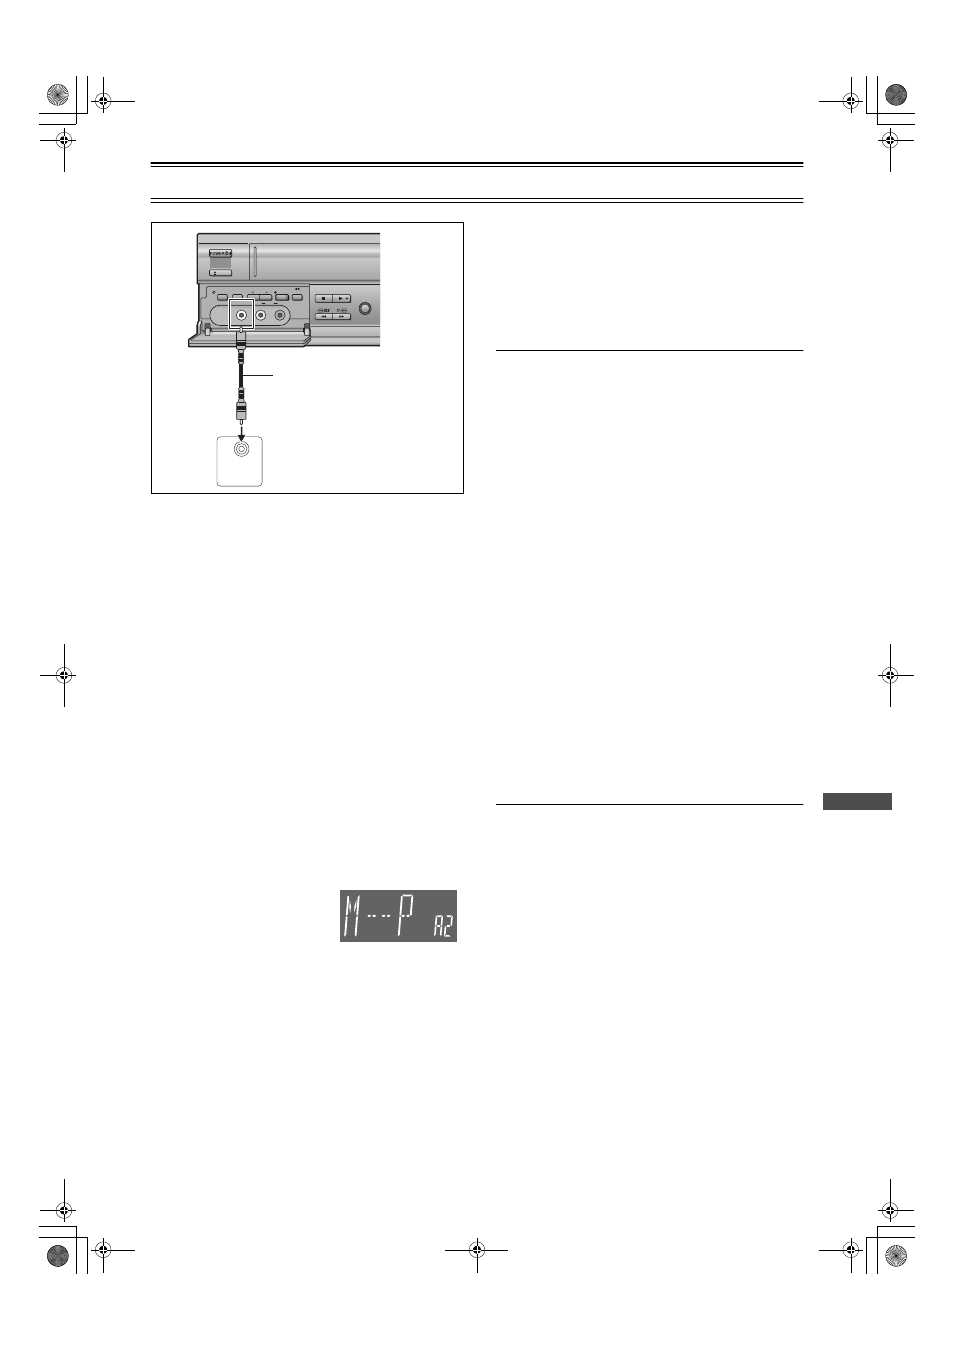
≥Connect a camera to this unit as shown.
≥Confirm that the TV is on and the unit viewing channel is
selected.
≥Insert the disc containing the music to be played with images.
(
≥If you wish to record the images and music onto a video cassette,
insert a video cassette tape with an intact erasure prevention tab.
(
Common procedures
1
Switch [VCR/TV/DVD] to “DVD”.
2
Press [
1](PLAY) to start playing the disc to find
the playing start point.
Press [
;/D] at the playing start point to transit to
the pause (still) mode.
3
Press [MUSIC w/ PICTURE].
≥The video is automatically input
through the AV2 IN terminal.
Audio is switched to DVD.
ª When playing back
4
Start playing on the camera.
≥Initially, the "A2" channel is selected. However, if the camera
is not played (the external input is not used), you may press
[CH]
IJ to switch to the video of a TV program. (Audio
stays on DVD.)
5
Press [
1](PLAY) to start playing the DVD on this
unit.
To stop playing the disc
Press [
∫].
To cancel MUSIC WITH PICTURE mode.
Press [MUSIC w/ PICTURE].
Notes:
≥While in the MUSIC WITH PICTURE mode, pressing
[VCR/DVD OUTPUT] does not switch the output.
ª Recording onto a video cassette
You can start recording onto a video cassette at the same time of
disc playback. Only the discs, the audio on which is not copy
protected can be used.
4
Switch [VCR/TV/DVD] to “VCR”.
5
Press [
1](PLAY) to start playing the video cassette
to find the recording start point.
Press [
;/D] at the recording start point to transit to
the pause mode.
Press [REC
¥
] to switch this unit from the pause
mode to the recording standby mode.
6
Press [SPEED] to select the desired tape speed
(
7
Start playing on the camera.
8
Press [
;/D].
≥Video recording and disc playback start at the same time.
To stop recording
1) Press [
∫]. Recording will stop.
2) Switch [VCR/TV/DVD] to “DVD”.
3) Press [
∫]. Disc playback will stop.
≥Stopping recording does not cancel the MUSIC WITH
PICTURE mode.
To cancel the MUSIC WITH PICTURE mode.
Press [MUSIC w/ PICTURE].
Notes:
≥When the disc is copy protected, the music will not be recorded
correctly.
VIDEO
OUT
TIMER REC
TAPE
REFRESH
AV2 IN
REC/OTR
CH
TI
CH
PICTURE
MODE
EJECT
VCR
STOP
PLAY
JET REW
VIDEO
AUDIO
L
R
To AV2 IN (video input) socket
Video cable, etc. supplied
with camera
Digital camera (Not supplied) or
Video camera (Not supplied), etc.
Display Symbol