6b 6c 6d, Step 8 – ac adapter, Step 7 – water bottle holder assembly – Fitness Quest NBP01060-2 User Manual
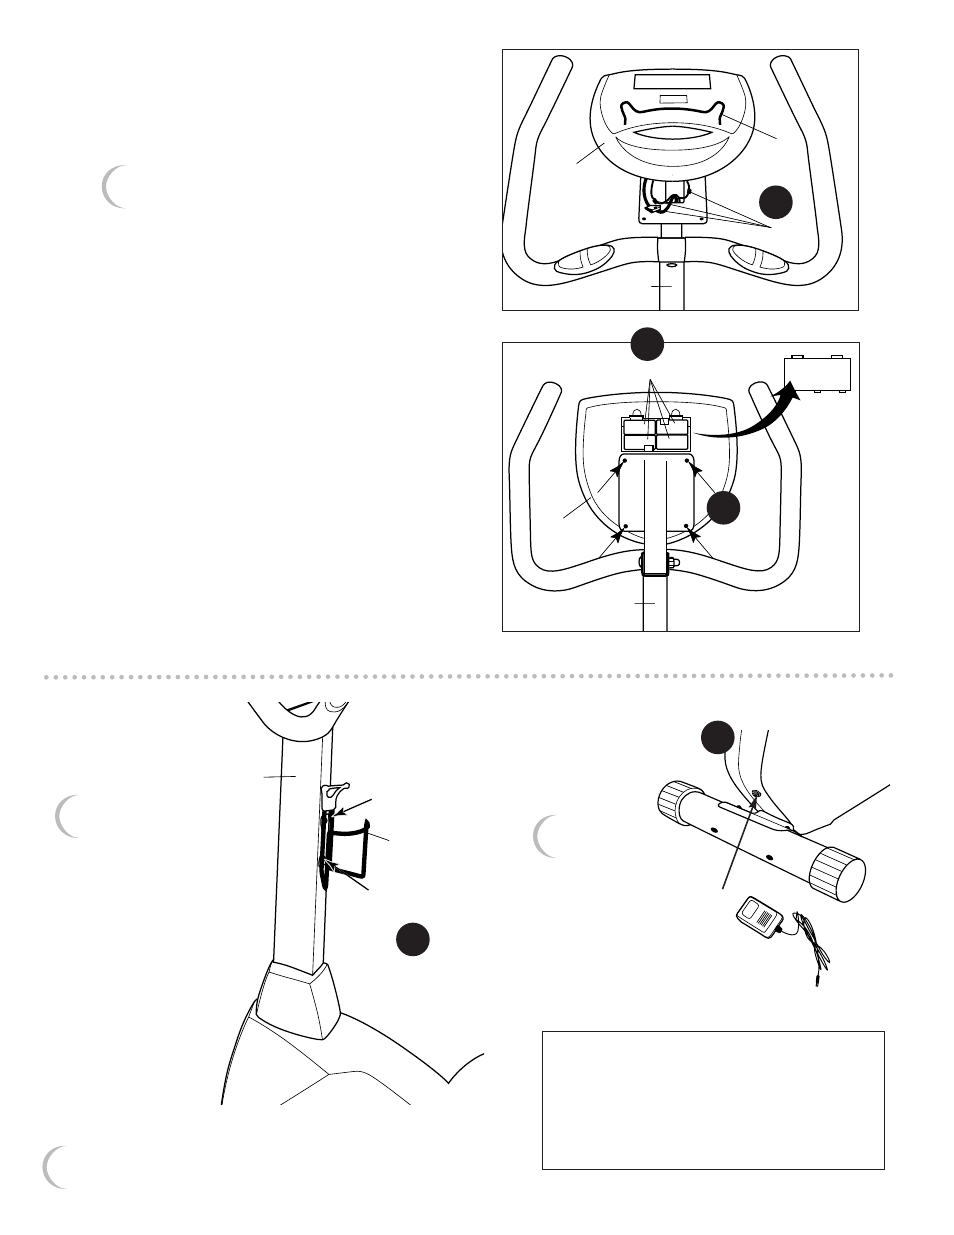
Page 9: Step 6 – computer assembly
8
water bottle
holder
remove and
re-insert screw
remove and
re-insert screw
handlebar
tube
7
front of unit
8
STEP 8 –
AC Adapter
Insert AC Adapter
into front of Unit,
then plug into wall.
STEP 7 –
Water Bottle
Holder Assembly
Remove Phillips Screws
from Handlebar Tube.
Line up Water Bottle
Holder and attach
to the Handlebar
Tube by re-inserting
Phillips Screws and
tightening them
with the
Screwdriver
provided.
book
holder
connectors
computer
handlebar
tube
4
1
3
2
four "C" batteries
back of
computer
handlebar
tube
battery
door
STEP 6 – Computer Assembly
a) Remove the four Phillips Bolts from the
back of the Computer.
b) Snap together Connectors for Computer,
tucking the Wires inside the Handlebar
Tube. Be careful not to pinch the wires.
The Book Holder can be attached to
the Computer at any time.
c) Attach the Computer using the four
Phillips Bolts you removed in step (a).
Tighten with the Screwdriver provided.
d) Remove Battery Door on the back of
the Computer.
Insert four “C” Batteries (included) in
numbered order and replace Battery
Door.
Front View
Back View
6b
6c
6d
Assembly is now complete.
IMPORTANT:
Please read pages 9-10 before beginning
your workout for important instructions
on how to use your New Balance
6.0u Upright Bike.