Mount new wallplate – Honeywell RCT8100 User Manual
Page 7
RCT8100 Programmable Thermostat
5
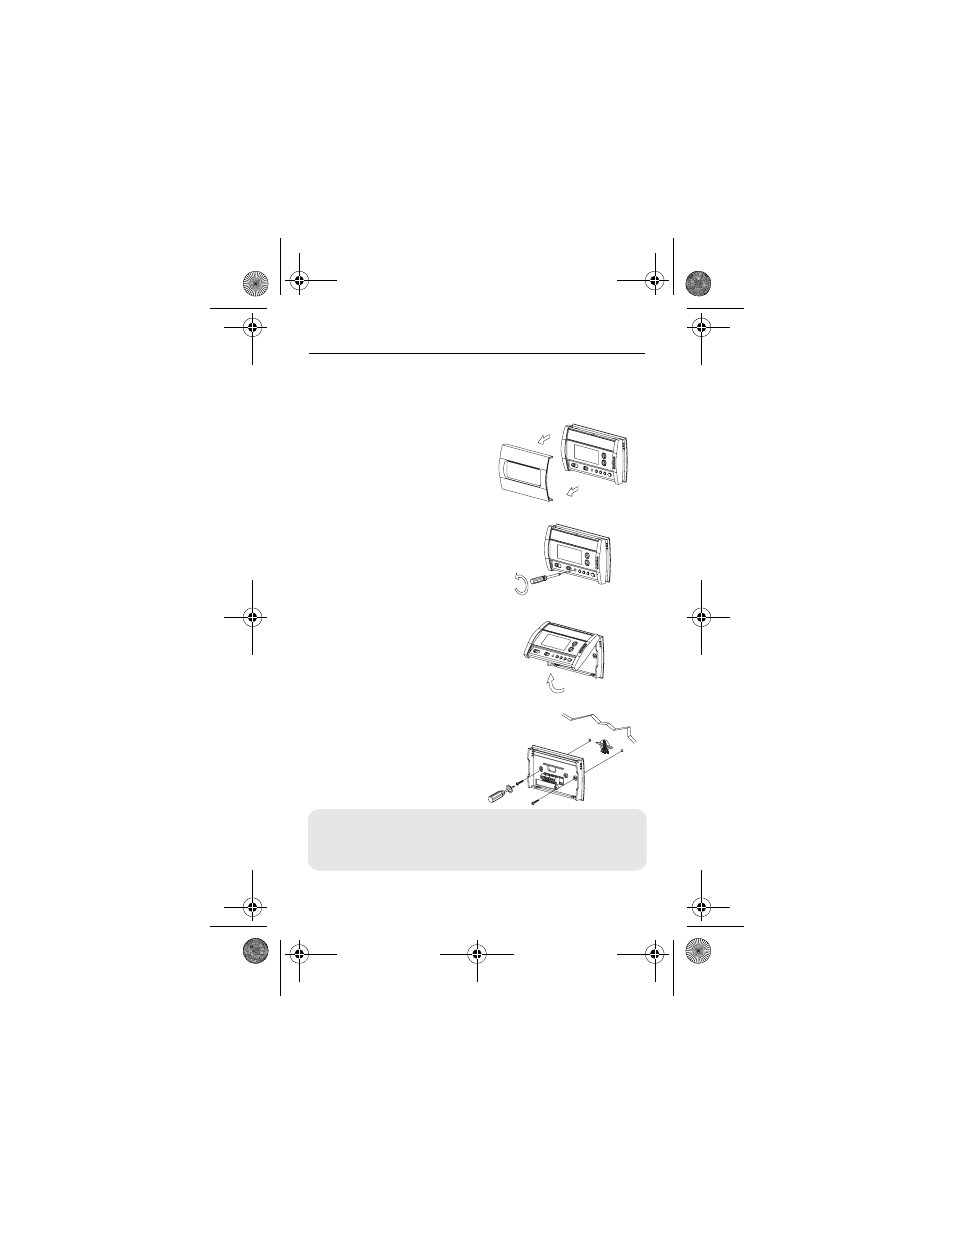
1)
Remove coverplate.
2)
Loosen screw (the
screw remains
captive on wallplate).
3)
Remove thermostat.
4)
Mark and drill
appropriate mounting
holes (or use existing
holes). Insert plastic
anchors. Pass wires
through opening of
wallplate and secure
wallplate to the wall
using provided
screws.
q
Mount New Wallplate
4.
Labels don’t match?
If a wire does not match any terminal on the thermostat,
see next page.
400-147-042-A (69-2336ES-01 RCT8100 TH147P Quick Installation Guide) ENG.fm Page 5 Thursday, October 1, 2009 10:36 AM
See also other documents in the category Honeywell Control panel:
- FocusPRO TH5000 Series (24 pages)
- FocusPRO TH5000 Series (1 page)
- FocusPRO TH6000 Series (80 pages)
- VisionPRO TH8000 Series (2 pages)
- VisionPRO TH8000 Series (96 pages)
- CHRONOTHERM III T8611R (8 pages)
- CHRONOTHERM III T8611M (32 pages)
- FocusPRO TH6000 Series (2 pages)
- CT70 (24 pages)
- ELECTRONIC THERMOSTATS T8401C (8 pages)
- T6169 (2 pages)
- CM 507 A (2 pages)
- Q674A-G (12 pages)
- PCR-100 (16 pages)
- CM907 (18 pages)
- CT3650 (24 pages)
- ZIO TR71 (24 pages)
- CT70A (6 pages)
- T6380 (6 pages)
- T4398A (8 pages)
- Chronotherm IV T8611G (12 pages)
- T694D (1 page)
- PROGRAMMABLE THERMOSTAT 8160 (4 pages)
- PRO 2000 Series (22 pages)
- T4800A (4 pages)
- EN2Z-0906GE51 R0708 (160 pages)
- Q539G (12 pages)
- RTH110B (4 pages)
- RTH7600 (60 pages)
- RLV310 (2 pages)
- 7300 (4 pages)
- T4098A (8 pages)
- RF CM61NG (2 pages)
- H8908C Dehumidistat (4 pages)
- CT3400 (20 pages)
- MINI-ZONE 69-1361 (2 pages)
- MICRONIK 200 R7426B (20 pages)
- CT50A (8 pages)
- CT3600 (24 pages)
- CTL500 (20 pages)
- 191108AJ (28 pages)
- CT1802 (8 pages)
- MULTISTAGETHERMOSTATSAND Q674C (8 pages)
- CT3500 (2 pages)
- MAGIC STAT MS3000 (15 pages)