Assembly and adjustment, Warning – Hitachi CB 13F User Manual
Page 11
—
—
11
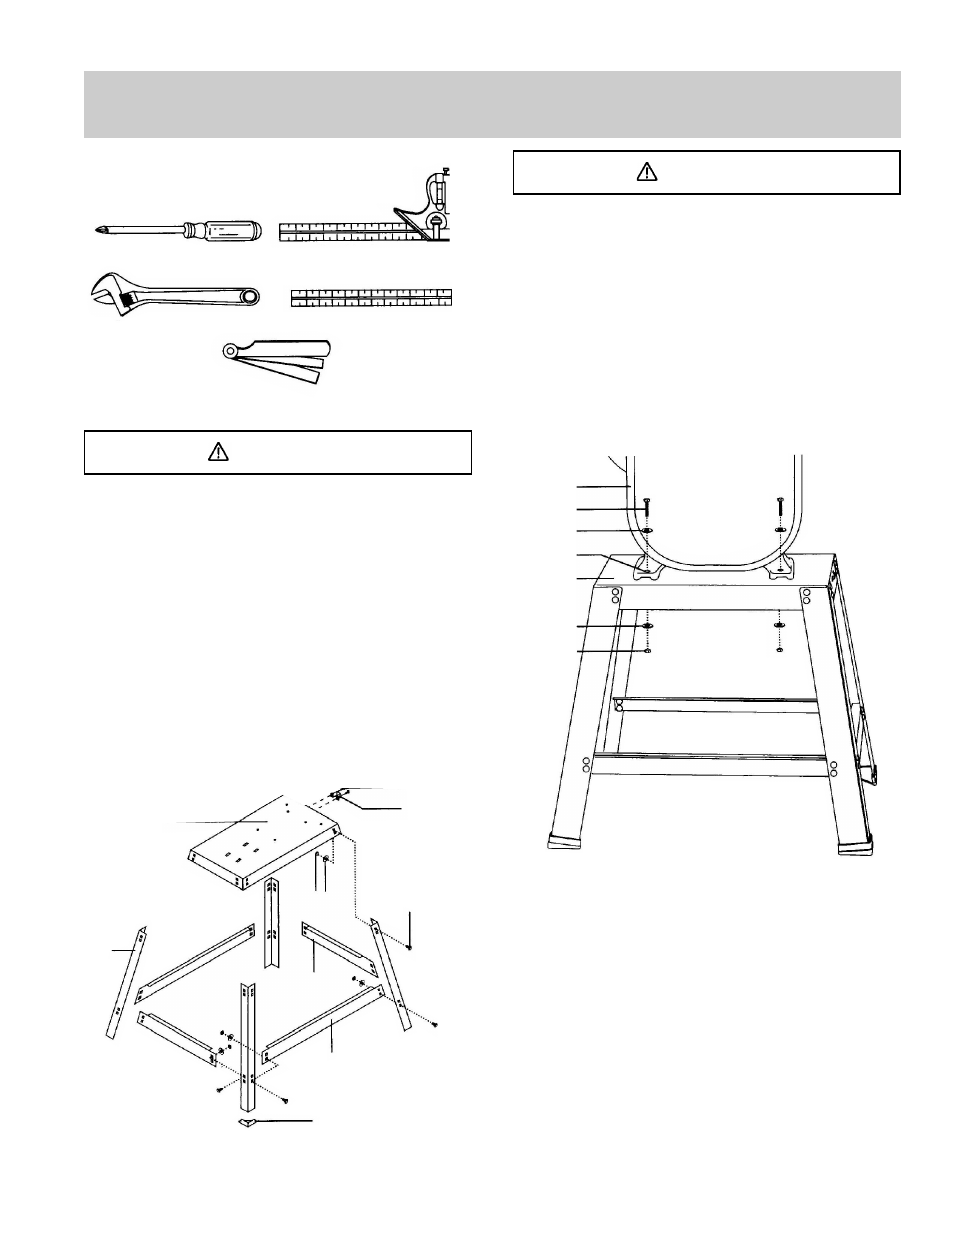
ASSEMBLY INSTRUCTIONS
Feeler gauge - size 0.02
Philips screwdriver
Straight edge
Adjustable wrench
Combination square
WARNING
For your safety, never connect plug to power source
receptacle until all assembly and adjustment steps are
completed, and you have read and understood the safety
and operating instructions.
LEG STAND ASSEMBLY (Fig. A)
1.
Lay the top plate (1) upside down on a flat surface.
2.
Attach a leg (2) to the outside of the stand top plate
with four carriage bolts (3), washers (4), and nuts(5).
Do not tighten.
3.
Repeat for the remaining three legs.
4.
Attach two long brackets (6) and two short brackets (7)
to the inside for the legs, using carriage bolts (3),
washers (4), and nuts (5). Do not tighten.
5.
Place the leg pads (8) on each leg and turn the leg
stand upright on a firm level surface.
6.
Adjust the stand for stability.
Fig. A
1
2
8
6
7
3
5 4
11
12
ASSEMBLY AND ADJUSTMENT
WARNING
Although compact, this saw is heavy. To avoid back injury,
get help to lift the saw.
ASSEMBLE BAND SAW TO LEG STAND (Fig. B)
1. Lift the saw body (1) and place on the leg stand (2),
aligning the mounting holes (3) of the saw base with
the four mounting holes of the leg stand top plate.
2. Attach the band saw to the stand with four long hex
head bolts (4) and four flat washers (5).
3. Place a flat washer (5) and hex nut (6) on each bolt
from the underside. Hand tighten.
4. Tighten all mounting bolts and nuts with a wrench.
5. Tighten all leg stand bolts and nuts with a wrench.
Fig. B
1
4
5
3
2
5
6
THE SAWDUST PORT (Fig. C)
The sawdust port has a 2-1/2"(O.D) /2-1/4"(I.D) diameter
opening, suitable for attaching to a wet / dry vacuum
hose, to help keep the work area free of sawdust.
1. Remove the bolts (1) and washers (2) from the
sawdust port (3).
2. Open the wheel cover (4).
3. Attach the sawdust port to the edge of the wheel
cover, using the same hex. head bolts and washers.
4. Tighten the bolts and close the cover.
ESTIMATED ASSEMBLY TIME 35~50MINUTES