Spark arrester (optional equipment), Sediment cup cleaning – HONDA WMP20X User Manual
Page 10
10
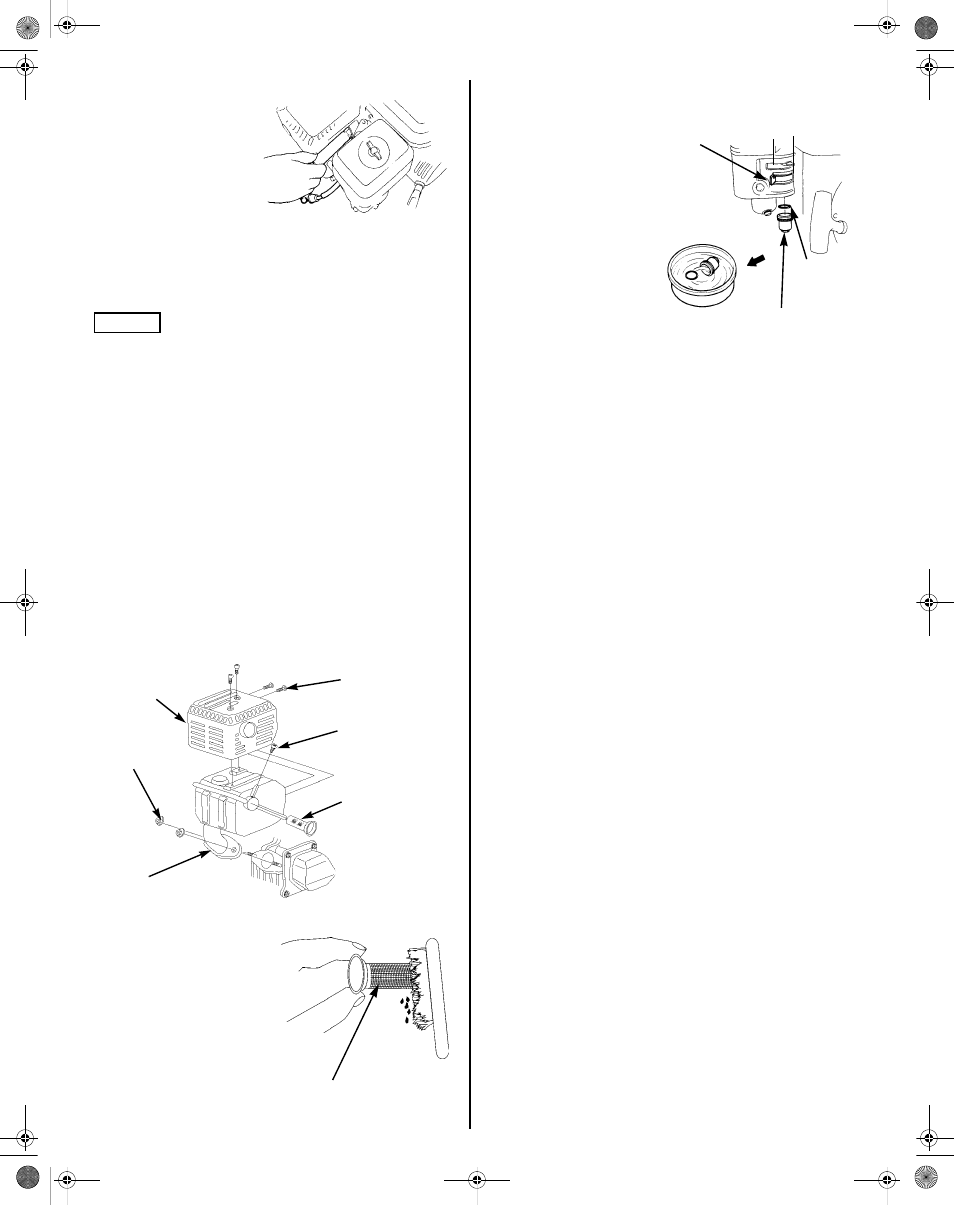
5. Check that the spark
plug washer is in good
condition, and thread the
spark plug in by hand to
prevent cross-threading.
6. After the spark plug is
seated, tighten with a
spark plug wrench to
compress the washer.
If installing a new spark plug, tighten 1/2 turn after the spark plug
seats to compress the washer.
If reinstalling a used spark plug, tighten 1/8 - 1/4 turn after the
spark plug seats to compress the washer.
NOTICE
A loose spark plug can overheat and damage the engine.
Overtightening the spark plug can damage the threads in the
cylinder head.
7. Reconnect the spark plug cap.
Spark Arrester (optional equipment)
Your pump engine is not factory-equipped with a spark arrester. In
some areas, it is illegal to operate an engine without a spark arrester.
Check local laws and regulations. An optional USDA approved spark
arrester is available from an authorized Honda servicing dealer. See
page 16 for part numbers.
The spark arrester must be serviced every 100 hours to keep it
functioning as designed.
1. Allow the engine to cool, then remove the two 8 mm nuts and
remove the muffler from the cylinder head.
2. Remove the four 5 mm screws from the muffler protector and
remove the muffler protector.
3. Remove the 4 mm screw from the spark arrester and remove the
spark arrester from the muffler.
4. Use a stiff brush to remove
carbon deposits from the spark
arrester screen. Be careful not
to damage the spark arrester
screen.
5. Inspect the spark arrester for
breaks and holes. Replace it if
necessary.
6. Install the spark arrester and the
muffler in the reverse order of
disassembly.
Sediment Cup Cleaning
1. Turn the fuel valve to the
OFF position.
2. Remove the sediment
cup and O-ring and wash
them in nonflammable
solvent. Dry them
thoroughly.
3. Install the O-ring and
sediment cup and tighten
securely.
4. Turn the fuel valve to the
ON position and check
for leaks.
MUFFLER
PROTECTOR
8 mm NUT (2)
SPARK
ARRESTER
4 mm SCREW
5 mm SCREW (4)
MUFFLER
SPARK ARRESTER SCREEN
FUEL
VALVE
SEDIMENT CUP
O-RING
OFF
ON
POM50594-G_WMP20X.fm Page 10 Tuesday, March 25, 2008 2:34 PM