10 st, 10 st ep ep c c heck list heck list, Connect to a drainage system – Hotpoint WMTL80 User Manual
Page 8
6. Connect to a Drainage System...
● Connect up the drain hose, after fitting the hooked end support supplied in the
machine.
● Do not position standpipe near an electrical outlet.
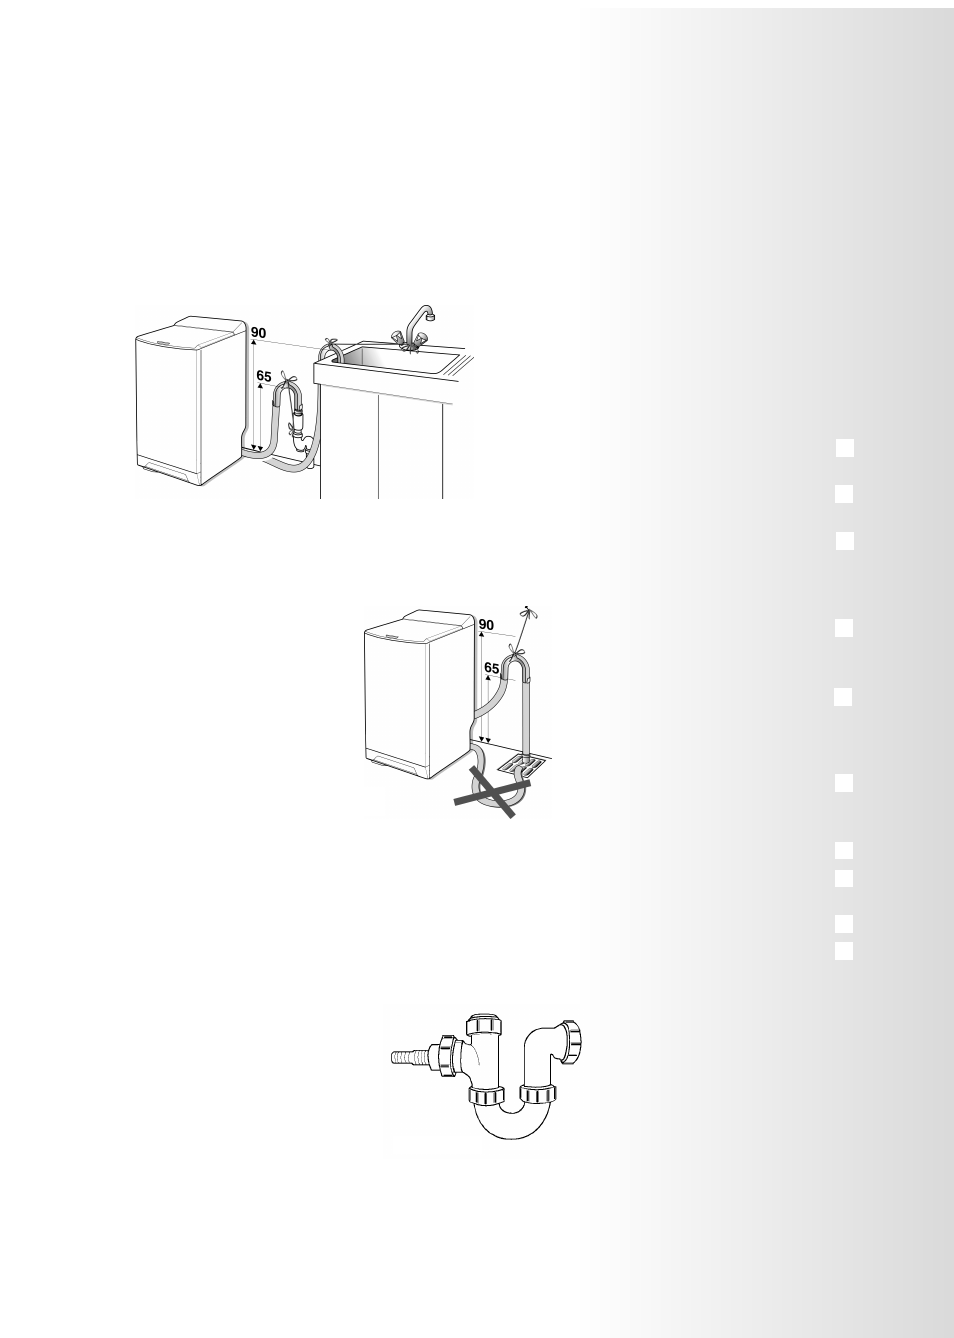
● For drainage into a standard worktop sink ensure the outlet pipe has a minimum
bore of 32mm. To avoid syphoning ensure the end of the drainage hose is above
the water level in the sink. If your sink is inset, the front edge of the basin must be
less than 75mm from the front edge of your worktop (Fig 1).
We recommend one of the following drainage methods:-
Standpipe
Note: Ensure the standpipe has a minimum diameter of 38 mm.
1. Ensure hooked end of drain hose is
positioned between 90 and 65cm above
the bottom of the machine (Fig 2).
2. Untie the end of the GREY drainage
hose from the rear of the appliance and
place approximately 100 mm into the
standpipe or sink trap spigot.
The waste water can be drained onto the ground, so long as the drain hose passes
through a point between 90 and 65cm higher than the bottom of the machine (Fig 2).
Sink Waste System
Note: Ensure the sink outlet pipe has a minimum diameter of 32 mm.
1. Untie the end of the GREY drainage hose from the rear of the appliance.
2. Reposition ‘Hooked End Support’ as required along the GREY drainage hose.
3. If fitting an under sink waste disposal unit
(Fig 3), cut out the membrane, bung or
blanking plug.
4. Attach the GREY drainage hose to the under
sink waste disposal unit securely, using a hose
clip.
5. Raise the hose to a minimum height of between
90 and 65cm to avoid syphoning.
● Ensure the drain hose is securely attached, to prevent it coming away while the
machine is in use and causing a flood.
When you have installed your
appliance, ensure it is ready to use by
following this 10 Step Check List
1. Dispose of packaging safely,
see ‘Recycling Information’.
2. Position appliance close to
electrical/water supply.
3. Remove all four Transit Fixing
Bolts.
4. Connect supplied hoses to
appliance water supply, confirm
water is flowing before connecting
to the appliance inlet valves.
5. Untie drainage hose at rear of
appliance and connect to a drainage
system see ‘Drainage’ opposite.
6. Untie mains lead at rear of
appliance and plug into electrical
supply via a switched socket,
see ‘Electrical Supply’.
7. Position appliance, taking care not to
kink or damage hoses at rear of
appliance.
8. Ensure the appliance is level.
9. Turn on the water supply
to the appliance.
10. Switch on at plug socket.
10 St
10 St
ep
ep
C
C
heck List
heck List
Fig 1
Fig 2
8
● Your appliance is now ready for use,
refer to ‘Getting to Know Your
Appliance’, to familiarise yourself
with the appliance.
Fig 3