Hill Phoenix ORIGIN2 ONIZ User Manual
Page 15
11
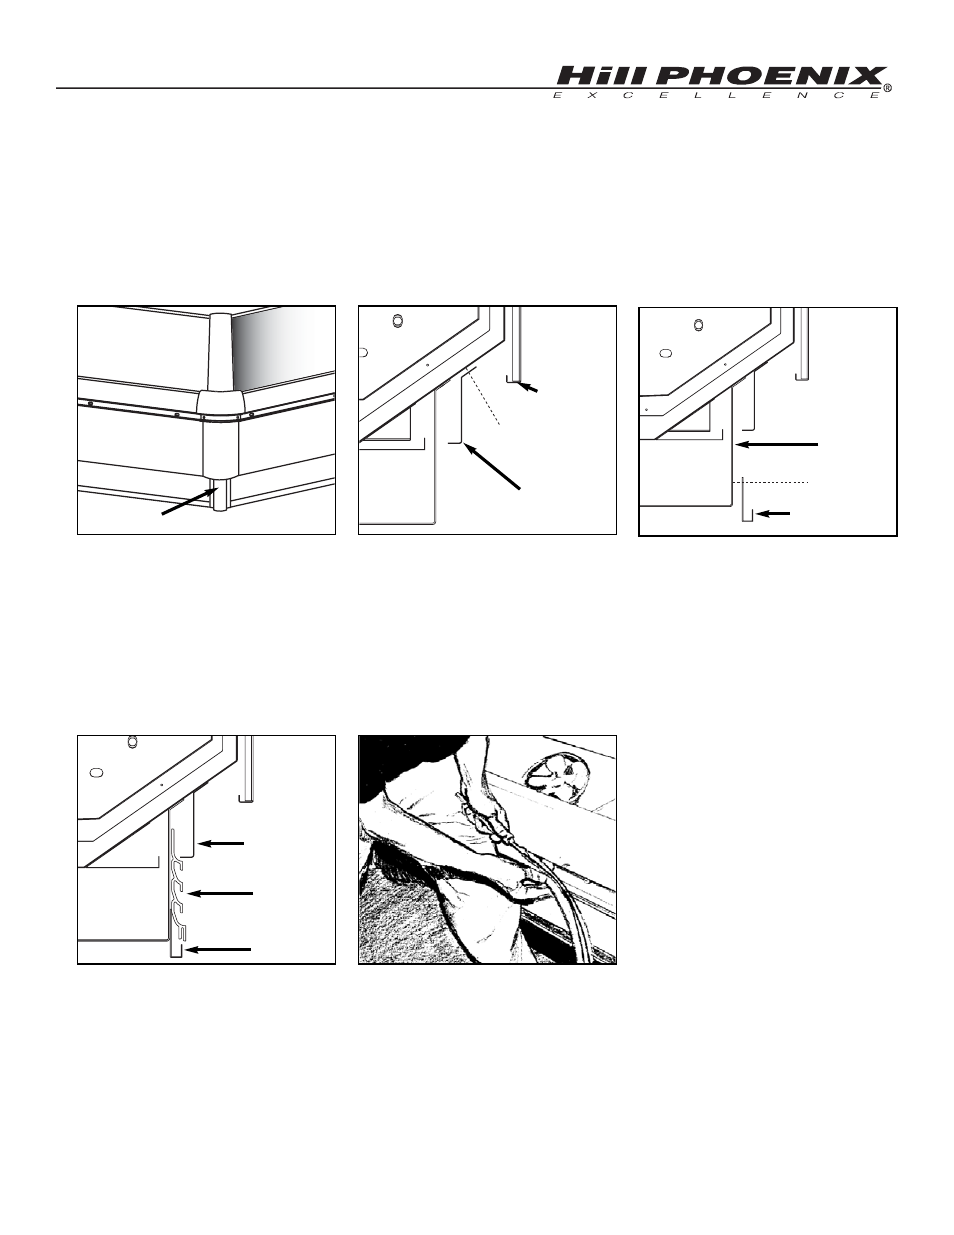
Insert nose bumper into master
bumper channel. Roll nose bumper
into channel along entire lineup (up to
96’). We recommend that the nose
bumper be left in the store 24 hours
before installing. DO NOT STRETCH
the bumper during installation as it
will shrink to its original length and
leave a gap.
10
Insert kickplate into “J” rail. Slide the
kickplate up, behind the lower front
panel and then down on to the “J” rail.
11
9
7
Attach the “J” rail. Locate the “J” rail
which is shipped loose with the case.
Line up the rail to the kickplate brack-
ets and secure with the screws pro-
vided.
8
Attach pedestals. Locate the
pedestals which are shipped loose
with the case. Attach the pedestals to
each wrap end of the case with the
fasteners provided.
Attach lower front panel. Line up the
lower front panel directly under the
front panel. Screw the lower front
panel to the tank with the fasteners
provided.
NOTE: An easy technique for one
person is to press against nose
bumper with leg as you guide
bumper into channel with a screen
spline. Insert bottom first.
LOWER FRONT
PANEL
FRONT PANEL
PEDESTAL
KICKPLATE
BRACKET
SCREW
“J” RAIL
KICKPLATE
LOWER FRONT
PANEL
SCREW
“J” RAIL