The belt – Hoover C1404 User Manual
Page 7
29
Slip agitator through new belt
(with lettering toward out-
side of cleaner) and position belt in
belt guide (C). Push end of belt into
opening in cleaner body.
Reposition agitator making sure to
align flat sides of projection (D) on
belt end of agitator with flat sides of
slot (E) in cleaner body.
Remove agitator and broken
agitator belt. (If belt is not
broken but is stretched or cut, pro-
ceed with steps for Figs. 33 to 35
and pull belt off motor pulley. Then
continue with Fig. 31).
How to replace
Disconnect cleaner from
electrical outlet.
Place handle in lowest position and
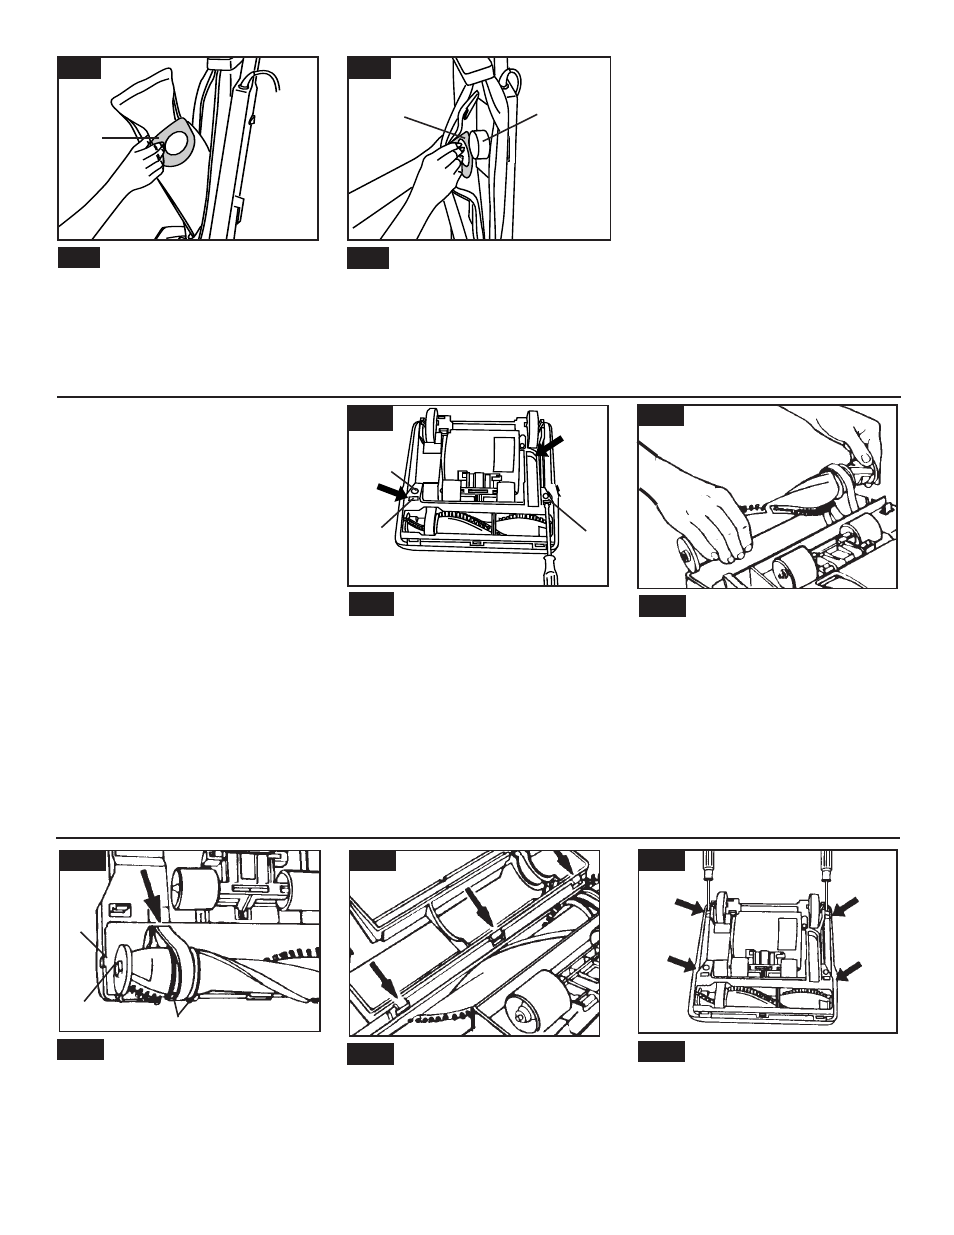
turn cleaner over.
To remove bottom plate remove
screw (A), insert end of flat screw-
driver into wide area of right-hand
slot (B) and push handle of screw-
driver to the rear. Repeat in left-hand
slot (B).
Lift extension (C) of bottom plate,
rotate plate and remove from clean-
er body.
The belt
The belt on your cleaner causes the
agitator to rotate and is important for
the effective operation of the clean-
er. The belt is located under the bot-
tom plate of the cleaner and should
be checked from time to time to be
sure it is in good condition.
When to replace
To check belt, remove bottom plate
as shown in “How to replace belt.”
Replace belt if it is stretched, cut or
broken.
What to buy
When purchasing a new belt, ask for
part No. 38528040.
Hold new filter bag as shown.
Align opening in filter bag with
dirt tube (B).
Push bag collar (A)
firmly onto tube.
Tuck in filter bag; zip outer bag.
7
How to replace
Disconnect cleaner from electrical
outlet.
To change filter bag, unzip outer bag,
grasp sides of filter bag collar (A) and
pull collar from tube.
Note: Do not clean out old filter bag
and reuse. Discard used filter bag.
B
A
A
27
27
28
28
Place the three tabs on bot-
tom plate into slots in front of
cleaner body. Snap bottom plate
into place over agitator.
Reinsert screw and tighten.
30
30
31
31
E
D
C
32
30
33
Remove hood by inserting
end of flat screwdriver into
one of the four slots beside an arrow
on bottom of cleaner.
Pry outward to release latch. Repeat
to release latches at the remaining
three arrows.
A
B
C
B
Continued
➜
29
33