Maintenance, Starter device – Husqvarna 335XPT User Manual
Page 30
30
– English
Starter device
WARNING!
• The recoil spring is in its tensioned position in its
cassette in the starter device. If the spring is handled
caralessly, it can pop out and cause personal injury..
• Always be careful, when changing the recoil spring or
the starter cord. Always wear safety goggles for eye
protection.
!
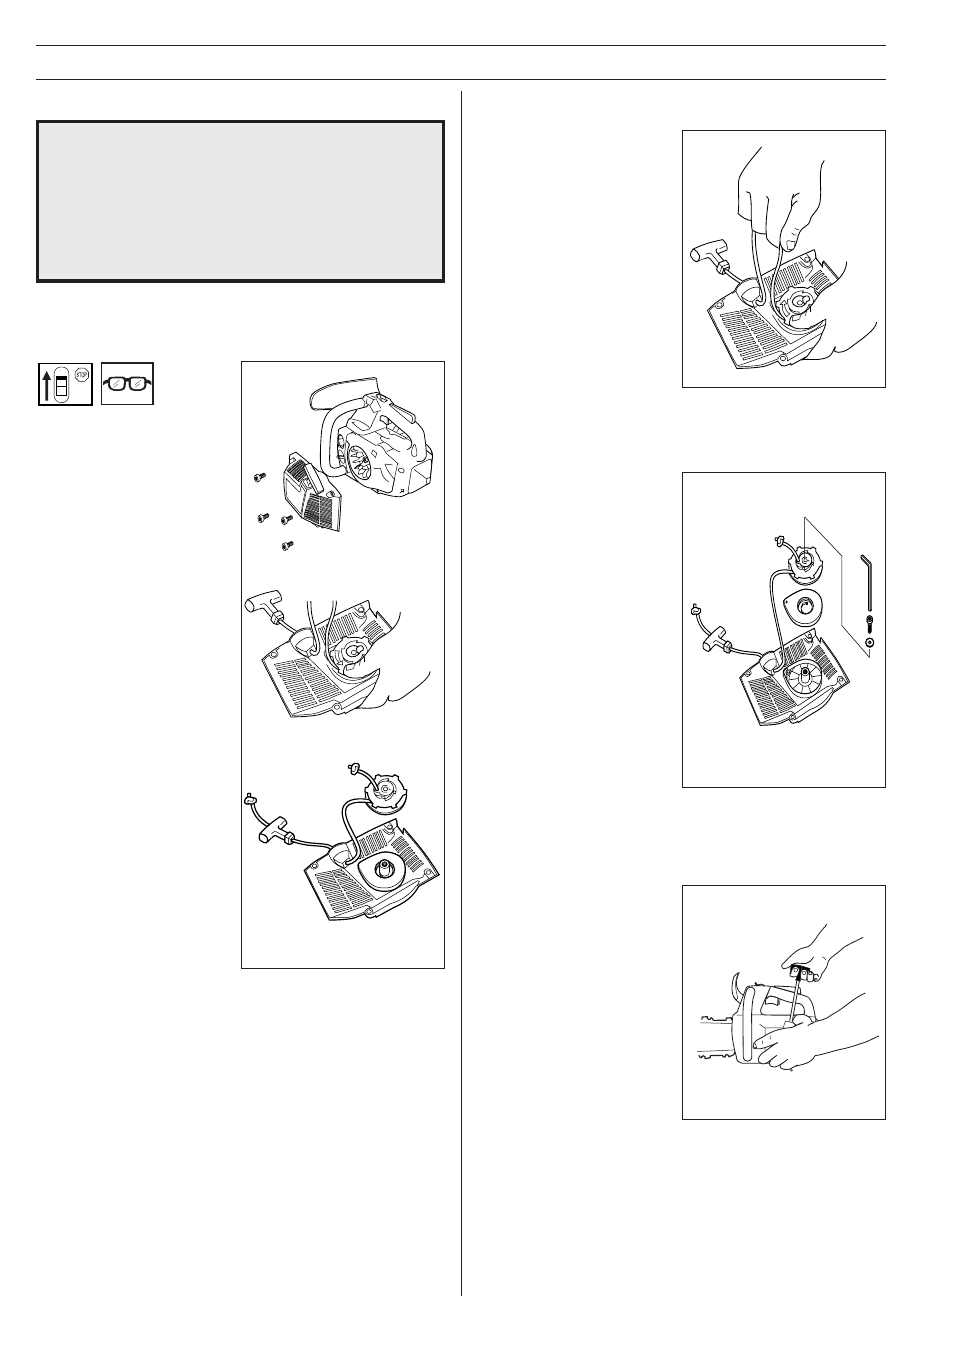
Tensioning the recoil spring
•
Lift the starter cord up in
the notch on the starter
pulley and turn the starter
pulley 2 turns clockwise.
NOTE! Check that the
starter pulley can be
turned at least half a turn,
when the starter cord is
entirely pulled out.
MAINTENANCE
Changing the broken recoil spring
• Lift the starter pulley. (See,
”Changing a broken or worn
starter cord”).
• Dismantle the recoil spring
cassette by lifting it up out
of the starter device. Make
sure that the spring does
not pop out and cause
personal injury.
• Lubricate the new recoil
spring with thin oil without
removing the spring out of
the cassette.
• Fit the new spring cassette.
• Fit the cord pulley and
retension the recoil spring.
Changing a broken or worn starter cord
• Loosen the screws, that
hold the starter device
against the crankcase and
remove the starter device.
• Pull out the cord approx. 30
cm and lift it up into the
notch in the pulley. Zero-set
the recoil spring by letting
the pulley rotate slowly
backwards. Undo the screw
in the centre of the pulley
and remove the pulley.
• Insert and fasten a new
starter cord in the pulley.
Wind approx. 3 turns of the
starter cord on to the pulley.
Assemble the starter pulley
against the recoil spring, so
the end of the spring
engages to the pulley. Fit
the screw in the centre of
the pulley. Carry the starter
cord through the hole in the
starter housing and the
starter handle. Make a knot
on the starter cord.
Starter device assembly
• Assemble the starter
device, by pulling the starter
cord out first, then place the
starter against the
crankcase. Then slowly
release the starter cord so
that the pulley engages with
the pawls.
• Assemble and tighten the
screws, which hold the
starter.