Hafler TRM6.1CE User Manual
Page 34
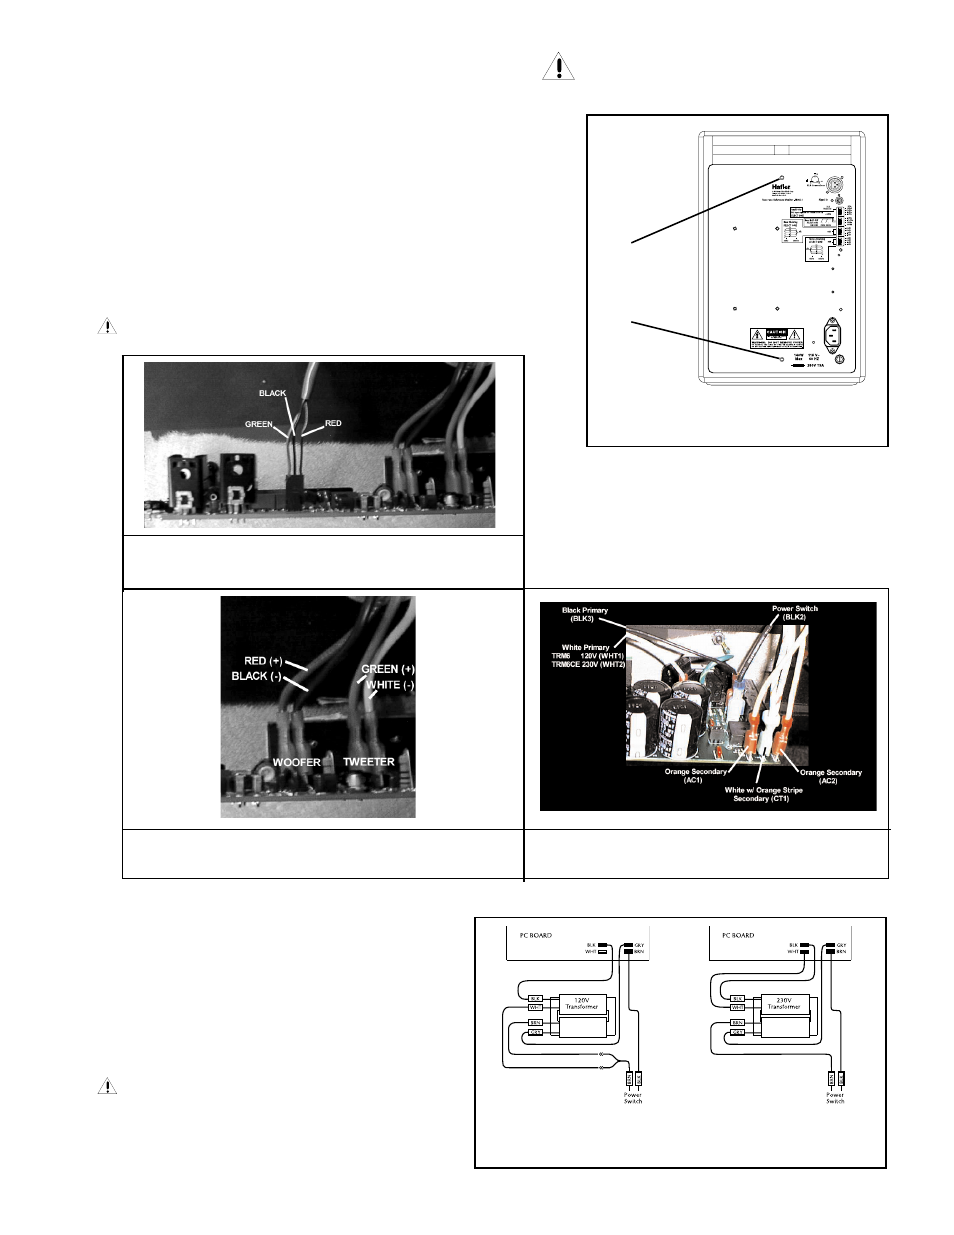
AMPLIFIER REPLACEMENT
– 25 –
Qualified Service Personnel Only
1. Remove (2) screws from back using a 3/32" Allen Wrench (FIG. 5)
2. Disconnect PCB mounted LED harness (FIG. 6)
3. Disconnect PCB mounted tweeter speaker wires (FIG. 7)
4. Disconnect PCB mounted woofer speaker wires (FIG. 7)
5. Disconnect PCB mounted transformer primary wires (FIG. 8)
6. Disconnect PCB mounted transformer secondary wires (FIG. 8)
7. Disconnect PCB mounted power switch wires (FIG. 8)
CAUTION: Reconnect wires as indicated in diagram!
FIG. 5
Amplifier Replacement
Remove
only
these
(2) screws
FIG. 6
PCB Mounted LED Harness
FIG. 7
PCB Mounted Speaker Wires
FIG. 8
Transformer / Power Switch Wires
TRANSFORMER REPLACEMENT
MODEL TRM6.1
120V 50Hz VAC
MODEL TRM6.1CE
230V 50/60Hz VAC
The TRM6.1 is available both 120V and 230V
versions. If it is necessary to perform service on
the amplifier, be sure to check connections to the
transformer before re-applying power and/or re-
assembling the unit.
CAUTION: Reconnect wires as indicated in
diagram!