Adjustment and operation – Healthrider HRCR9155.0 User Manual
Page 8
ADJUSTMENT AND OPERATION
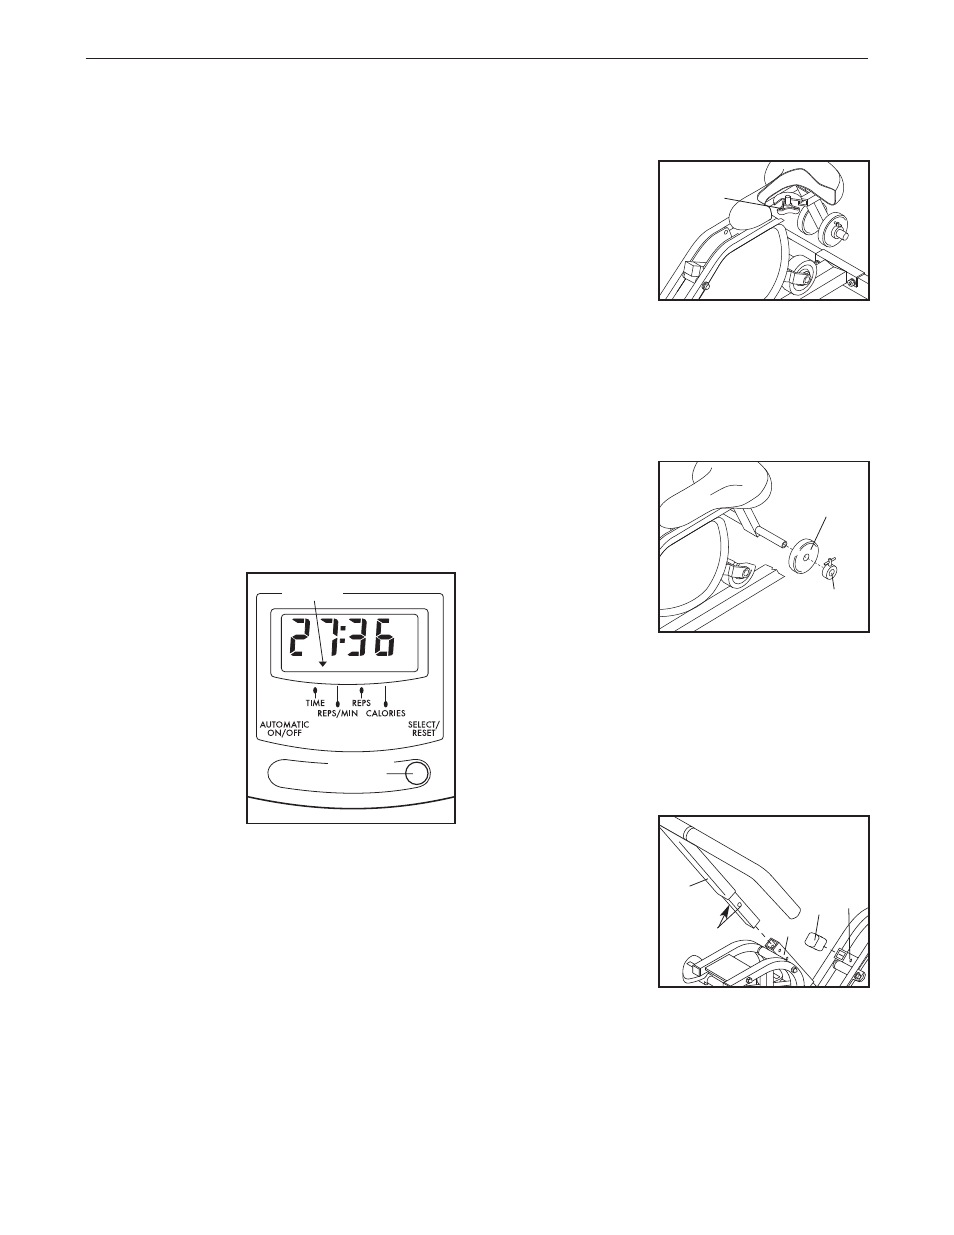
DESCRIPTION OF THE CONSOLE
The console offers five modes that provide instant
exercise feedback:
• Time—This mode displays the elapsed time. Note: If
you stop exercising for a few seconds, the Time
mode will pause.
• Reps/Min—This mode displays your exercise pace,
in repetitions per minute.
• Reps—This mode displays the total number of repe-
titions you have completed, up to 9,999.
• Calories—This mode displays the approximate num-
ber of calories you have burned.
• Scan—This mode displays the Time, Reps/Min,
Reps, and Calories modes, for a few seconds each,
in a repeating cycle.
HOW TO OPERATE THE CONSOLE
1. To turn on the
power, press the
console button
or simply begin
exercising.
2. Select the
desired mode:
To select the
Time, Reps/Min,
Reps, or
Calories mode,
press the
console button
repeatedly until an arrow points to the name of the
desired mode. Make sure that the Scan mode is
not selected.
To select the Scan mode, press the console button
repeatedly. While the Scan mode is selected, an
arrow will show which mode is currently displayed.
To reset the Time, Reps, and Calories modes to
zero, hold down the console button for a few sec-
onds.
3. The console has an “auto-off” feature. If the
pedals are not moved and the console button is
not pressed for a few minutes, the power will turn
off automatically to conserve the batteries.
ADJUSTING THE SEAT
To adjust the posi-
tion of the seat,
loosen the knob
under the seat,
move the seat to
the desired posi-
tion, and then
retighten the knob.
To determine if the
seat is properly adjusted, sit on the seat and pull the
handlebar as close as possible to your stomach. Your
legs should be almost straight, with your knees bent
slightly.
ADDING AND REMOVING WEIGHT
The HealthRider
exerciser features a
weight bar that lets
you increase the
intensity of your
exercise by adding
weights (not
included). To add
weights, first
remove the weight
collars from the
weight bar. Slide the desired amount of weight onto
the weight bar and reattach the weight collars. Note:
Place equal amounts of weight on both sides of
the weight bar. The combined weight of the user
and added weights should not exceed 300 pounds.
CHANGING THE POSITION OF THE HANDLEBAR
To exercise the
muscles of the
lower body, the
position of the han-
dlebar can be
changed. Remove
the Swing Arm Cap
(28) from the
Wheel Swing Arm
(3). Next, press the
Snap Buttons (46)
and slide the Handlebar Assembly (6) out of the
Handlebar Swing Arm (5). Press the Snap Buttons
again and insert the Handlebar Assembly into the
Wheel Swing Arm (3). Make sure that the Snap
Buttons snap into the holes in the Wheel Swing
Arm. Press the Swing Arm Cap (28) onto the
Handlebar Swing Arm (5).
8
Seat
Knob
Weight
Collar
Weight
28
46
5
3
6
Arrow
Button