Assembly – Healthrider HRCR9155.0 User Manual
Page 4
4
ASSEMBLY
To hire an authorized service technician to
assemble the HealthRider exerciser, call toll-free
1-800-445-2480.
Before beginning assembly, carefully read the
following information and instructions:
• Assembly requires two persons.
• Place all parts in a cleared area and remove the
packing materials; do not dispose of the packing
materials until assembly is completed.
• Read each assembly step before you begin.
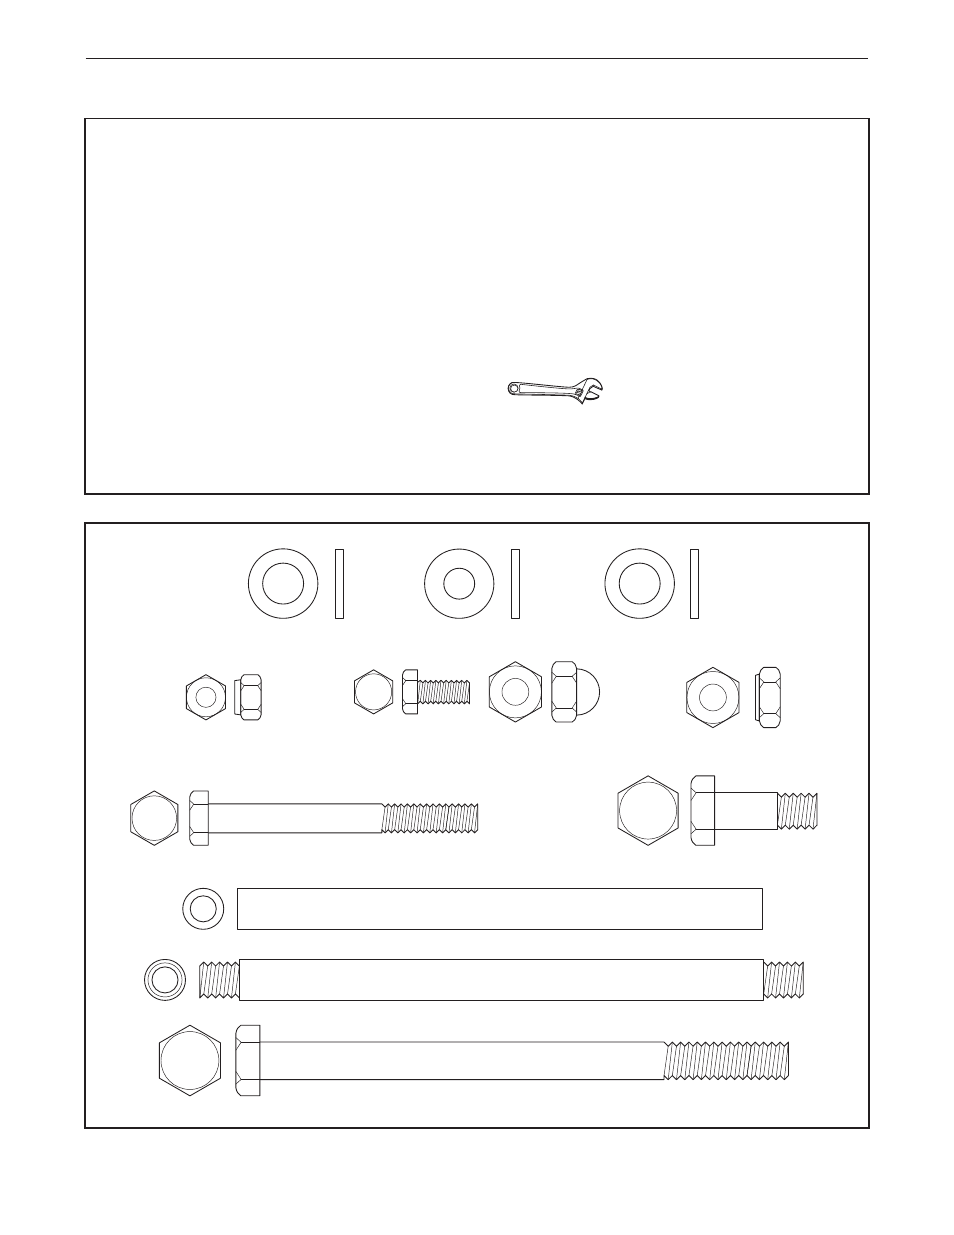
• To identify small parts, see the part identification
drawings below. The number in parentheses
below each drawing is the key number of the
part, from the PART LIST on page 14. The num-
ber after the parentheses is the quantity needed
for assembly. Note: Some parts may have
been pre-attached. If a part is not in the parts
bag, check to see if it has been pre-attached.
• Tighten all parts as you assemble them, unless
instructed to do otherwise.
• Make sure that all parts are oriented as shown in
the drawings.
• Assembly requires two adjustable wrenches
(not included).
• Assembly will be more convenient if you have a
rubber mallet and a socket set or a set of open-
end or closed-end wrenches.
Rubber Washer (51)–4
Frame Axle (13)–2 (External Thread)
M8 Nylon Jam Nut (7)–2
M6 Flat Washer (55)–4
M8 x 35mm Bolt (17)–1
M6 x 62mm Bolt (53)–4
Plastic Washer (49)–2
T
M8 x 120mm Bolt (52)–1
Axle Fastener (56)–4
(either Bolts OR Acorn Nuts)
OR
Frame Axle (13)–2 (Internal Thread)
M6 Nylon Locknut (54)–4