Filters- secondary and micro, Belt replacement – Hoover WindTunnel Wind Tunnel Canister Cleaner with Powered Nozzle User Manual
Page 8
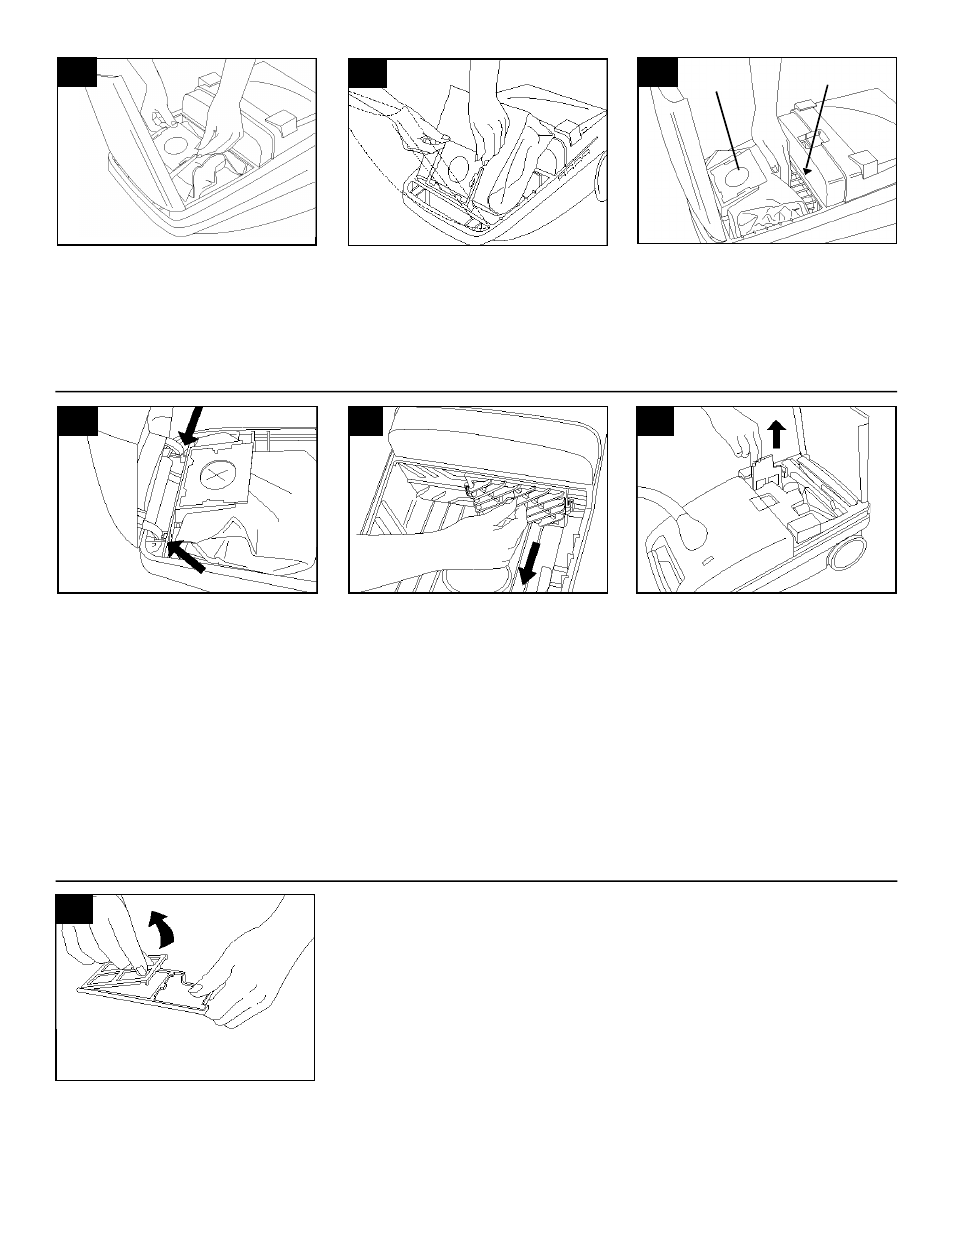
3 - 8
Carefully pull out used bag.
8
3 - 2
3 - 3
3 - 4
B
A
Form new bag into a box-like shape.
Slide bag collar
firmly
into holder.
Push rear edge of bag into bag cavity
below seal (A).
Clear bag opening (B) by pushing the
pierced paper through opening toward
bag interior.
Close bag lid.
How to attach bag lid
The bag lid and hinges are designed
with a “break- away” feature. If the lid is
pushed open too far, it will come off. It
can be easily re-attached by aligning the
hinges with the appropriate slots in the
cleaner, as shown.
Filters-
secondary and micro
How to clean
Disconnect cleaner from electrical
outlet.
The
secondary filter
, located behind
the grill in the bag compartment, pro-
tects the motor from dirt particles. If fil-
ter becomes dirty, pull off grill and lift out
filter. Wash filter in warm water or
replace it with a new one. A
dry
filter
must be put back into cleaner.
Do not operate cleaner without sec-
ondary filter in place.
3 - 5
The
micro filter
aids in the filtration
process to return clean air to the room.
To remove this filter, open tool lid,
remove dusting brush and pull up red fil-
ter cassette.
If filter is dirty, open grid on cassette
and remove filter. Wash filter in warm
water or replace it with a new one. A
dry
filter must be put back into cleaner.
3 - 6
Belt replacement
The belt in your power nozzle drives the
a g i t a t o r. It has been designed specifi-
cally for use in this cleaner and is impor-
tant for effective operation.
What to buy
T h e re are other belts manufactured that
a re similar in shape and size, but are not
designed for the HOOVER power nozzle.
Such belts do not operate the agitator
c o rrectly and may create stress which
could damage your power nozzle. Use
only a genuine HOOVER Belt
p a rt n o .
4 0 2 0 1 1 8 0
when a belt replacement is
n e c e s s a ry.
When to replace
The belt should be checked from time to
time to be sure it is in good condition. To
check, remove the hood (see following
section). Replace the belt if it is stre t c h e d ,
cut, or broken.
3 - 7