Pre-assembly assembly step 1, Assembly step 2 – Horizon Fitness AFG T6 User Manual
Page 5
INTRODUCTION
IMPORT
ANT
PRECAUTIONS
ASSEMBL
Y
BEFORE
YOU
BEGIN
TREADMILL
OPERA
TION
LIMITED
W
ARRANTY
TROUBLESHOOTING
&
MAINTENANCE
CONDITIONING
GUIDELINES
INTRODUCTION
IMPORT
ANT
PRECAUTIONS
ASSEMBL
Y
BEFORE YOU
BEGIN
TREADMILL OPERA
TION
CONDITIONING GUIDELINES
TROUBLESHOOTING &
MAINTENANCE
LIMITED WARRANTY
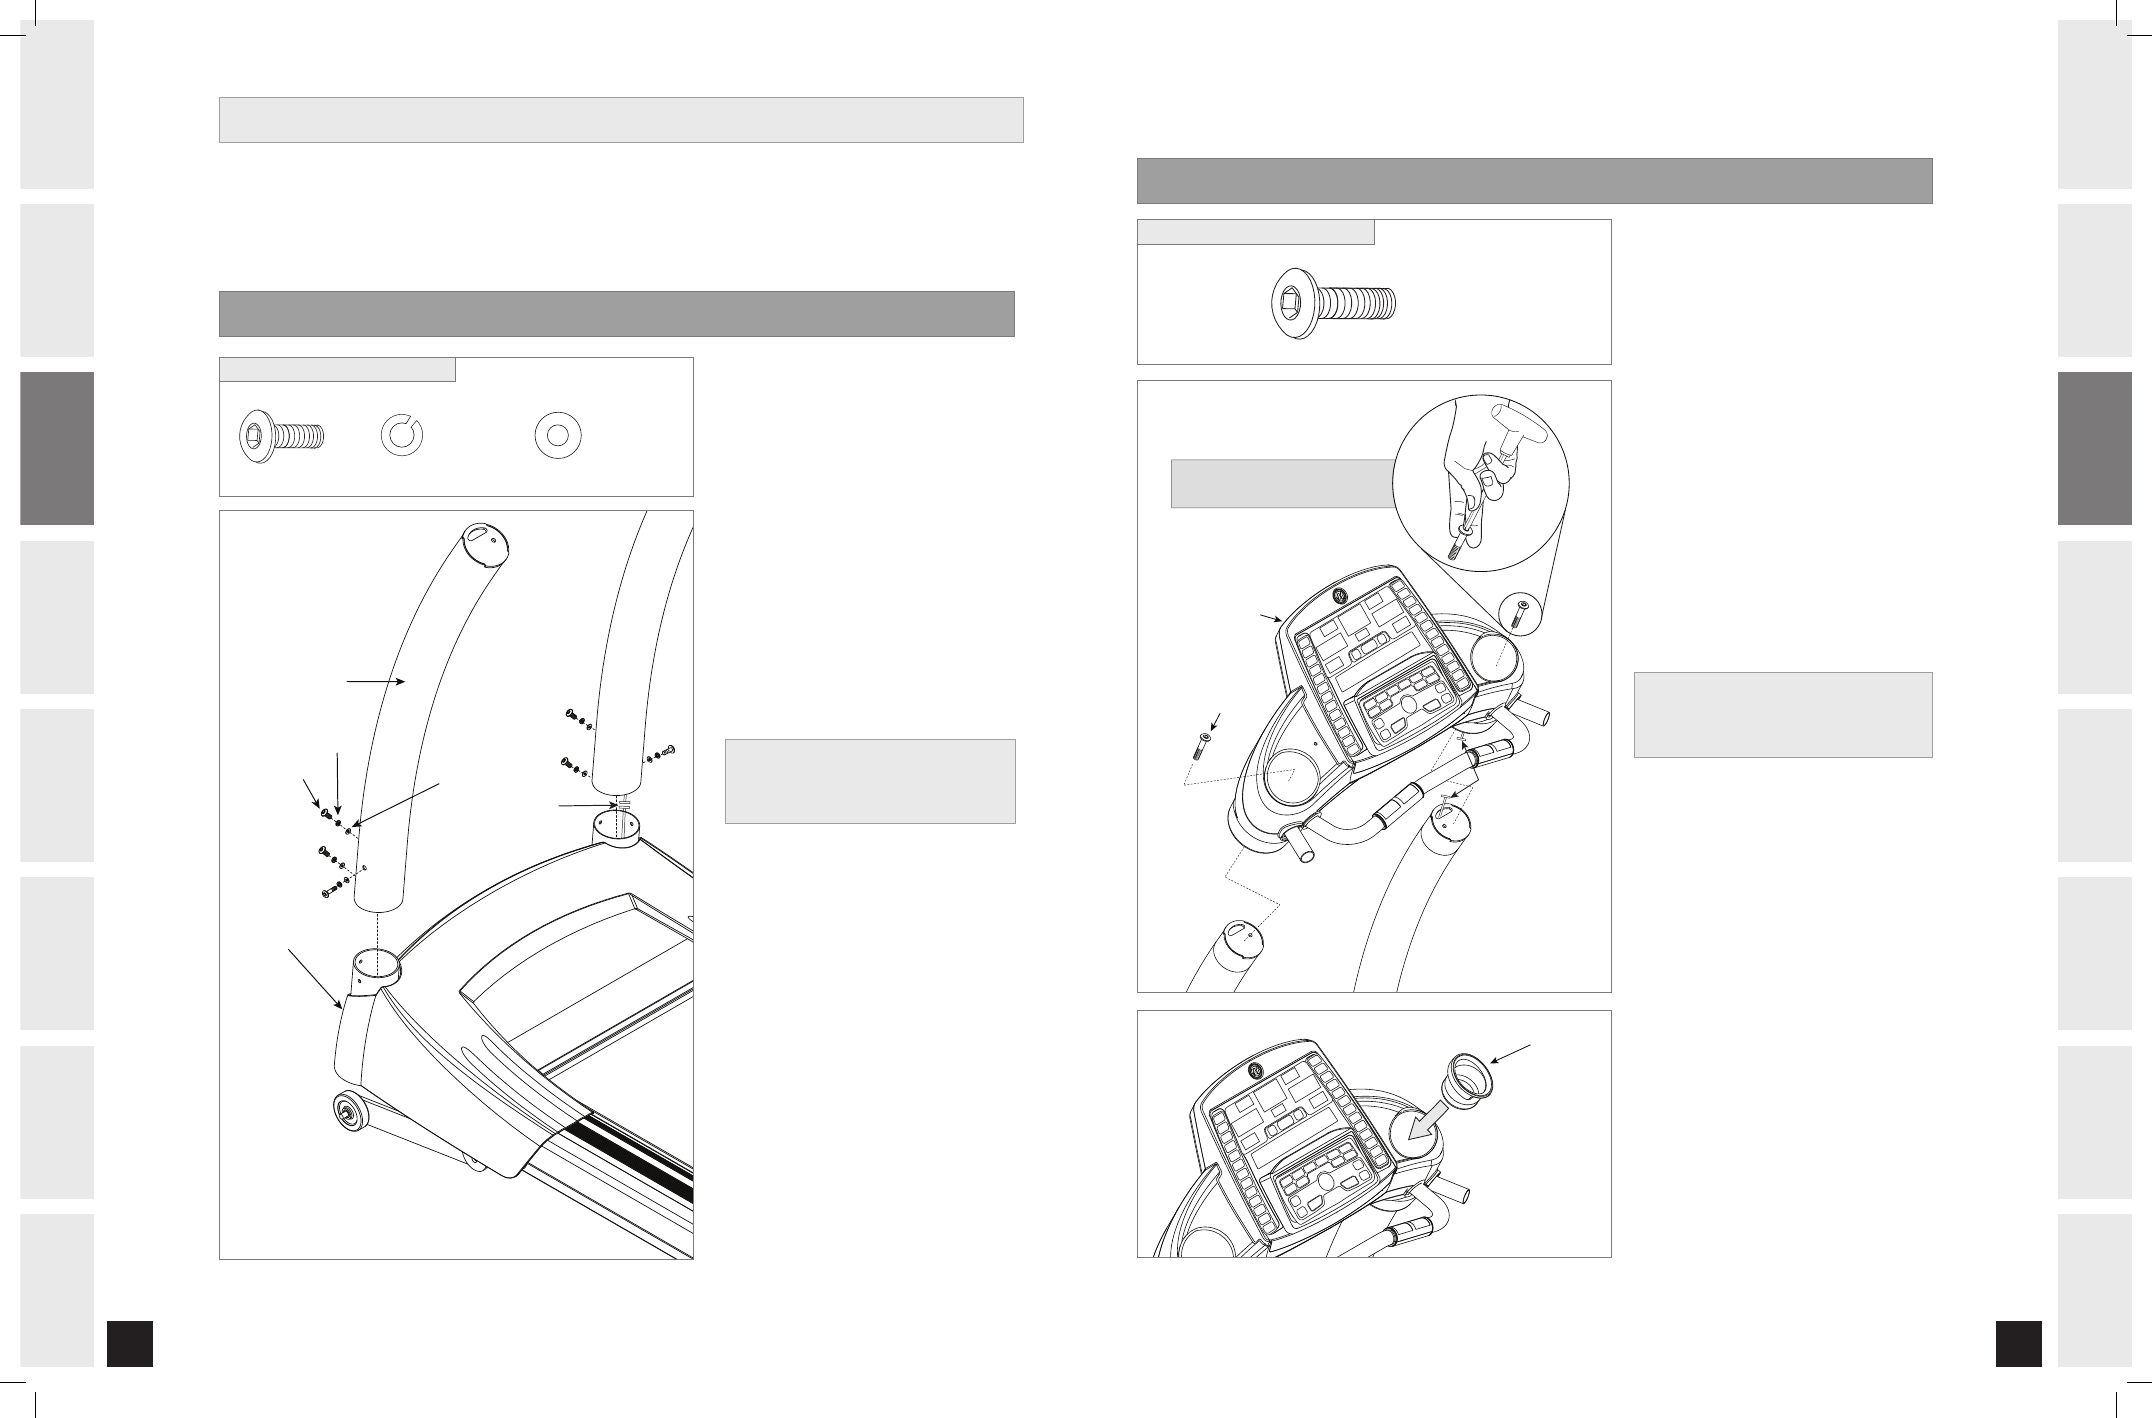
A Open BLUE HARDWARE BAG.
B Connect the CONSOLE WIRES
from the CONSOLE to those from
the top of the MAST.
C Attach CONSOLE to the
CONSOLE MASTS using
1 BOLT (D).
D Repeat on other side.
E Tighten all console bolts.
F Snap each of the CUP HOLDERS
firmly into the CONSOLE.
NOTE:
During each assembly step, ensure that ALL nuts and bolts are in place and partially threaded in before
completely tightening any ONE bolt. NOTE: A light application of grease may aid in the installation of hardware.
Any grease, such as lithium bike grease is recommended.
PRE-ASSEMBLY
ASSEMBLY STEP 1
BOLT (A)
15 mm
Qty: 6
ARC WASHER (C)
8 mm Diameter
Qty: 6
SPRING WASHER (B)
8 mm DIAMETER
Qty: 6
PINK HARDWARE BAG CONTENTS :
ASSEMBLY STEP 2
BOLT (D)
20 mm
Qty: 2
BLUE HARDWARE BAG CONTENTS :
BOLT (A)
SPRING WASHER (B)
WASHER (C)
CONSOLE MAST
BASE FRAME
CONSOLE WIRES
BOLT (D)
CONSOLE
SUGGESTED METHOD FOR STARTING BOLT
CONSOLE WIRES
A Open PINK HARDWARE BAG.
B Connect the CONSOLE WIRES
from the BASE FRAME to the
bottom of the CONSOLE MAST.
C Attach LEFT CONSOLE MAST
using 3 BOLTS (A), 3 SPRING
WASHERS (B) and 3 ARC
WASHERS (C).
D Repeat on other side.
CUP HOLDER
* NOTE: Be careful not to pinch any
wires while assembling the masts.
* NOTE: Be careful not to pinch any
wires while assembling the console.
T4_T6_Rev.1.7.indd 8-9
10/19/06 9:21:57 AM