Battery fuel gauge, disposal & service, Battery disposal, Dirt cup and filter replacement – Hoover BH50010 User Manual
Page 6
Battery Fuel Gauge: Battery Capacity Indicator Information
All three LEDS will momentarily light when the product’s power switch is turned on. Then the Battery Fuel Gauge will
indicate the pack’s remaining capacity as noted below. NOTE: Unit and lights will turn off when battery is fully discharged.
Once battery is fully discharged return switch to off position.
3 LEDs lit Remaining battery capacity > 75%
2 LEDs lit Remaining battery capacity > 50%
For belt replacement, please call 1-800-944-9200 or visit our website at www.hoover.com to locate
a dealer nearest you. Belt Service Part # 001942002
4. BATTERY FUEL GAUGE, DISPOSAL & SERVICE
Battery Disposal
WARNING: RISK OF EXPLOSION OR
EXPOSURE TO TOXIC MATERIAL
CAUTION:
The battery used in this device may present a risk of fire or chemical burn if mistreated. Do not
disassemble, heat above manufacturer’s maximum temperature limit (60˚C/140˚F), or incinerate. Replace battery
with HOOVER
®
® battery Part # BH50000 only. Use of another battery may present a risk of fire or explosion.
Dispose of used battery promptly. Keep away from children. Do not disassemble and do not dispose of in fire.
Do not attempt to disassemble the battery or remove any component projecting from the battery terminals. The
battery and charger have no user serviceable parts. Fire or injury may result. Prior to disposal, protect exposed
terminals with heavy insulating tape to prevent shorting.
1 LED lit Remaining battery capacity > 25%
1 LED blinking Remaining battery capacity < 25%
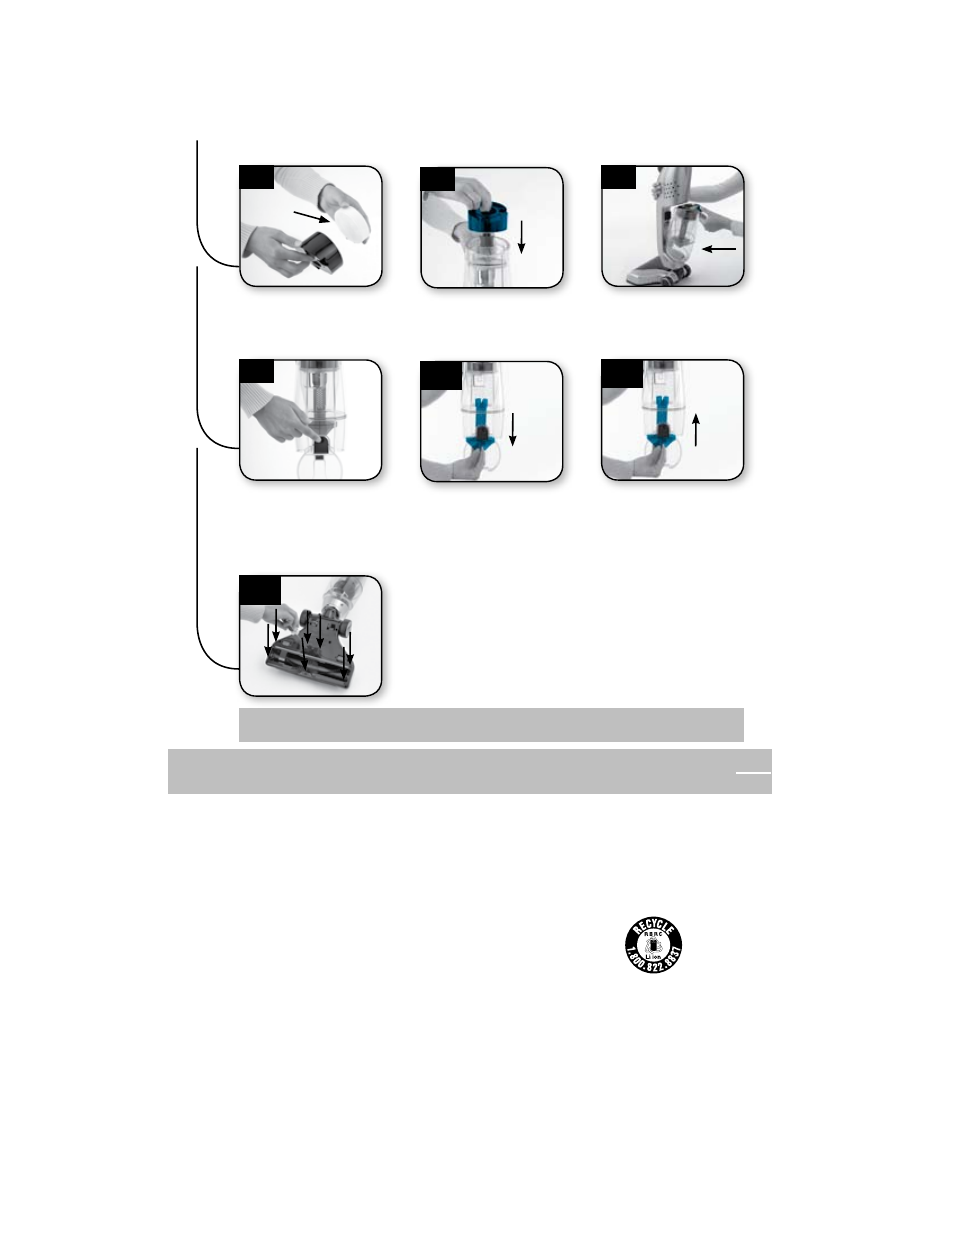
Baffle Tube Removal and Replacement
Belt and Brushroll Replacement
REMOVAL
Hold dirt cup right side up and
press bottom release button to
open trap door.
Turn baffle tube counter
clockwise until it stops. Pull out
baffle tube, hold over trash can
and shake free debris.
REPLACEMENT
To replace baffle tube, insert
back into dirt cup, align slots
and twist clockwise till tube
locks in place.
3.11
3.12
3.13
3.14
Dirt Cup and Filter Replacement
REPLACEMENT
Insert filter into filter cap.
Insert filter cap into dirt cup.
Place bottom of dirt cup onto
housing and pivot into place until
dirt cup release button locks.
3.8
3.9
3.10
WARNING: Remove battery before servicing.
Turn vacuum nozzle over. Remove screws indicated by arrows on
bottom nozzle plate. Lift plate off nozzle bottom to access brush, belt
and nozzle.
After replacement turn brushroll making sure belt turns freely.
Return nozzle plate and screws.