Operation – Harbor Freight Tools 7528 User Manual
Page 5
SKU 07528
Page 5
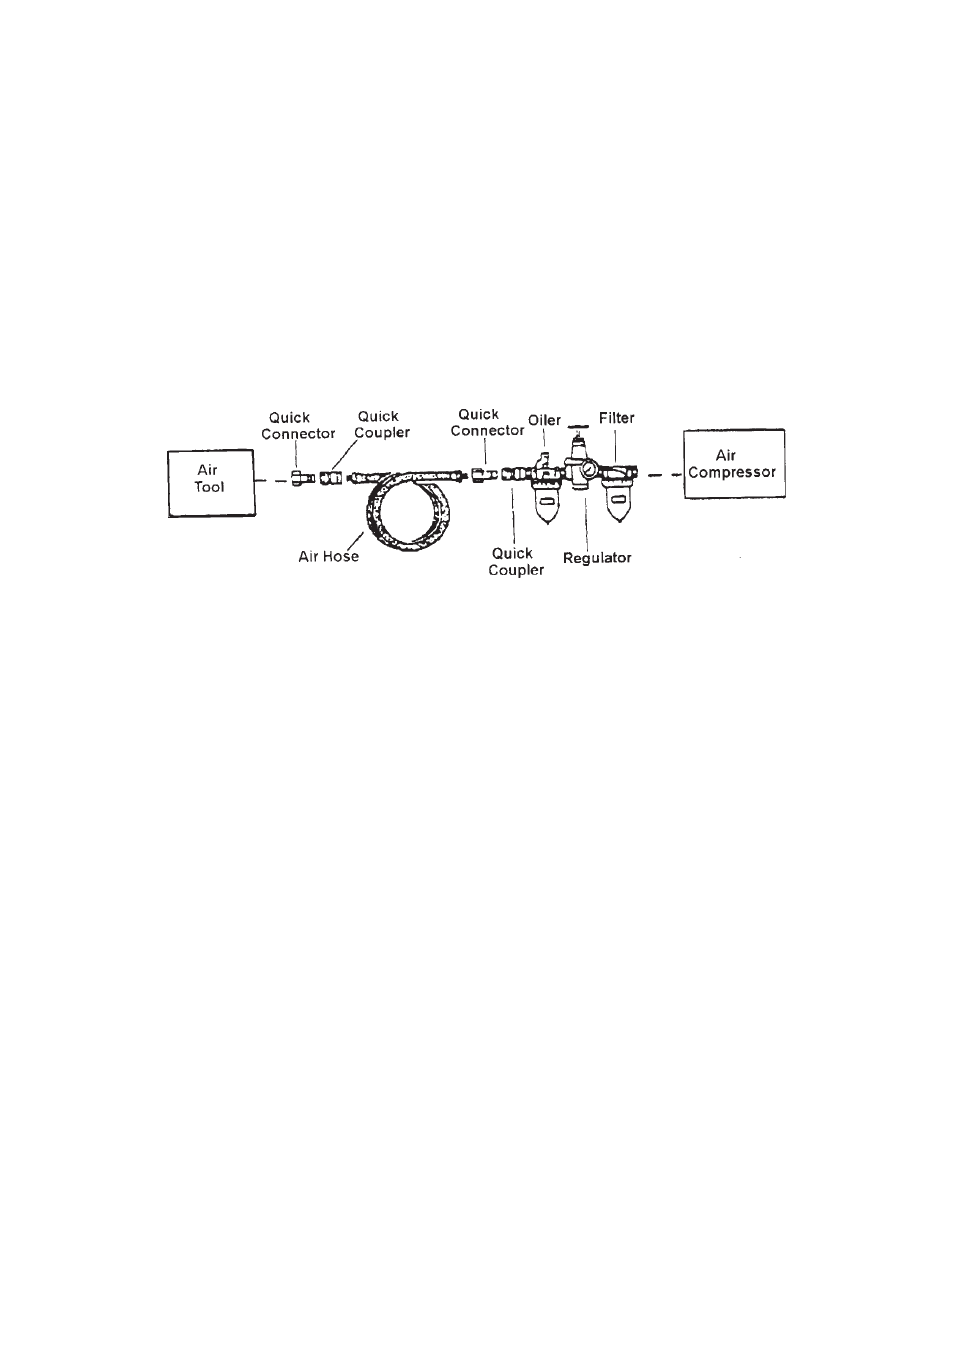
Oiler and Filter Connection
Dirt, water, and the lack of pneumatic tool oil are major causes for tool wear.
Install an optional oiler-filter, as illustrated below for better performance.
1. Connect the air tool, air hoses, filter, and oiler to the Compressor Air Outlet
as illustrated below.
The filter and oiler (not supplied) are recommended but not mandatory for
operation.
If the filter and oiler are not used, connect the air hose directly to the 1/4
inch, 18 NPT connector located at the Air Inlet (13) fitting. Also, a few drops
of pneumatic tool oil must be added through the air line before each use.
Note: Use pipe thread seal or Teflon tape on all threaded connections.
Side Handle
1. Slip the Brass Ring (35) over the Clamp Nut (30) and point the treads to
either the left or right side for the desired operation. See photo on the cover.
2. Screw the Handle (34) onto the threads of the Brass Ring and tighten.
Operation
1. Attach the desired bit (not supplied) to the Air Drill Chuck (32), making sure it
is locked in place with Chuck Key (36).
2. Connect the compressor air hose (3/8”) to the Air Inlet (13) on the handle of
the housing (1).
3. Set the (1.5 HP minimum) air compressor pressure regulator to 90 PSI.
If any air leaking, disconnect the air hose and repair the leak.
4. Grip the Air Drill firmly with both hands and press down on the Trigger (8).
Caution: If the Air Drill will not turn, or if it stalls while drilling, do not raise the
outlet pressure of the air compressor. Do not continue with attempts to drill
until the problem is resolved.
REV 07g