How to use, Cleaner description, On-off switch – Hoover Commercial Lightweight Cleaner with Dirt Cup User Manual
Page 4
4
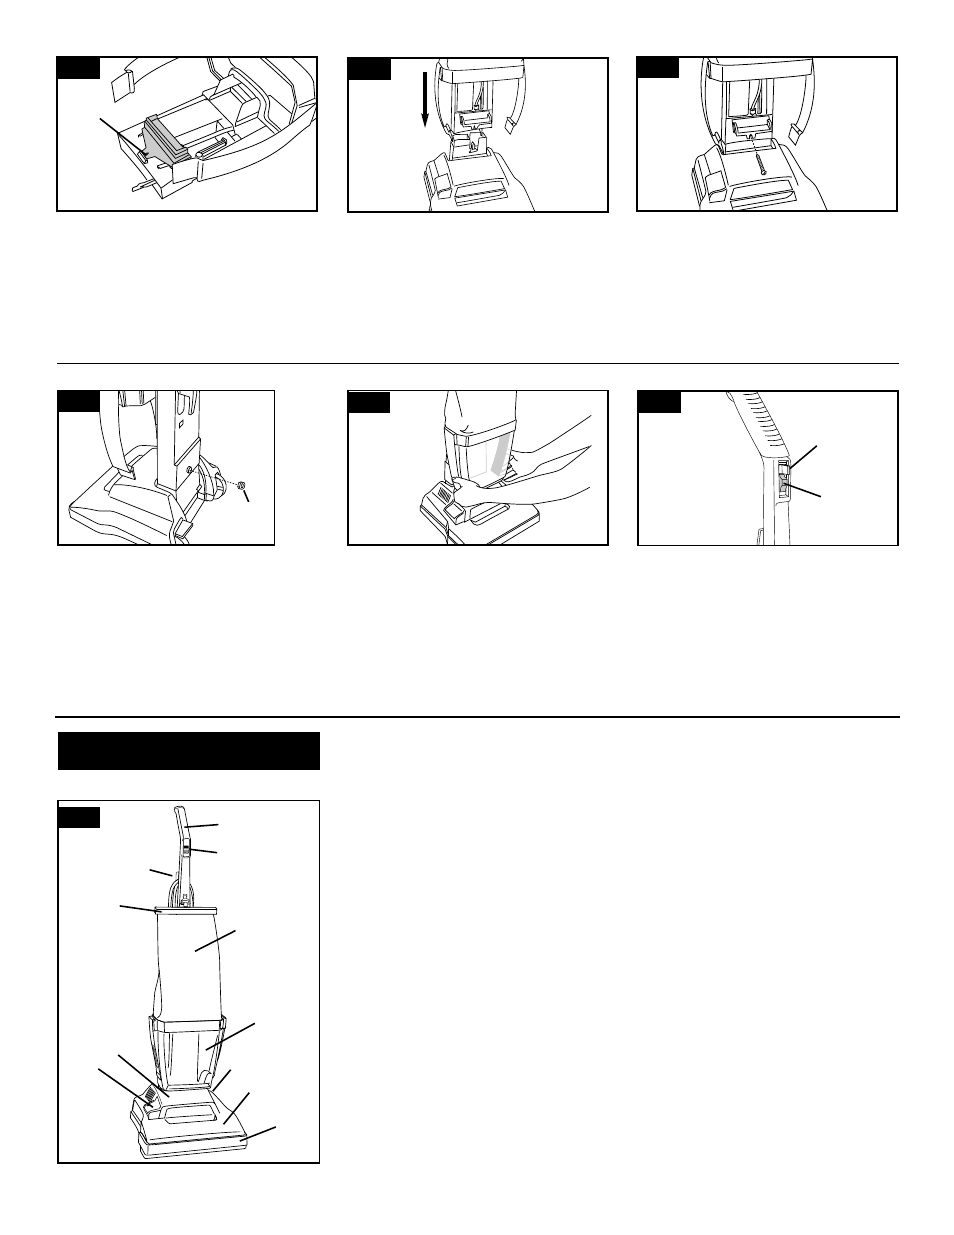
Pull switch lock (P) above ON-OFF
switch (Q) straight out.
Dispose of lock.
Note: If lock has come off during
assembly, make sure switch is in
the OFF position (down) before
plugging cord in to electrical out-
let.
Cleaner description
2. How to use
The assembled cleaner will look like the
drawing.
1. Handle
2. ON/OFF switch
3. Cord hooks:
wrap cord around
hooks for storage
.
4. Bag cap
5. Cloth bag
6. Dirt cup
7. Handle release lever:
step on lever
to lower handle to operating or low
position.
8. Cleaner body
9. Furniture guard:
helps prevent
cleaner from marking furniture.
10. Hood
11. Extra belt storage:
open door to
store extra belt.
Operate cleaner only at voltage speci-
fied on data plate on bottom of cleaner.
WARNING: electrical shock could occur
if used outdoors or on wet surfaces.
To reduce the risk of electric shock, this
appliance has a polarized plug (one blade
is wider than the other). This plug will fit in
a polarized outlet only one way. If the plug
does not fit fully in the outlet, reverse the
plug. If it still does not fit, contact a quali-
fied electrician to install the proper outlet.
Do not change the plug in any way.
ON-OFF switch
To turn cleaner ON, push switch up.
To turn cleaner OFF, push switch down.
1-14
Pull support toward bottom of han-
dle slightly to make sure support is
locked in place.
Make sure hole in handle (N) is visi-
ble through hole in support.
With cloth bag to the front, place
assembled handle onto handle base
of cleaner body.
Rock handle side to side while
pushing down firmly. Extra push-
ing effort may be required.
Push
bolt
into hole on lower
front of
handle.
If bolt will not go through hole
easily, handle is not pushed com-
pletely down.
1-15
1-16
1-17
1-18
1-19
Place
nut (O)
in recessed area at
back of handle.
Hold nut in place
while tightening bolt securely with a
screw driver.
Note:
Only one nut is needed on this
model. The extra nut is not required
but has been provided for your
convenience.
Reposition dirt cup into support at
bottom of cloth bag and snap latch-
es into position.
2-1
1
2
3
4
5
6
8
7
9
10
11
O
N
Q
P