Assembly step, You’re finished – Horizon Fitness H-SERIES E5 User Manual
Page 8
BEFORE
YOU
BEGIN
1
INTRODUCTION
IMPORT
ANT
PRECAUTIONS
ASSEMBL
Y
BEFORE
YOU
BEGIN
ELLIPTICAL
OPERA
TION
LIMITED
W
ARRANTY
TROUBLESHOOTING
&
MAINTENANCE
CONDITIONING
GUIDELINES
BEFORE YOU
BEGIN
ASSEMBL
Y
15
INTRODUCTION
IMPORT
ANT
PRECAUTIONS
ELLIPTICAL OPERA
TION
CONDITIONING GUIDELINES
TROUBLESHOOTING &
MAINTENANCE
LIMITED WARRANTY
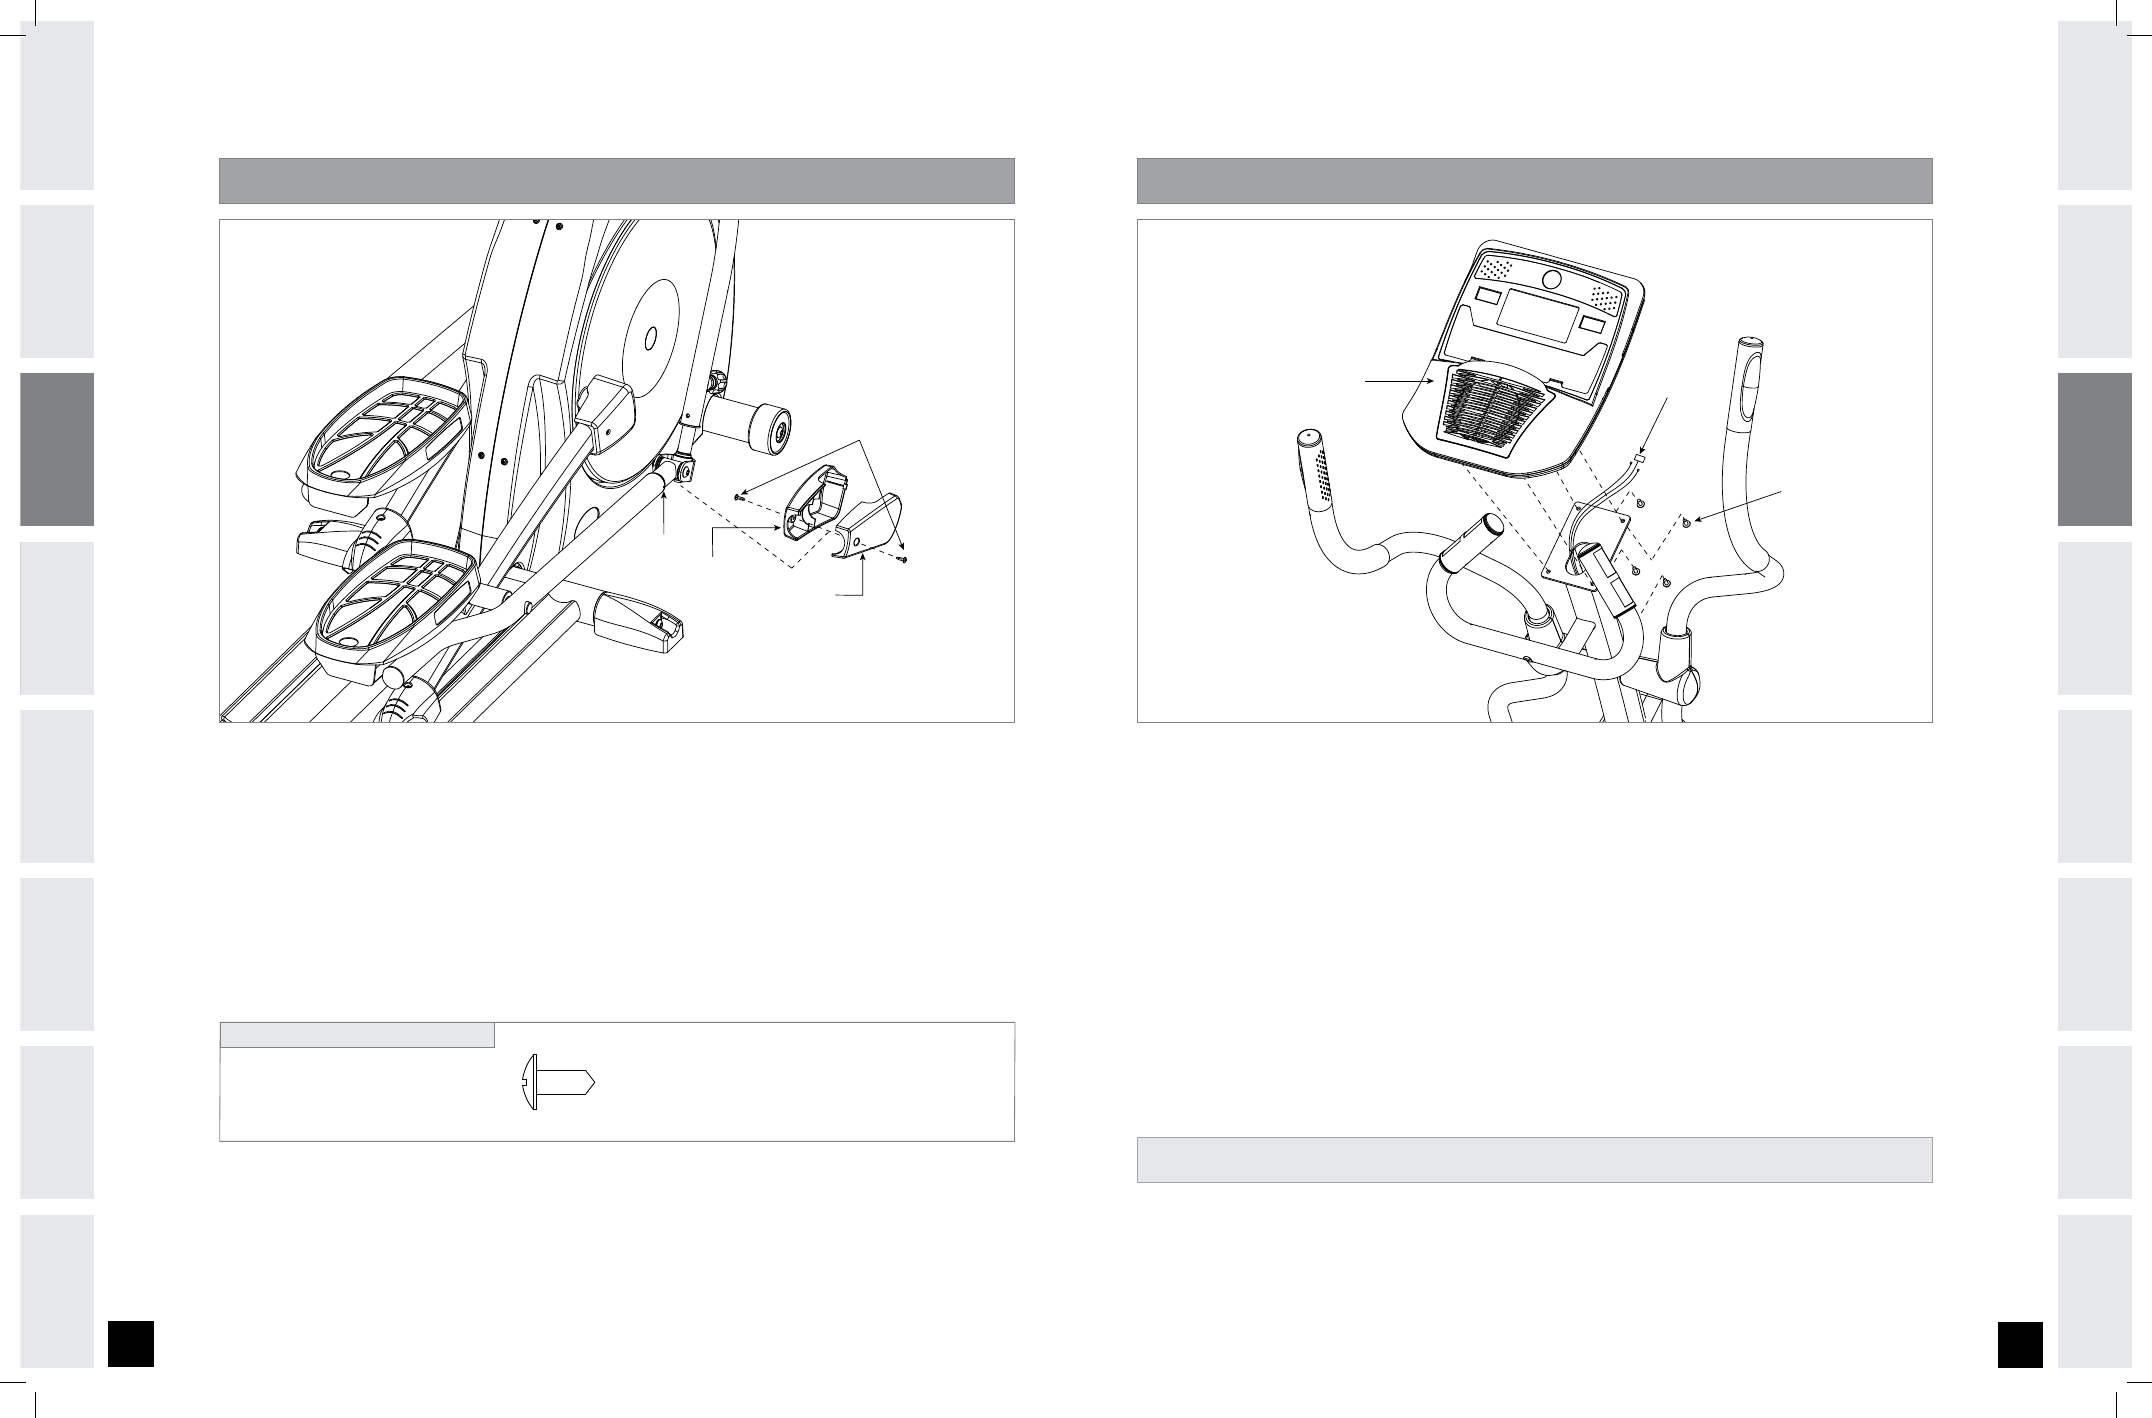
ASSEMBLY STEP
CONSOLE
CONSOLE WIRES
PRE-ATTACHED
SCREWS
ASSEMBLY STEP
SCREWS (Q)
INSIDE ELBOW COVER
OUTSIDE ELBOW COVER
ELBOW JOINT
A) Open
HARDWARE BAG FOR STEP 8.
B) Attach the
OUTSIDE ELBOW COVER to the ELBOW JOINT using 1 SCREW (Q).
C) Snap the
INSIDE ELBOW COVER onto the OUTSIDE ELBOW COVER.
Note the position of the snap tabs before snapping into position.
D) Attach the
INSIDE ELBOW COVER to the ELBOW JOINT using 1 SCREW (Q).
E) Repeat on other side.
NOTE: There is NO hardware bag for this step. All hardware is pre-installed.
A) Attach the
CONSOLE MAST wires to the CONSOLE wires .
B) Carefully tuck the
CONSOLE MAST wires into the CONSOLE MAST before attaching the CONSOLE.
C) Attach
CONSOLE to the CONSOLE MAST using the 4 PRE-ATTACHED SCREWS (screws will have to be removed
from the console first).
DO NOT PINCH WIRES!
Connect AC ADAPTOR to the AC ADAPTOR INPUT, located at front of the main frame. Connect
ADAPTOR to a power outlet. Locate the ON / OFF switch on the back of the CONSOLE. Flip the switch
to the ON position. After a “beep”, the CONSOLE will turn on.
HARDWARE BAG FOR STEP CONTENTS :
SCREW (Q)
15 mm
Qty: 4
YOU’RE FINISHED!
H-series_E5_Rev.1.2.indd 14-15
6/16/08 2:40:19 PM