Harbor Freight Tools 02665 User Manual
Page 6
Page 6
SKU 02665
4.
Place the desired welding electrode rod securely into the jaws of the Torch Cable
Clamp (1A). Generally, the higher the amperage, the thicker the welding rod.
5.
Verify that the Power Switch is in the OFF position, then plug the Arc Welder 220 VAC
plug into a dedicated, 50 amp line with delayed action type circuit breaker or fuses.
If an extension cord is used, it must have the following wire size: up to 30 feet, use 10
AWG size wire; 30 to 50 feet, use 8 AWG wire; Over 50 feet, use 6 AWG wire.
6.
While holding the Torch Cable Clamp with electrode clearly out of the way of any
grounded objects, turn the Power Switch to the ON position.
7.
Orient yourself on the area to be welded, then lower the Face Shield over your eyes.
WARNING: NEVER LOOK AT THE IGNITED ARC WITHOUT ANSI APPROVED, ARC
SHADED, EYE PROTECTION IN A FULL FACE SHIELD. PERMANENT EYE DAMAGE
OR BLINDNESS CAN OCCUR. SKIN BURNS CAN OCCUR. NEVER BREATH ARC
FUMES.
8.
Stroke the area to be welded with the electrode to ignite the arc.
Never tap the electrode into the welding surface to ignite the arc. This damages its
external coating on the electrode which prevents oxygen in the air from coming into
contact with the molten metal, causing it to oxidize.
9.
Once the arc is ignited, tilt the electrode forward at an angle of approximately 30° and
hold it at a distance from the welding object equal to the diameter of the electrode.
Note: If too much current is drawn from the Arc Welder, the Thermal Overload protector will
activate, the red indicator will light, and the Arc Welder will turn off until it cools down. If this
happens, turn the Power Switch to the OFF position and wait about 20 minutes.
10.
When the weld is complete, lift the electrode clearly away from any grounded object
and lift the Face Shield up. Turn toward the Arc Welder to turn the Power Switch to the
OFF position.
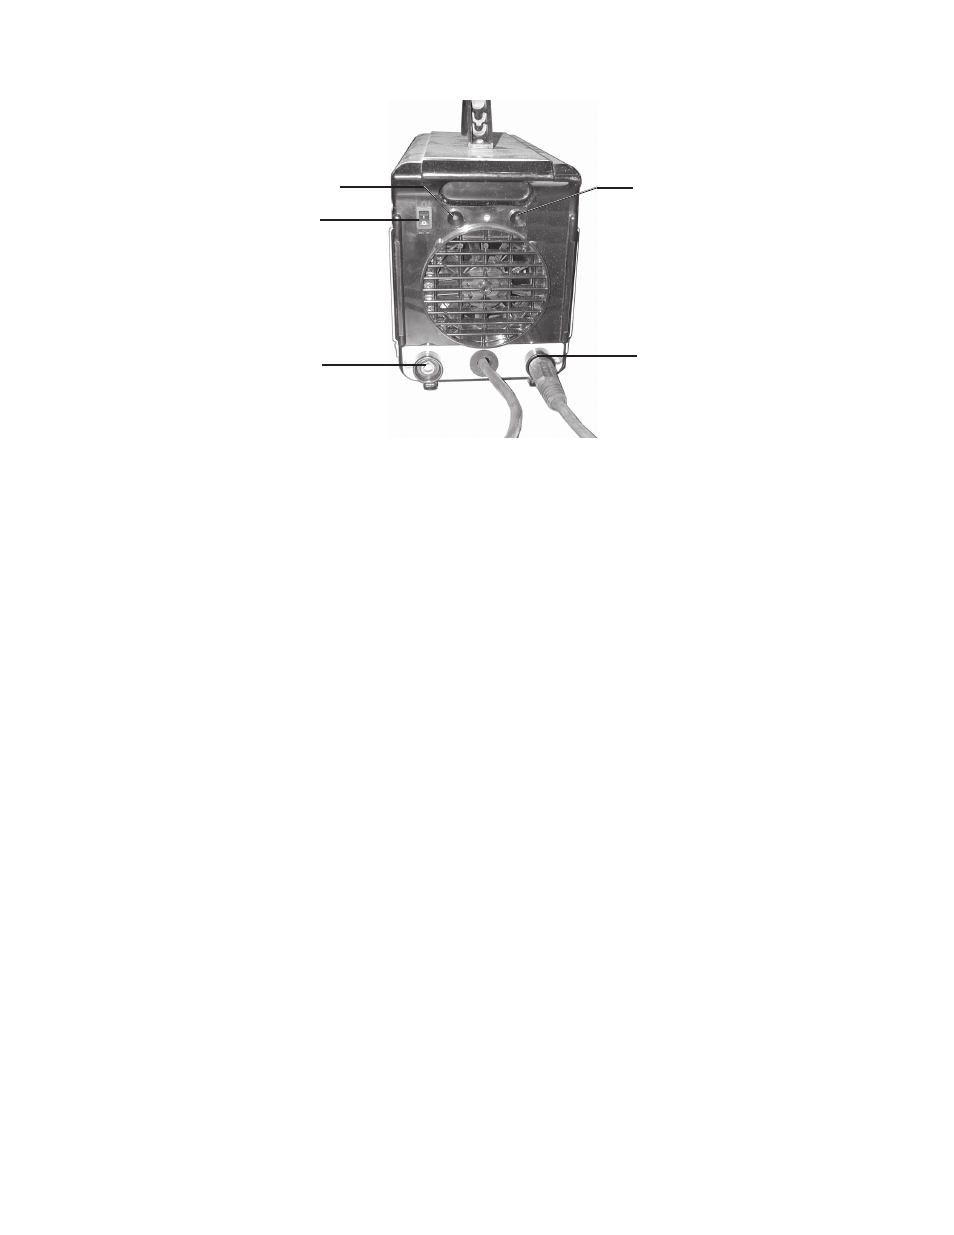
Switch (5)
Power On (green) Indicator
Thermal Overload (red) Indicator
160 Amp Connector
80 Amp Connector
Ground Cable (2A)
Torch Cable (1A)