Battery connections for electric starter, Remote control linkage – HONDA GXV520 User Manual
Page 14
ENGLISH
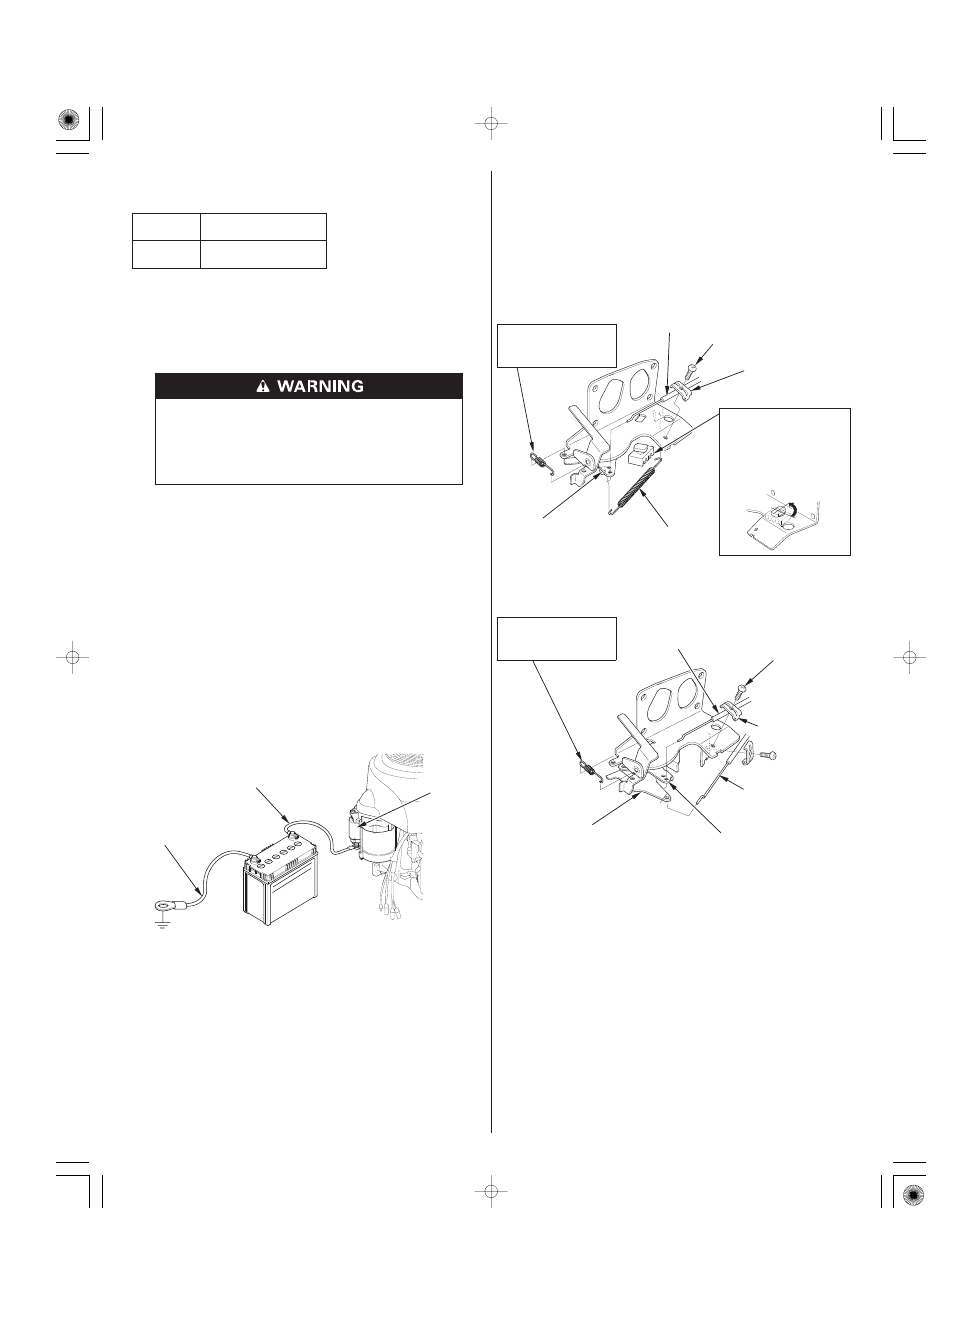
Remote Control Linkage
Battery Connections for Electric Starter
WARNING:
Wash hands after handling.
Recommended Battery
STARTER
SOLENOID
BATTERY
POSITIVE (
) CABLE
BATTERY
NEGATIVE (
) CABLE
Single Lever Type:
Dual Lever Type:
THROTTLE/CHOKE
CABLE (SOLID WIRE)
STOPPER RUBBER
LEVER SPRING
CONTROL LEVER
CHOKE RETURN SPRING
THROTTLE CABLE
(SOLID WIRE)
CHOKE CABLE
(SOLID WIRE)
5
16 mm SCREW
CABLE HOLDER
CHOKE RETURN SPRING
5
16 mm SCREW (2)
CABLE HOLDER (2)
INSTALLATION:
INSTALLATION:
INSTALLATION:
THROTTLE LEVER
CHOKE LEVER
14
The throttle and choke control levers are provided with holes for
optional cable attachment.
The following illustrations show installation examples for a solid
wire cable. Do not use a braided wire cable.
Coat the terminals and cable ends with grease.
Connect the battery negative (
) cable to the battery negative
(
) terminal as shown.
Connect the battery positive (
) cable to the battery positive (
)
terminal as shown.
Connect the battery negative (
) cable to an engine mounting
bolt, frame bolt, or other good engine ground connection.
Connect the battery positive (
) cable to the starter solenoid
terminal as shown.
Battery posts, terminals, and related accessories
contain lead and lead compounds.
Keep all sparks, open flames, and smoking materials
away from the battery.
A battery can explode if you do not follow the correct
procedure, seriously injuring anyone nearby.
Be careful not to connect the battery in reverse polarity, as this will
short circuit the battery charging system. Always connect the
positive (
) battery cable to the battery terminal before
connecting the negative (
) battery cable, so your tools cannot
cause a short circuit if they touch a grounded part while tightening
the positive (
) battery cable end.
12 V
30 Ah
12 V
30 Ah
1.
2.
3.
4.
5.
GCV520
GXV520
GCV530
GXV530
Install with the short
end hook toward the
control base side.
To install the stopper
rubber, first align the boss
with the hole of the
control lever bracket, then
turn the rubber 90° and
secure it to the bracket as
shown.
Install with the short
end hook toward the
control base side.
08/06/18 15:36:43 32Z5Z600_014