Mounting to tripod (3), Mounting to wall – Harbor Freight Tools CEN-TECH 92801 User Manual
Page 4
Page 4
For technical questions, please call 1-800-444-3353.
SKU 92801
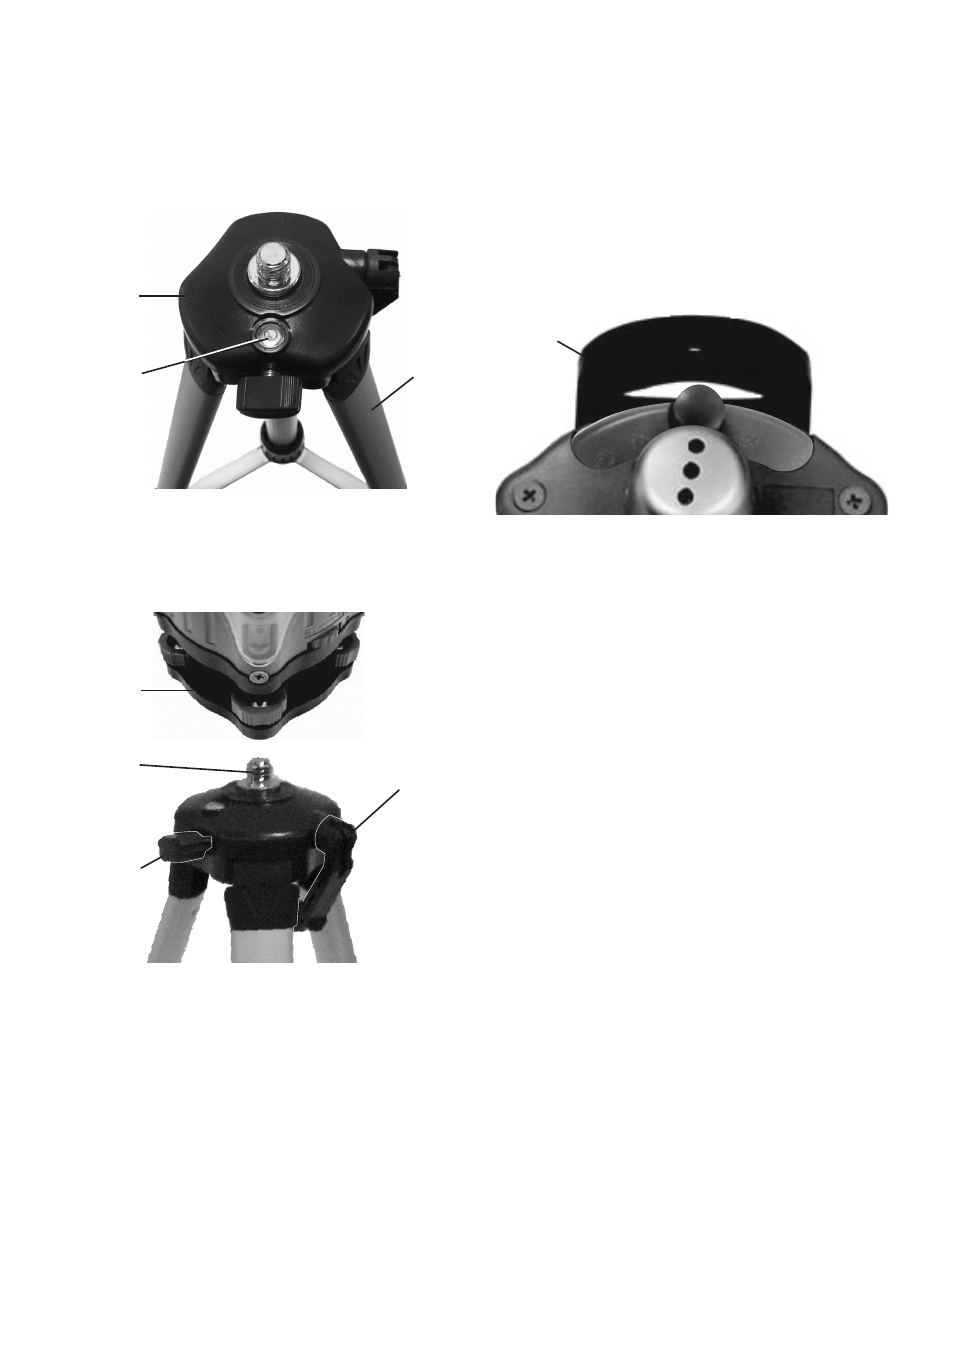
Mounting To Tripod (3)
1. If mounting the Laser Level with the Tripod (3),
position the Tripod on a flat and level ground surface.
Extend Tripod Legs to the desired height, using the
Bull’s Eye Vial (15) located on the Tripod Head (4).
See Figure 2, below.
Figure 2
Tripod
Head (4)
Bull’s Eye
Vial (15)
Tripod
(3)
2. Once the Tripod is level, lock the legs in
place using the clamps on each leg.
3. Then thread Wall Bracket (7A) onto
Tripod Head. See Figure 3, below.
Figure 3
Tripod
Head (4)
Wall
Bracket
(7A)
Height
Adjusting
Handle (13)
Height
Locking
Knob (14)
4. Once the Wall Bracket (7A) is secured on the head,
you can use the Height Adjusting Handle (13) to raise
the Level Housing to the desired height. Once the
desired height is reached, lock the height in place by
turning the Height Locking Knob (14). See Figure 3.
Mounting To Wall
1. The Laser Level may also be installed on a wall
surface without the Tripod. To do so, use the Wall
Bracket (7A) to secure the Laser Level to the wall.
2. First, set the Level Housing against the part of
the wall where you wish to install the Laser Level.
WARNING! Verify that installation surface has no
hidden utility lines before drilling or driving screws.
3. Use a pencil to mark drill holes through the
Wall Bracket (7A). See Figure 4, below.
Figure 4
Wall
Bracket
(7A)
4. Secure the Laser Level to the wall surface
using screws and plastic anchors (not included).
NOTE: The mounting screws must be long enough
to allow for the Wall Bracket frame to fit over them.
5. Once installed on wall, level the Laser,
using the Leveling Knobs (8A) located
on each side of the Laser and the Level
Vials (9A) located at the top of the Laser.