Aligning the print head, Epson stylus cx4400 series – Epson CX4400 User Manual
Page 10
Epson Stylus CX4400 Series
10
5/07
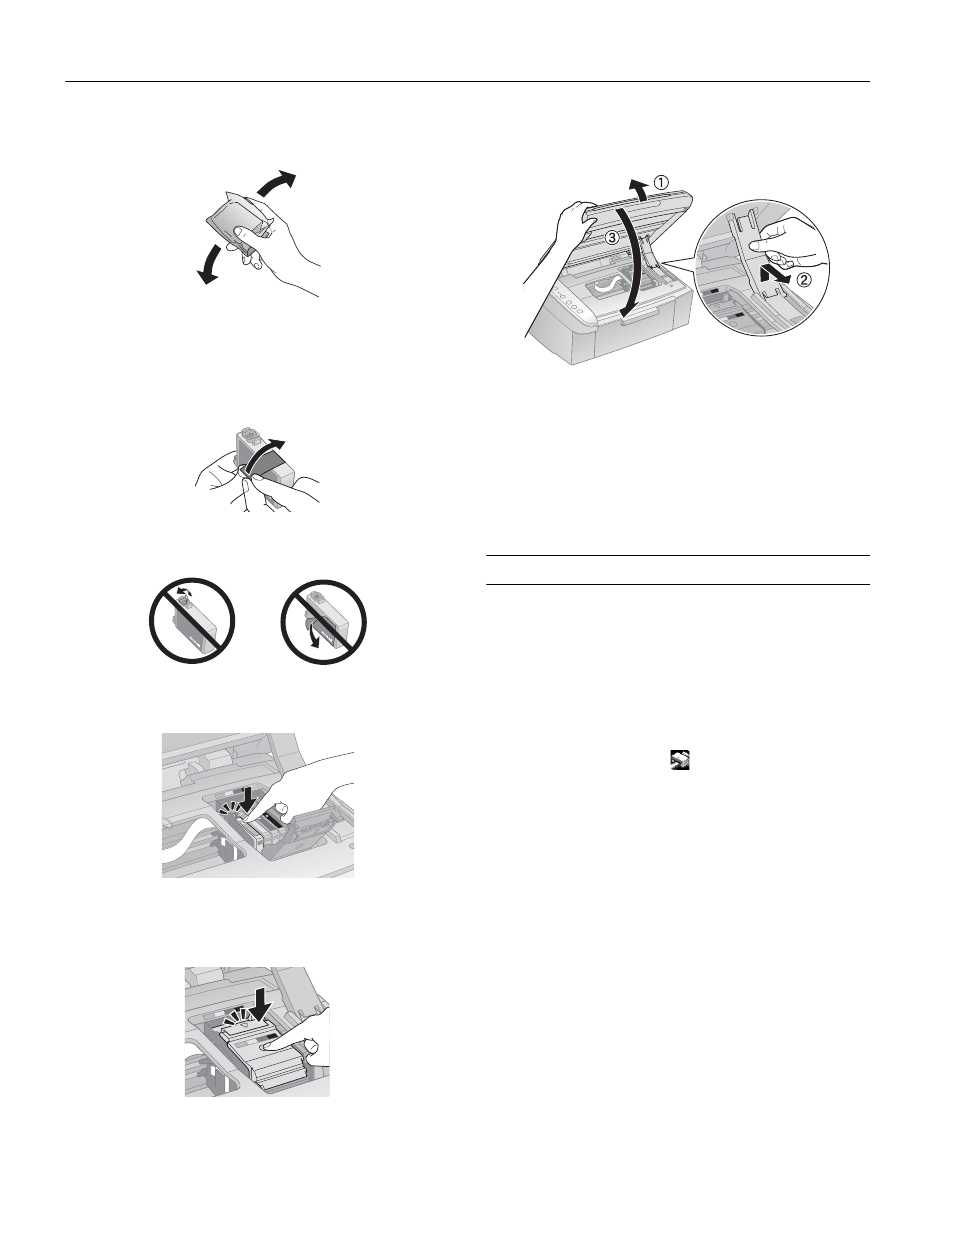
7. Before you open the new ink cartridge package, shake it
four or five times. Then remove it from the package.
Caution:
Do not touch the green chip on the front of the cartridge. This can
damage the ink cartridge.
8. Remove the yellow tape from the bottom of the ink
cartridge.
Caution:
Do not remove any other labels or seals, or ink will leak.
9. Place the new ink cartridge into the cartridge holder and
push it down until it clicks into place.
10. Once you have replaced all the cartridges that need
replacing, close the ink cartridge cover and press it until it
clicks into place.
11. Hold the scanner while you release the support. Then close
the scanner.
12. Press the y
Stop
button to begin charging the ink. This
takes about one and a half minutes. When it’s finished, the
On
light stops flashing and remains on, and the B ink light
goes out.
Caution:
Never turn off the CX4400 Series while the On light is flashing or
you’ll waste ink. If the
B
ink light flashes, press the
y
Stop
button and press down all the cartridges securely.
Aligning the Print Head
If your printouts look grainy or blurry, or you see light or dark
bands across them, you may need to align the print head.
Note:
Banding may also occur if your print head nozzles need cleaning.
1. Turn on the CX4400 Series.
2. Load several sheets of paper.
3. Windows: Right-click the
printer icon on your taskbar
(in the lower right corner of your screen). Select
Print Head
Alignment
.
Macintosh OS X: Open the
Applications
folder and select
EPSON Print Utility
. Select your
CX4400 Series
in the
printer list, click
OK
, and select
Print Head Alignment
.
4. Follow the instructions on the screen to print an alignment
sheet.
Note:
Do not press the
y
Stop button to cancel printing of the
alignment sheet.