Using the rangehood – Electrolux ERCE90AS User Manual
Page 6
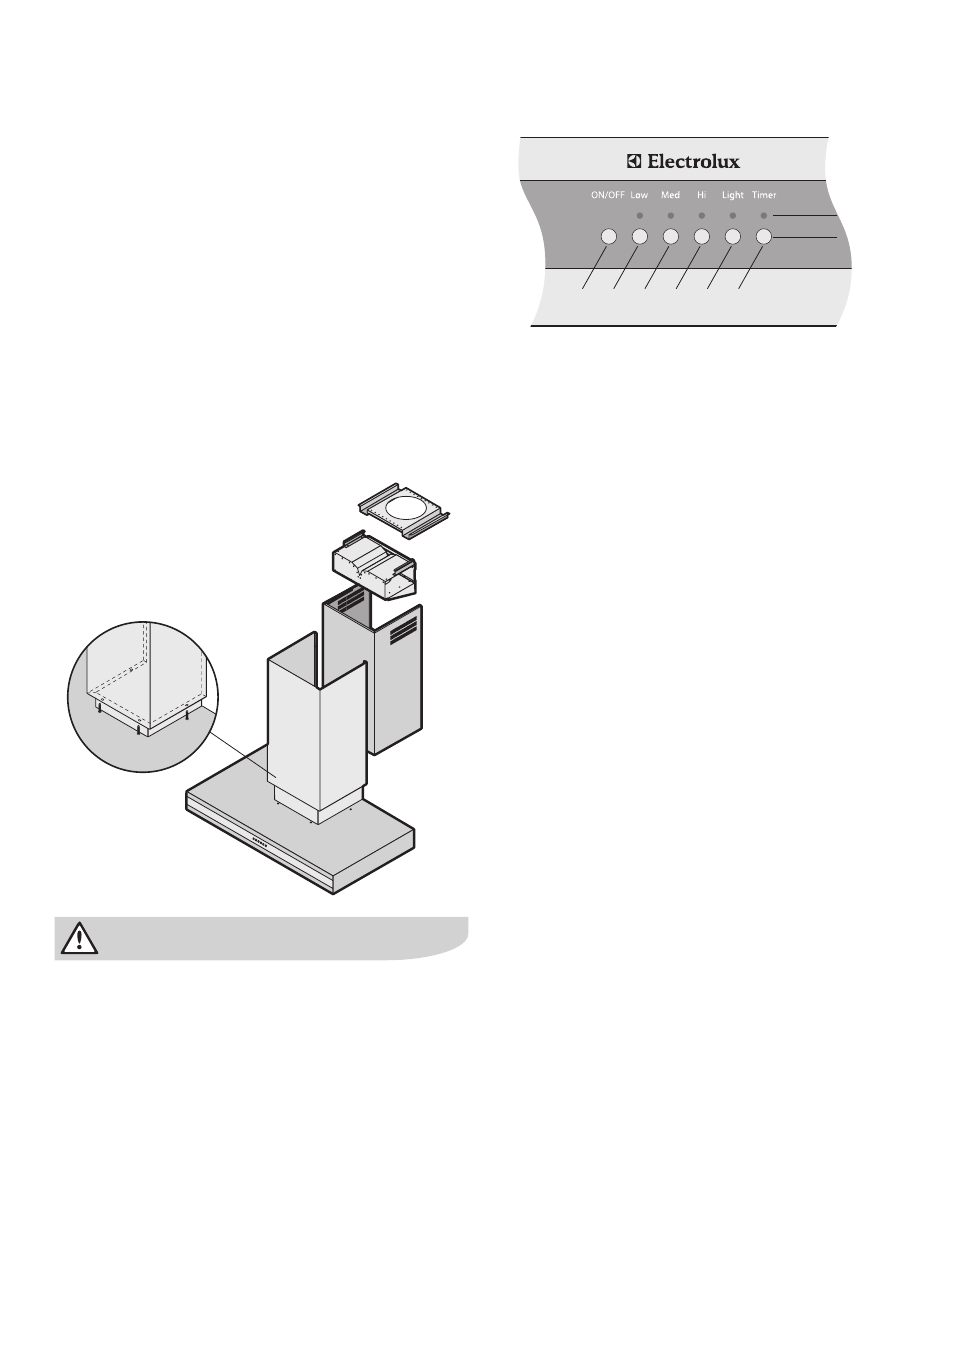
Installation of outer flue cover
7. You will need to separate the outer and inner flue cover
sections, and carefully peel the protective coating from
both. Additionally, remove the protective coating from
the hood body.
Carefully reassemble the outer and inner flue sections by
sliding the inner flue cover into the outer flue cover.
8. Holding both flue cover sections together, gently slide
the inner flue cover section over the recirculating T-
piece (for recirculating mode) or over the top-flue fixing
bracket (for ducted mode) until the rear edge of the flue
is touching the rear wall.
Carefully lower the outer flue cover section to the top of
the hood body.
9. With filters removed, fix the outer hood section to the
hood body (using the M5x20mm screws supplied) by
fixing through the under side of the hood body.
important
Care must be taken to ensure the screws are not cross
threaded when attaching the outer flue cover.
10. If installed in recirculating mode, insert the optional
carbon filter (not supplied).
11. Replace the aluminium mesh filters. Your Electrolux
rangehood is now ready for use.
To switch Canopy ON and OFF
Depress push button 1 to turn the unit ON and depress
push button 1 again to turn the unit OFF.
Setting the power level required
Depress either of the push buttons 2,3 or 4 to select the
desired power required for the type of cooking you are
doing. Confirmation of the level selected is indicated by
the red LED indicator above the selection chosen. Below
is a guide only of the type of cooking being performed and
suggested settings.
setting Low – light frying/boiling
setting Med – frying/wok cooking/heavy boiling
setting Hi
– grilling, intensive frying and wok cooking
To switch Lights ON and OFF
Depress push button 5 to turn the lights ON and depress
push button 5 again to turn the lights OFF. Confirmation of
the light being selected is indicated by the red LED indicator
above the light push button.
Using the Timer
At the end of cooking if the timer is switched on the canopy
rangehood will continue to run for an additional 15 minutes
to remove any odours that remain at the completion of
cooking. After 15 minutes the canopy will turn itself OFF.
Depress push button 6 to turn the timer ON and depress
push button 6 again to turn the timer OFF, if you do not
wish to let it run for the full amount of time. Confirmation
of the timer being selected is indicated by the red LED
indicator above the timer push button.
Using the rangehood
4 installation/using the rangehood
electrolux e:line rangehood
red LEDs
1
buttons
2
3
4
5
6