Removing and installing a photo cartridge, Picturemate pal (pm 200) – Epson PM 200 User Manual
Page 8
PictureMate Pal (PM 200)
8 -
PictureMate Pal (PM 200)
6/06
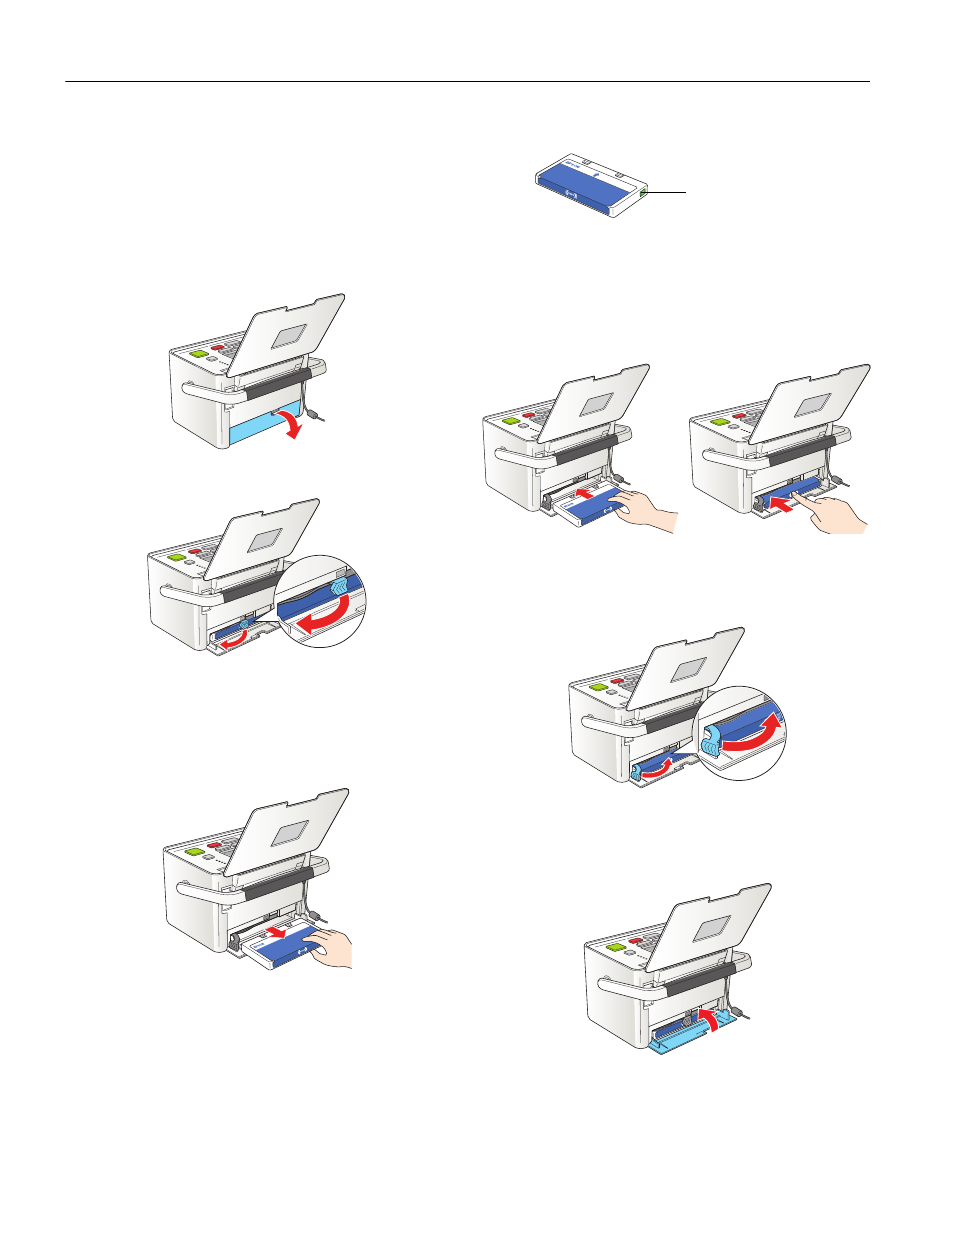
Removing and Installing a Photo
Cartridge
Make sure you have a new PictureMate 200 Series Print Pack
before you remove the old photo cartridge. Once you remove
the cartridge, you must install the new one right away.
1. Make sure PictureMate Pal is on but not printing.
2. Open the cartridge door on the back of PictureMate Pal.
3. Slide the cartridge lever left, to the
Release
position.
Caution: Do not try to pull out the cartridge without moving the
lever.
4. Pull out the cartridge and dispose of it properly. (For
appropriate disposal, check local resources for recycling
guidelines.)
Warning: Keep photo cartridges out of the reach of children and
do not drink the ink.
If ink gets on your hands, wash them thoroughly with soap and
water. If ink gets in your eyes, flush them thoroughly with
water. If discomfort or vision problems continue after flushing,
see a doctor immediately.
5. Remove the new photo cartridge from its package.
Caution: Don’t touch the small green circuit board. Install the
photo cartridge immediately after you remove it from its
package. If you leave a cartridge unpacked for a long time before
using it, normal printing may not be possible.
6. Slide the cartridge straight into the slot, label side up, until
it clicks in place.
Note: The cartridge won’t go in all the way. You need to use the
cartridge lever to lock it in place.
7. Slide the lever all the way right, to the
Lock
position.
Caution: If the cartridge is not inserted correctly, PictureMate
Pal will not be able to print.
8. Close the cartridge door all the way.
PictureMate Pal starts charging and displays a message.
9. When it’s finished charging, press
OK
.
Don’t touch the
green chip