Operating your ceiling fan, Installation of storage bracket – Emerson KF180 User Manual
Page 11
button is held down. When the light is
at the desired brightness, release the
button.
5. To turn the light on and off, press and
release the button. The light will turn
on at the light level previously set (see
step 4).
6. If airflow is desired in the opposite
direction, turn the fan off and wait for
the blades to stop turning. Then slide
the reversing switch (Figure 18) to the
opposite position and turn the fan on
again. The blades will turn in the oppo-
site direction and reverse the airflow.
REVERSING
SWITCH
9. Grasp the lower ring assembly and
raise it up and over the ring rods of the
adapter assemlby (Figure 16). Position
the ring assembly of that the ring
assembly arms protrude through the
holes at the end of the ring rods.
Secure the ring asembly in the ring
rods using the six ring screws.
10. Your ceiling fan is now installed and
wired to be controlled by your remote
control system.
11
LOWER RING
ASSEMBLY
RING
SCREWS (6)
RING ROD
ARM
Figure 16
Operating Your
Ceiling Fan
IMPORTANT
Fan installation must be completed,
including the installation of the fan
blades, before testing of the remote
control.
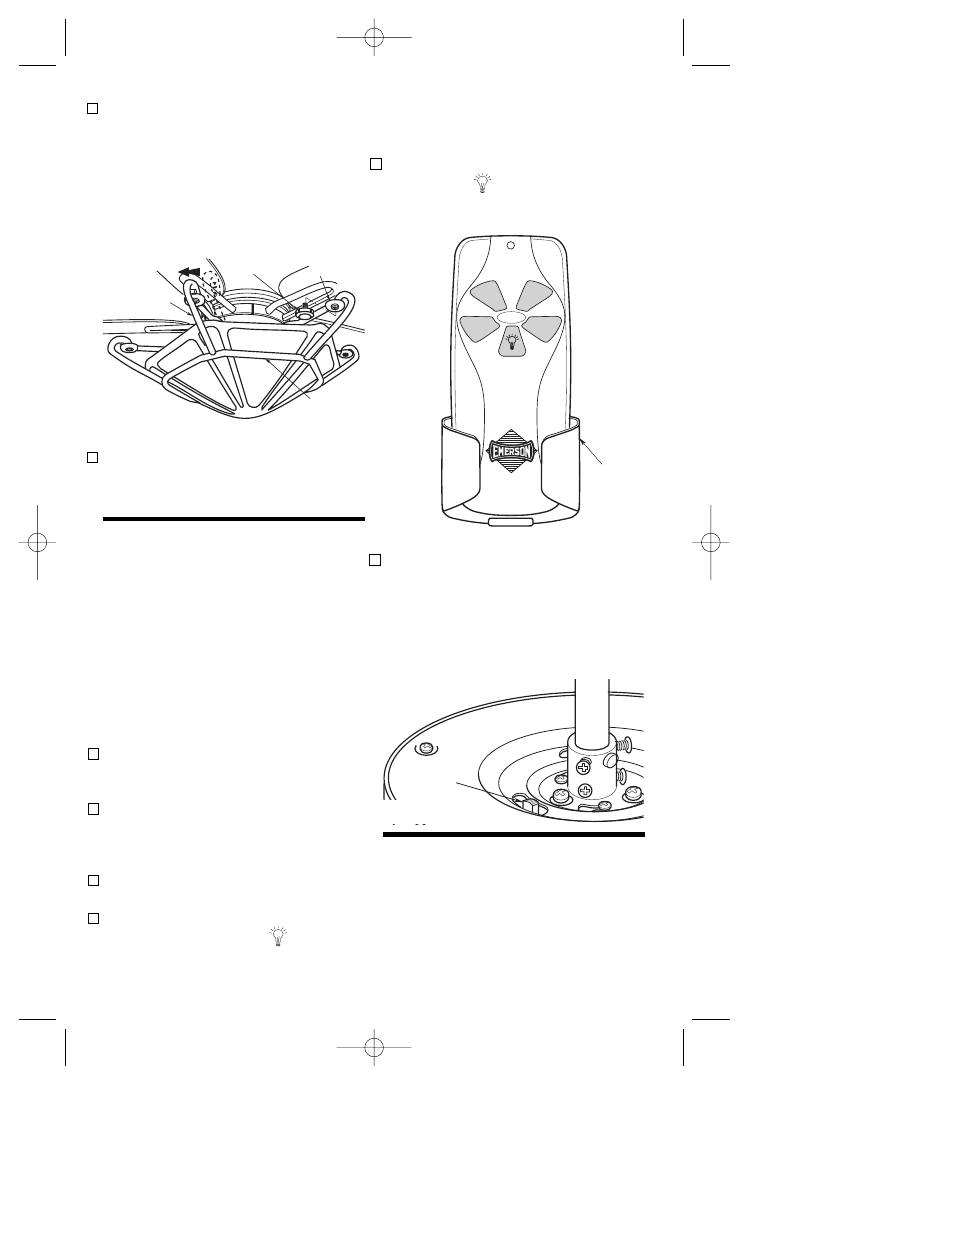
Your remote control (Figure 17) has full
control of your fan and light. However, air-
flow direction is controlled by a slide
switch on the switch housing.
1. Restore electrical power to the outlet
box by turning the electricity on at the
service panel.
2. To set the desired fan speed, press the
HI, MED, or LOW buttons to operate
your fan on high, medium, or low speed
(Figure 17).
3. To turn your fan off, press the OFF
button.
4. To set the level of light brightness,
press and hold the light button. The
light brightness will continue to
increase then decrease while the
STORAGE
BRACKET
H
I
OFF
LOW
MED
Figure 17
Figure 18
Installation of
Storage Bracket
A storage bracket is supplied with the
remote control for holding the transmitter
when not in use. If you desire to use the
bracket, use the two screws (supplied)
and install it on a wall that is away from
excess heat or humidity.
BP7284, Sturbrige, KF180 7/31/06 10:52 AM Page 11