Pas r – Echo 99944200610 User Manual
Page 9
PAS R
APid
L
oAdeR
TM
T
RiMMeR
A
TTAchMenT
o
PeRAToR
'
S
M
AnuAL
9
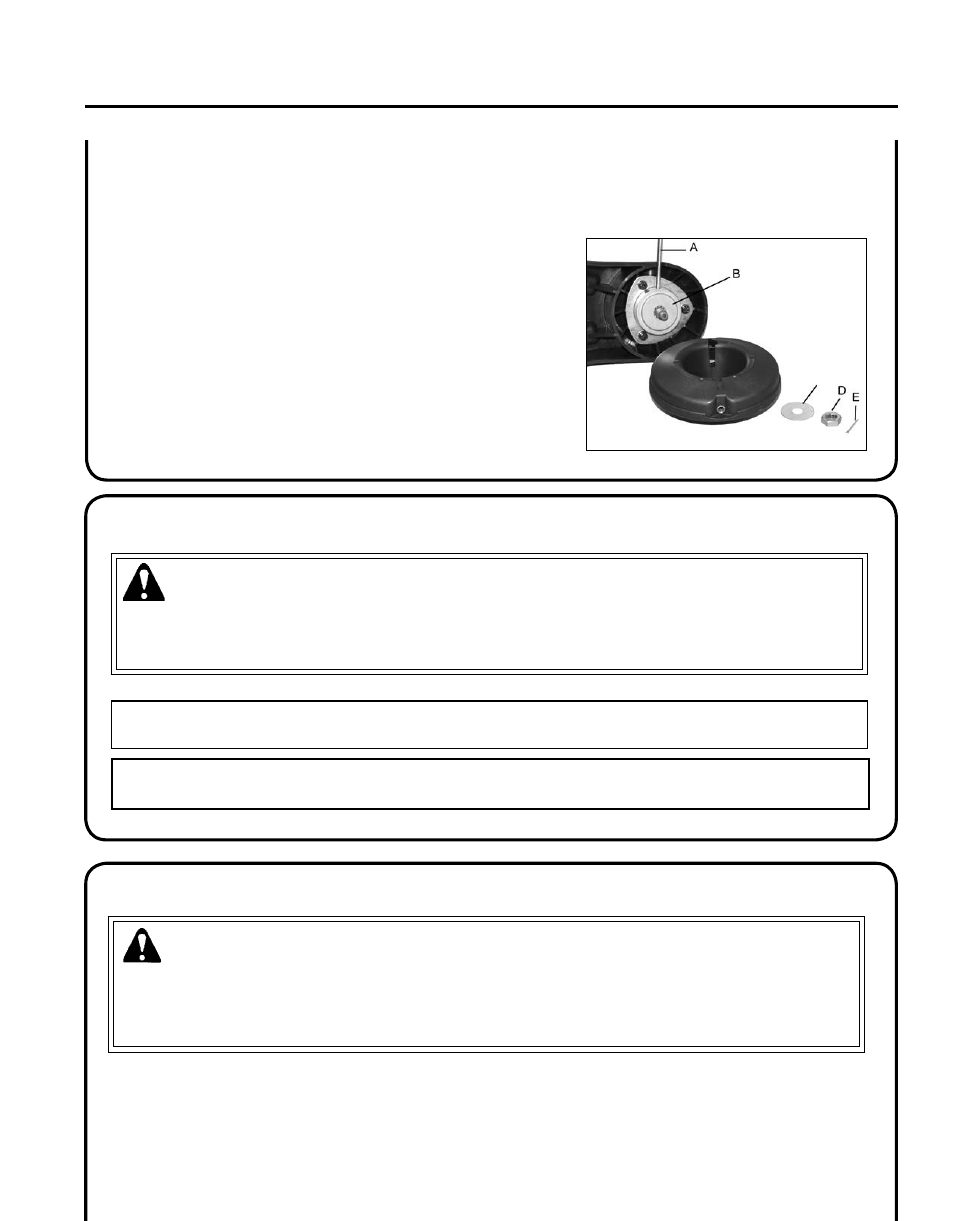
nylon
lIne
head
InsTallaTIon
/
removal
1. Align hole in upper plate with notch in edge of gear housing and
insert head locking tool (A). Remove plastic sleeve from PTO
shaft.
2. Be sure upper plate (B) remains on PTO shaft.
3. Place line head onto PTO shaft, followed by large metal washer
(C).
4. Thread L.H. nut (D) on PTO shaft. Tighten securely.
5. Install new split pin (E).
6. Remove locking tool (A).
7. To remove line head, reverse assembly instructions.
C
Your ECHO trimmer is designed to provide many hours of trouble free service. Regular scheduled maintenance will
help your trimmer achieve that goal. If you are unsure or are not equipped with the necessary tools, you may want to
take your unit to an ECHO Service Dealer for maintenance. To help you decide whether you want to DO-IT-YOUR-
SELF or have the ECHO Dealer do it, each maintenance task has been graded. If the task is not listed see your ECHO
dealer for repairs.
WARNING
Moving parts can amputate fingers or cause severe injuries. Keep hands, clothing and loose objects away from all
openings. Always stop engine, disconnect spark plug, and make sure all moving parts have come to a complete stop
before removing obstructions, clearing debris, or servicing unit. Allow unit to cool before performing service. Wear
gloves to protect hands from sharp edges and hot surfaces.
m
aInTenanCe
NOTE
Refer to the Grass Trimmer / Brush Cutter Safety Manual for proper and safe trimming techniques.
IMPORTANT
Never wear line shorter than 1-1/2 inch extension from head, otherwise overspeeding and engine damage may result.
o
peraTIon
WARNING
Moving parts can amputate fingers or cause severe injuries. Keep hands, clothing and loose objects away from all
openings. Always stop engine, disconnect spark plug, and make sure all moving parts have come to a complete stop
before removing obstructions, clearing debris, or servicing unit.