Trouble shooting – Euro-Pro SC620 User Manual
Page 5
OPERATING INSTRUCTIONS cont.
IMPORTANT NOTES DURING OPERATION
Step 3: Using Garment Steamer
cont.
3.
After the unit has cooled down,
remove the water tank and empty
the water remaining in the water
tank in a sink. Rinse the water
tank and set aside to dry.
4.
Disconnect the steamer hose from
the unit and set aside.
5.
Disconnect the garment rod
entirely from the unit.
6.
Lift the unit over a sink and empty
what water has remained in the
water reservoir. Wash the interior
of the reservoir by flushing with
some tap water. This will dislodge
any sediment that has
accumulated. Drain this water
from the reservoir and dry.
7.
Reattach the garment rod and
steamer hose or store separately.
8.
Once the unit has dried, you may
store in a cool, dry place.
Important:
If you wish to leave your
steamer ready for use on a daily
basis, simply leave the water bottle
filled and in place. While you do not
have to empty the water bottle each
day, you should periodically empty the
old water out of the steamer and
remove any sediment that has
accumulated. We recommend that
you empty and clean it once a month
depending on amount of use and
water mineral content in your area.
Safety Thermostat
Should your unit run out of water, the safety
thermostat will trip in order to prevent
damage to the unit. To reset, unplug unit,
refill water tank, re-plug unit into wall outlet
and depress On/Off switch. This will reset
the thermal protector circuit.
If steamer hose gurgles during use:
•
This is a normal result of
condensation collecting inside the
hose. Simply lift the steam
diffuser/handgrip upward until the
hose is extended to its full height.
•
The gurgling will disappear when
the excess moisture inside the
hose has had a chance to drain
back into the base.
If the steamer stops producing
steam then starts again:
•
You may wish to examine the
inside of the reservoir. The most
common reason for this effect is
the accumulation of sediment from
mineral laden water.
•
Clean the sediment from inside the
water reservoir following the
instructions on page 8.
TROUBLE SHOOTING
Below is a chart detailing the most common problems, their causes and solutions.
PROBLEM
CAUSE
SOLUTION
Steamer Does
Not Get Hot
1. Steamer is not
plugged into
electrical outlet.
2. The water tank is
empty and the
reservoir has
drained.
1. Plug power cord into
electrical outlet.
2. Refill water tank
following instructions on
page 7.
No Steam
1. Water level is too
low.
1. Refill the water tank
following instructions on
page 7.
Water Drips
From The
Steam Diffuser
1. Condensation
has
formed inside the
steamer hose.
1. Hold the steamer hose
upright fully extended
and allow excess
moisture to drain back
in the water reservoir.
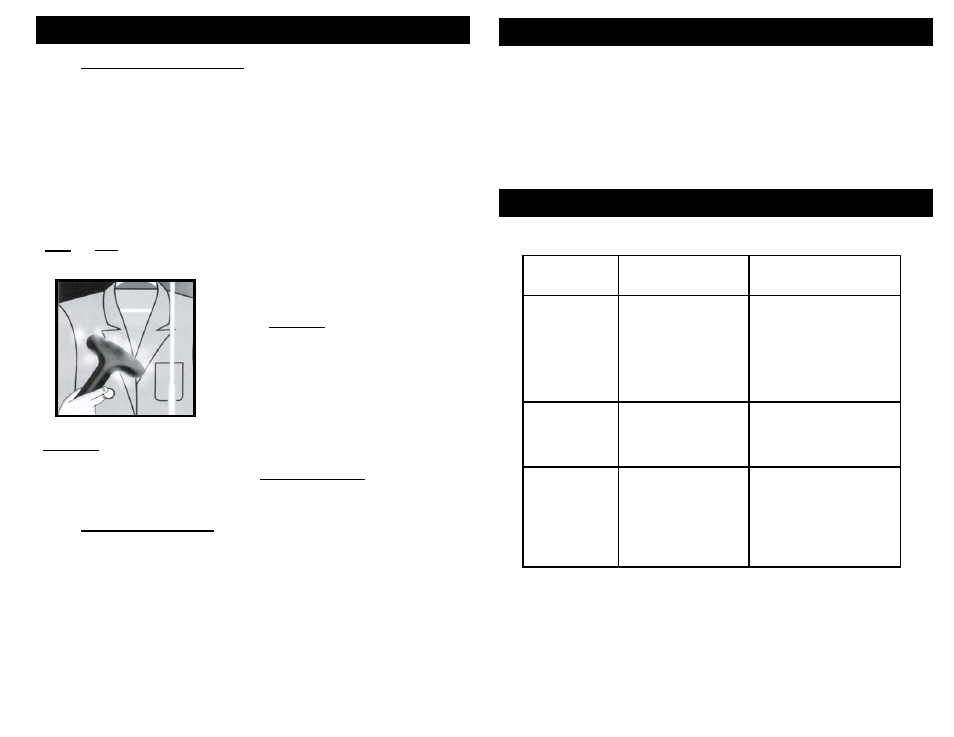
4. Once steam is being released
from the steam diffuser with the
garment brush attached, hold
the handgrip with the nozzle
facing upward and begin steaming
from the bottom of the garment
allowing the escaping steam to rise
inside and out side removing the
wrinkles. (See fig. 10)
5. After a few seconds, remove
the steam diffuser from the
garment and smooth the garment
with your free hand and check to
see if more steam is required.
Note:
Do NOT leave the steam
diffuser in one area for a long period of
time because the garment will get wet.
Fig. 10
Important:
For heavier fabrics, you
may need to use repeated
applications. Avoid heating a single
area with steam for a prolonged
period. Check the garment to see
that the process is succeeding.
Step 4: Maintenance & Storage
1.
Turn the unit “Off”. The power on
light (green) will go out. Disconnect
the plug from the electrical outlet.
2.
Wait for garment steamer to cool
down completely for at least 30
minutes before draining the water
tank.
9
8