Primacoustic EcoScapes Slat Wall (98 x 32", Oak, 2-Pack) User Manual
Page 3
9.6"(24mm)
24"(610mm)
9.6"(24mm)
24"(610mm)
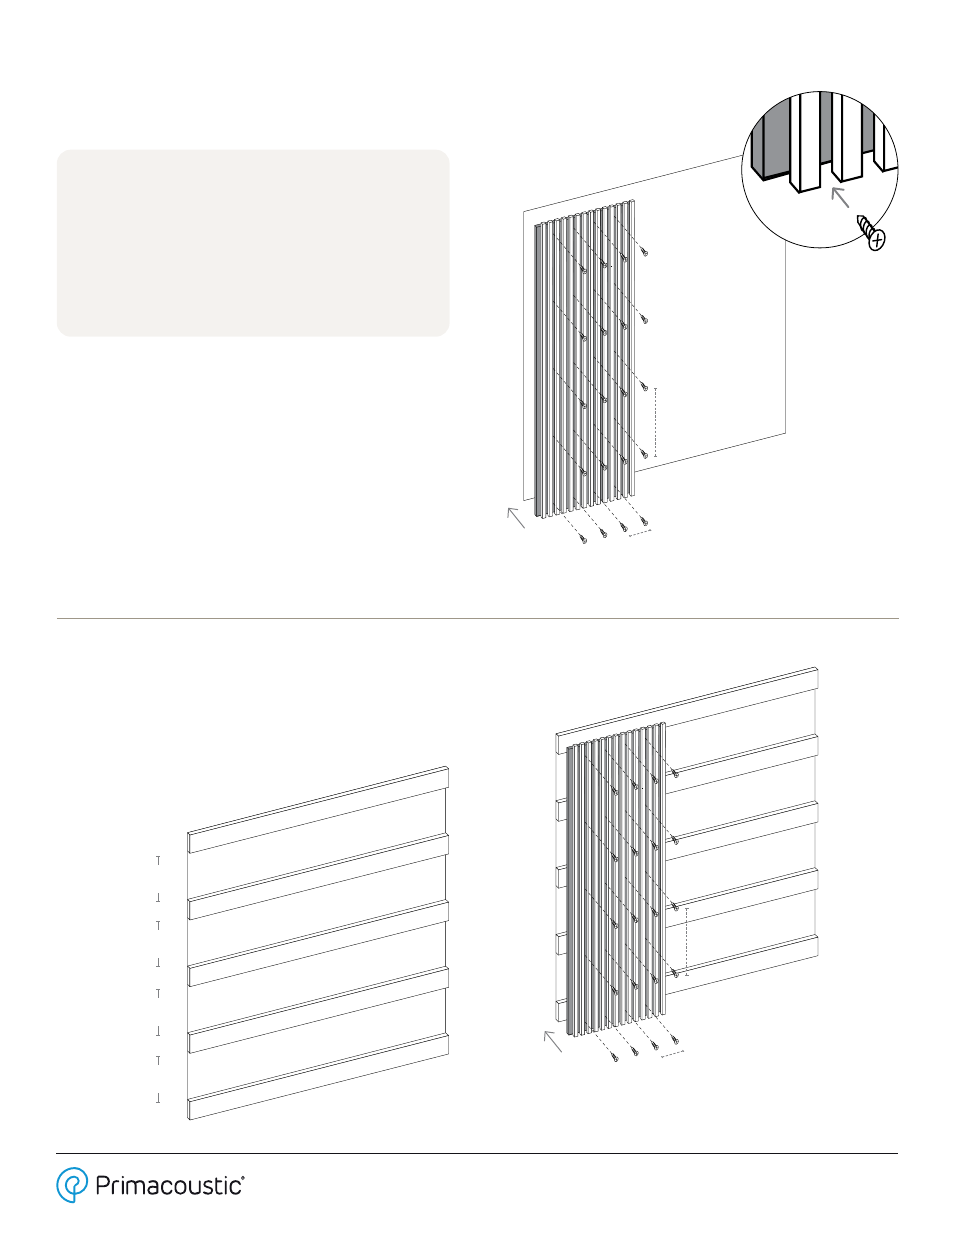
Method 2. Screwing the panels directly onto the wall:
Screw the
drywall screws
into the PET
panel between
the slats
NOTE: Don’t over-tighten
the drywall screws as
this will strip the
holes’ thread. Only
tighten enough to hold
the panel in place.
Method 3. Screwing the panels into 2" wide furring strips:
23.5"
(600mm)
23.5"
(600mm)
23.5"
(600mm)
23.5"
(600mm)
Tel: 604-942-1001 Fax: 604-942-1010 [email protected]
www.primacoustic.com
INSTALLATION MANUAL
EcoScapes Slat Wall Acoustic Panels
Tools & materials required:
• Measuring Tape
•
Ladder/Scaffolding
• Drill/Screwdriver
• DryWall Screws
•
1x2 Timber Strips
(if required)
• Anchors
(for ceiling/plasterboard
installation)
Using black drywall screws, fasten the panel directly
onto the wall through the black PET panel backing.
We recommend a minimum of 20 screws per panel at
approximately 9.6" (24mm) intervals across the width
and 24" (610mm) intervals down the length of the panel.
Please make sure to use appropriate anchors if screwing
into plasterboard.
If installing onto ceilings, fasten the screws directly
into the ceiling joists, or (for hollow ceilings) using
appropriate anchors.
This method leaves an air gap behind the panel, providing
additional bass absorption. We recommend installing 1x2
timber furring strips to the wall, fastening
them into the wall joists at 23.5"
(600mm) intervals.
The panels can then be screwed directly into the strips
through the PET Panel, as per method 2.