Power supply, Installing the batteries – Sony Multi Interface Shoe Adapter User Manual
Page 5
5
B
RF (radio frequency) transmission power
indication
Indicates the current transmission power setting. You can
change the setting with the RF transmission power setting
function.
H:
transmitting at 25 mW
M:
transmitting at 10 mW
L:
transmitting at 2 mW
C
Audio input level meter
Indicates the input signal level.
D
Reference level gauge
Indicates the reference input level. When the attenuation is
0 dB with INPUT LEVEL set to MIC, –58 dBu (–60 dBV)
is indicated. When LINE is selected for INPUT LEVEL,
+4 dBu is indicated.
E
Peak indicator
Warns of excessive input by lighting up when the signal is
3 dB below the level at which distortion begins.
F
Lock indicator
Indicates whether the accidental operation locks are
enabled. Nothing is displayed when the lock function is
disabled.
: Operation of the POWER button is locked.
: Changes to the settings are locked.
: Operation of the POWER button and changes to the
settings are locked.
For details, see “Lock function (LOCK)” (page 11).
G
Cross Remote condition indication
Indicates the signal transmission condition of the wireless
remote control function (4 levels).
: Good transmission
: Somewhat good transmission
: Somewhat poor transmission
: Poor transmission
: Unable to communicate with paired receiver
When the wireless remote control function is off, this
indication does not appear.
H
Power display
Displays the type of power source being used.
: Operating on battery power, displays remaining
battery level.
: Operating on USB power.
For details, see “Battery indication” (page 5).
I
Menu display section
The status of 17 different functions are displayed here. To
select the function, press the + or – button repeatedly.
For details, see “Setting Menus” (page 10).
Power Supply
The transmitter can operate on two LR6 (size AA) alkaline
batteries continuously for about 6.5 hours at 25 °C (77 °F).
Connecting a mobile battery to the USB connector enables
operation for a long period of time.
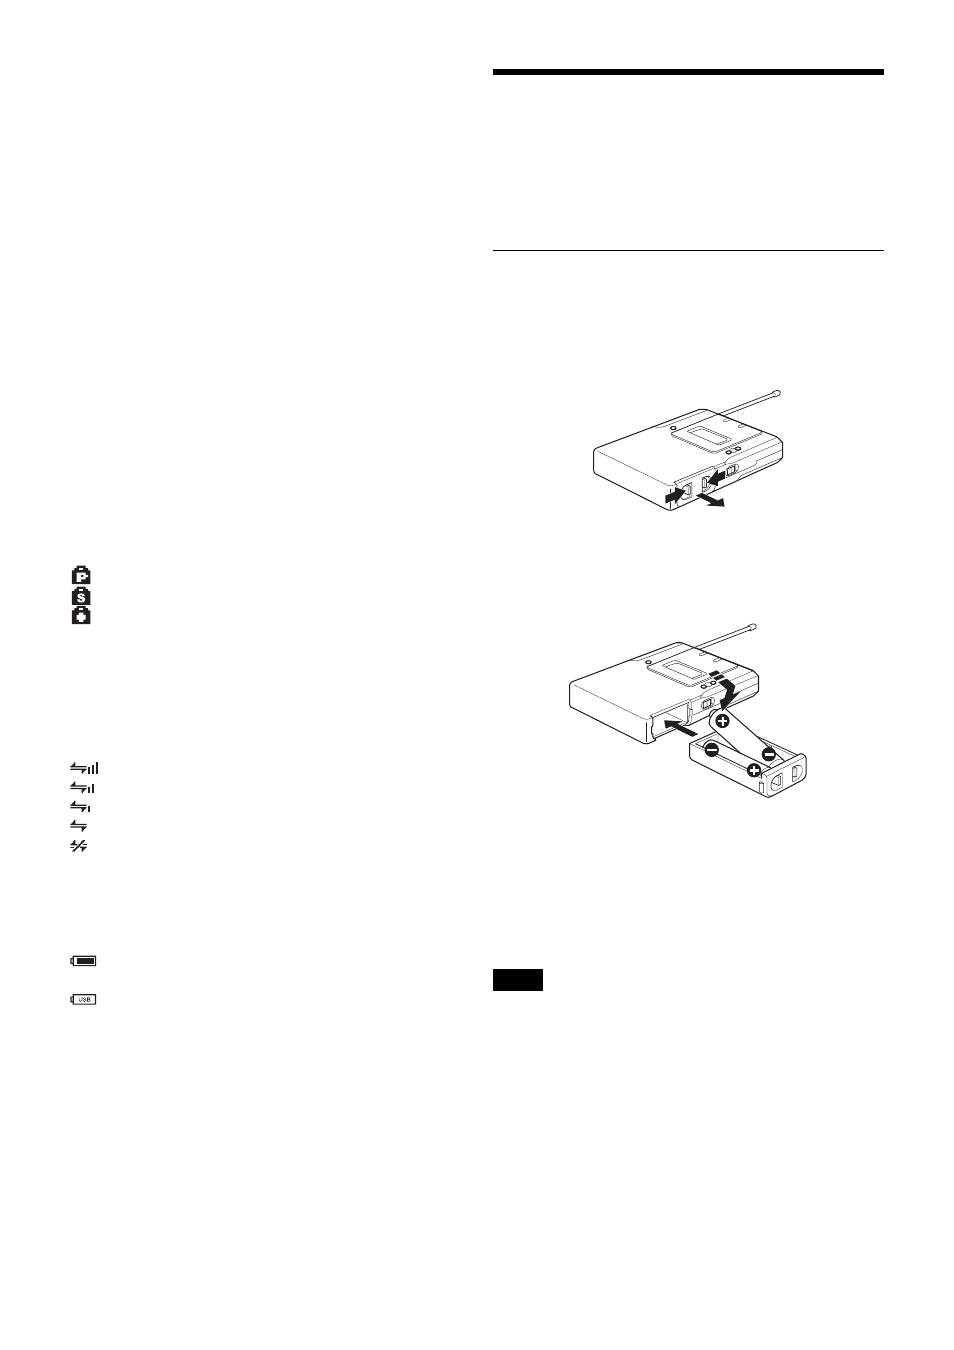
Installing the batteries
1
Squeeze the battery-holder tabs inward (in the
direction of the arrows) and slide out the battery
holder.
2
Insert new batteries, making sure the polarities are
correct, and then return the battery holder to its
original position.
Battery indication
The power status is indicated by eight level indications.
Replace both batteries when the battery indication starts to
flash.
Be sure to check the expiration date printed date on the
new batteries before using them.
• When BATTERY TYPE is set to TYPE1, the power
status is indicated based on the use of new LR6 (size
AA) Sony Alkaline batteries. An incorrect indication
may result when a different kind of batteries, a different
brand of batteries or old batteries are used. If you plan to
use other kind of batteries than alkaline, set the
BATTERY TYPE function according to the type of
batteries to be used.
• If you plan to use the transmitter for a long period of
time, it is recommended that you replace the batteries
with brand new ones.
• Use USB power source capable of supplying 1.0 A or
higher.
Notes