Test the scenario – PLANET IPX-300 User Manual
Page 14
1
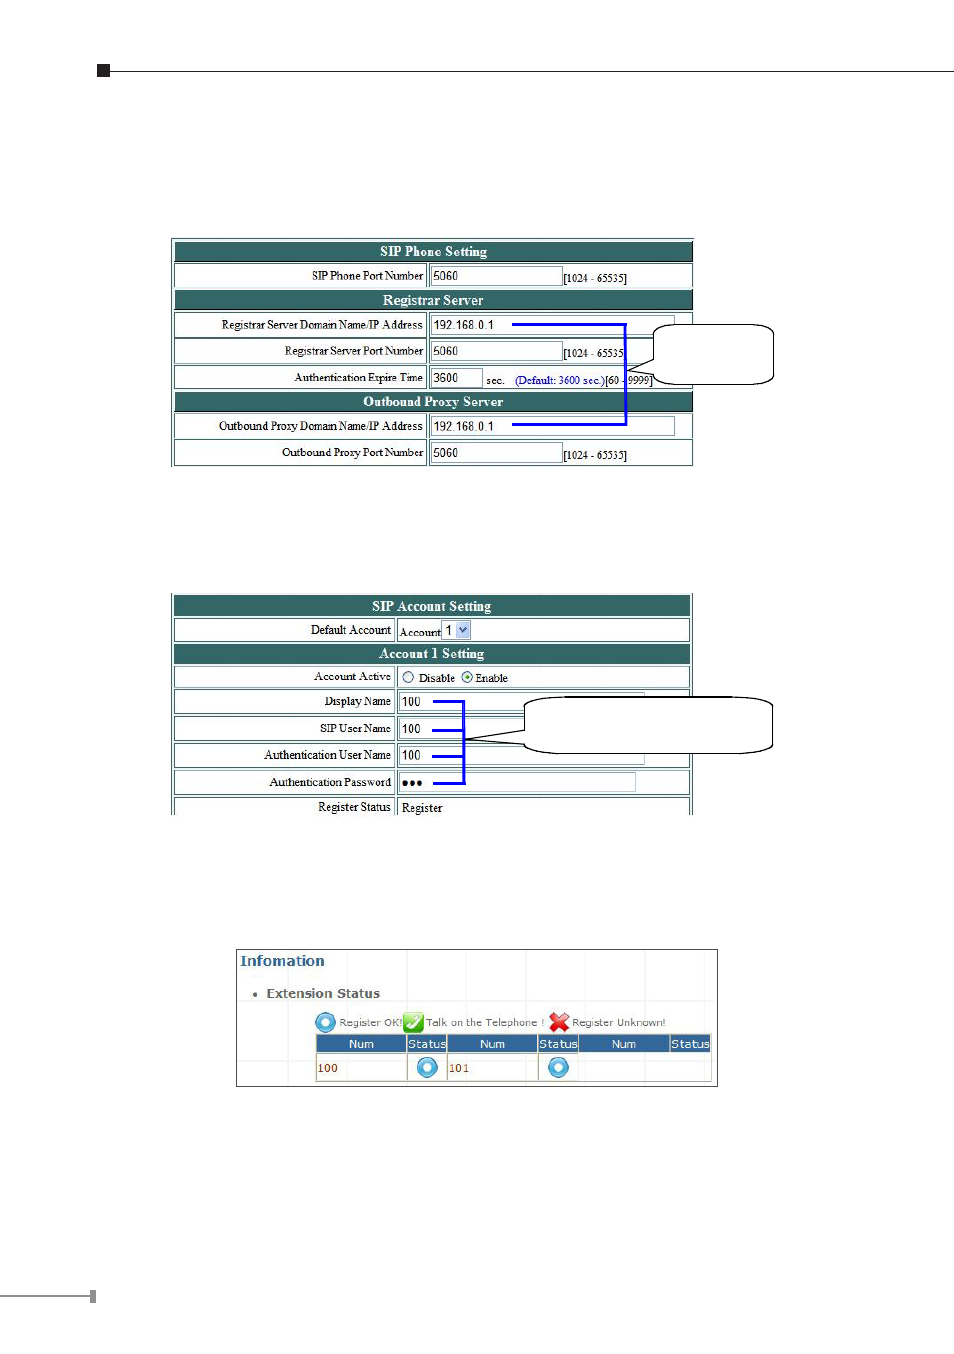
STEP 5: Please take VIP-192 and setup the wireless network to connect with IP
PBX (IPX-300W) by keypad menu method. Then log in VIP-192 via web browser
and browser to
“SIP Settings”
configuration menu. Insert the Register and
Outbound Proxy IP Address information.
The IP address
of IP PB X
Figure 17. SIP settings of VIP-192
Then browse to
“SIP Account Settings”
configuration menu and fill in the account/
password information. The sample configuration screen is shown below:
Dat a match with Fi gure 15. IP
PBX’s extensio n settings
Figure 18. SIP account settings of VIP-192
STEP 6: After both of devices have registered to IP PBX successfully, it could
browse to
“Information ⁄ PBX Extension Status”
page to show the registration
status:
Figure 19. Extension status
Test the scenario:
1. VIP-154T pick up the telephone
2. Dial the number: 100 (VIP-192) shall be able to connect to the VIP-192
- VIP-156 (68 pages)
- VIP-156 (68 pages)
- VIP-156 (75 pages)
- VIP-156 (76 pages)
- ATA-150 (36 pages)
- ATA-150 (51 pages)
- FRT-420SN (2 pages)
- FRT-420SN (80 pages)
- ICF-1600 (34 pages)
- ICF-1600 (63 pages)
- ICF-1800 (2 pages)
- ICF-1601 (42 pages)
- ICF-1700 (32 pages)
- ICF-1700 (115 pages)
- IPX-1900 (14 pages)
- IPX-1900 (84 pages)
- IPX-2000 (51 pages)
- IPX-1980 (89 pages)
- IPX-1980 (12 pages)
- IPX-1500 (85 pages)
- IPX-2000 (14 pages)
- IPX-330 (102 pages)
- IPX-2100 (12 pages)
- IPX-330 (20 pages)
- IPX-330 (16 pages)
- IPX-300 (96 pages)
- IPX-300 (82 pages)
- MCU-1900 (2 pages)
- MCU-1900 (27 pages)
- SIP-50 (27 pages)
- UP-120 (15 pages)
- UP-121 (11 pages)
- VGW-400FO (12 pages)
- VGW-400FO (80 pages)
- VIP-400FO (130 pages)
- VIP-101T (34 pages)
- VIP-880 (93 pages)
- VIP-193 (2 pages)
- VIP-193 (83 pages)
- VIP-192 (74 pages)
- VIP-251T (57 pages)
- VIP-251T (2 pages)
- VIP-254NT (2 pages)
- VIP-254NT (57 pages)