Taking off thor’s grille, Connecting your thor – EarthQuake THOR IW-SUB10 User Manual
Page 7
Taking Off THOR’s Grille
STEP#1
Your are now ready to prepare the sub for installation.
Carefully remove the logo from the grille to expose the
fastener hex nut.
Using the provided allen wrench, remove the fastener
nut. Make sure you perform these steps before trying to
remove the grille (you will damage the grille otherwise).
STEP#2
Now to remove the grille you simply use your fingers to
push out the prongs from the back side of the unit. Push
out all prongs and the grille will simply fall out.
STEP#3
You have now successfully removed the grille and are
ready to begin preparing the wall for installation.
STEP#4
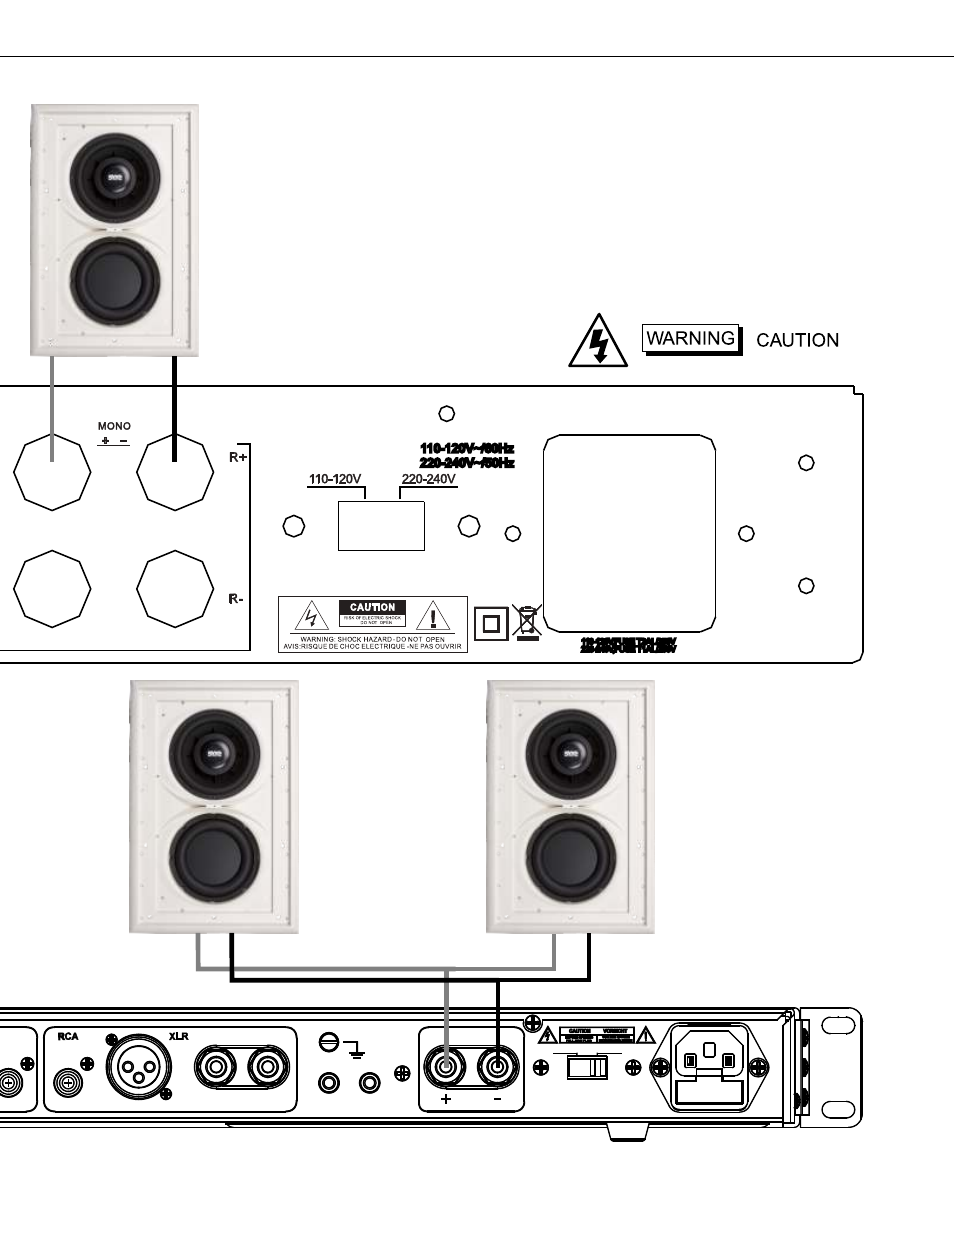
Connecting Your THOR
6
Earthquake Sound Corp. | (510) 732-1000 | www.earthquakesound.com
7
Specifications are subject to change without notice.
SPEAKER OUTPUT
RCA
XLR
HI-LEVEL
CH2
T
INPU
CH1
T
INPU
HI-LEVEL
DC
12V
TRIGGER
IR
INPUT
220-240V~/50Hz
110-120V
220-240V
110-120V~/60Hz 110-120V, FUS
E T6.3AL/250V
220-240V, FUS
E T3.15AL/250V
+
-
Earthquake Sound’s XJ-300FR
amplifier is recommended for the use of one
THOR. The XJ-300FR amplifier is a 300-
watt amplifier and can be used as a mono
block, a 2 channel amplifier, or bridged for a
2.1 channel amplifier.
Earthquake Sound’s XJ-600R amplifier is
recommended for the use of two THORs.
The XJ-600R is a 600-watt, 1 channel, rack
mountable amplifier. In this instance, the
two THORs are parallelly wired.
+ -
+
-