Step 4: select mode for results step 3: setup mode – Retrotec DM-2 DucTester setup for Codes User Manual
Page 2
Page 2 of 2
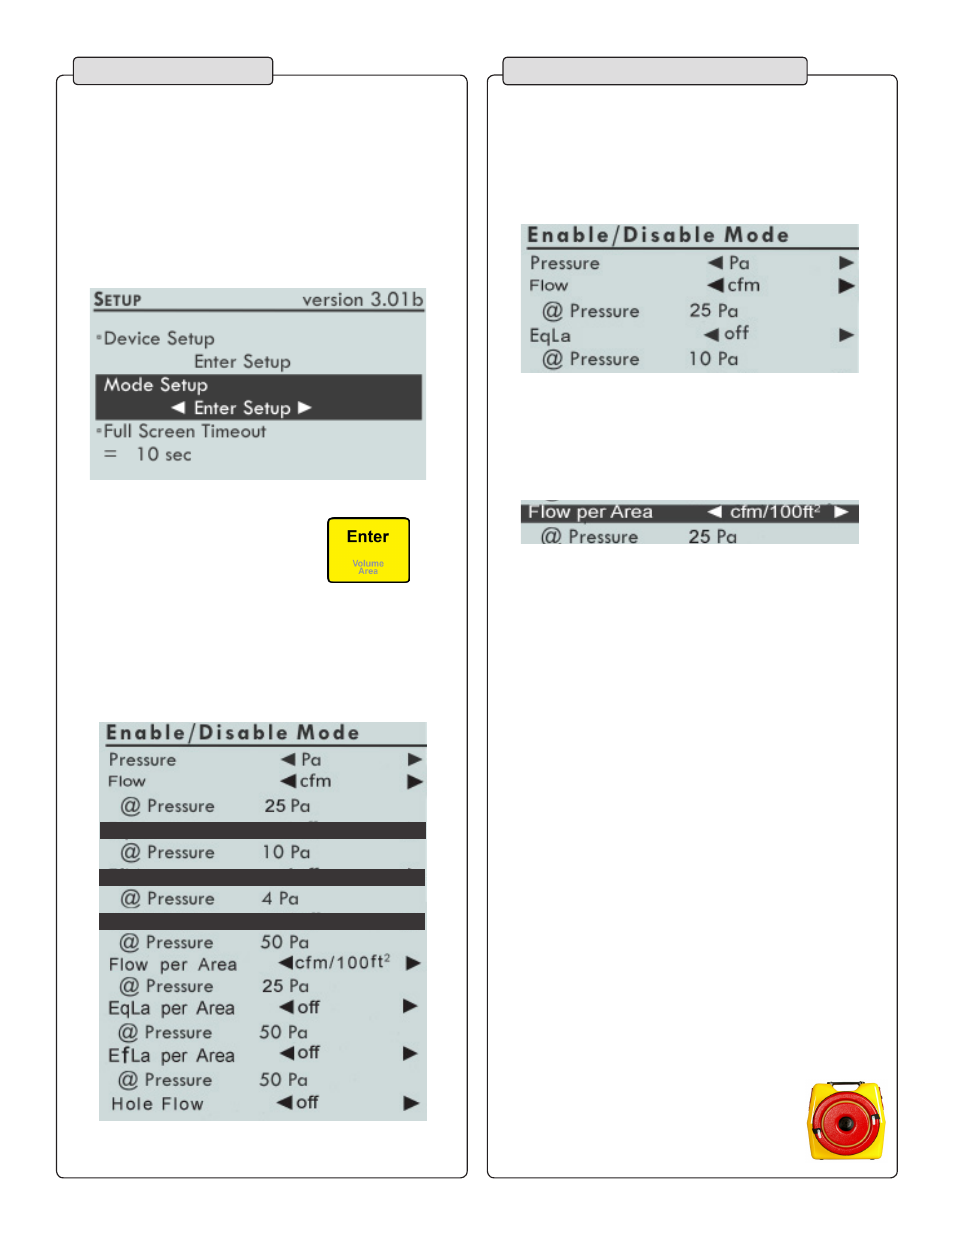
The “Mode Setup” allows you to select only the
results needed for duct testing according to
code (2009 IECC).
Instead of doing calculations by hand, simply select the
mode you are required to produce and the DM-2 will do
the work for you.
● Press [
▼
] to get to “Mode Setup”.
● Press [Enter].
The “Enable/Disable Mode” screen will list the various
modes the DM-2 will display. For Code duct testing,
most States require CFM per 100 sq. ft. of conditioned
floor area.
● Scroll down using [
▼
] past “Pressure”, and
“Flow”. Below “Flow” is “@ Pressure”.
Press [Enter][25][Enter] to change this to 25 Pa.
● Scroll down using [
▼
] to the next Mode, “EqLA”.
Press [Enter] or use [
►
] until “off” appears.
● Below “EqLA” is “@ Pressure”. Since EqLA was turned
“Off” in the previous step, “@ Pressure” can be left alone.
● Scroll down, turning the next few modes off until
the “Flow per Area.” Press [
►
] until “cfm/100ft
2
” is
selected.
● Scroll down to “@ Pressure” directly below “Flow per
Area” and press [Enter] [25] [Enter].
● Continue to turn all other Modes to “off”.
● Press [Exit] twice to return to main screen.
● Press [Mode] to switch between
results displaying on the main screen
Step 4:
Select Mode for results
Step 3:
Setup Mode
Congratulations, you’ve just set
up your gauge to test ducts!
EqLa
◄ off ►
EfLa
◄ off ►
Air Change
◄ off ►
EfLa per Area
◄ off ►
Hole Flow
◄ off ►
EqLa per Area
◄ off ►
List of Modes
●
Press [Auto Zero] until “On” appears -
to keep the gauge
zeroed and ready
to measure.
● Press [Time Avg] until “4s” appears.
● Press [Device] until “Retrotec DU200”
appears.
● Press [Range Config] until
“Mid” appears.