Fig. 2 fig. 2a – Medal Sports WMUS1344120 User Manual
Page 7
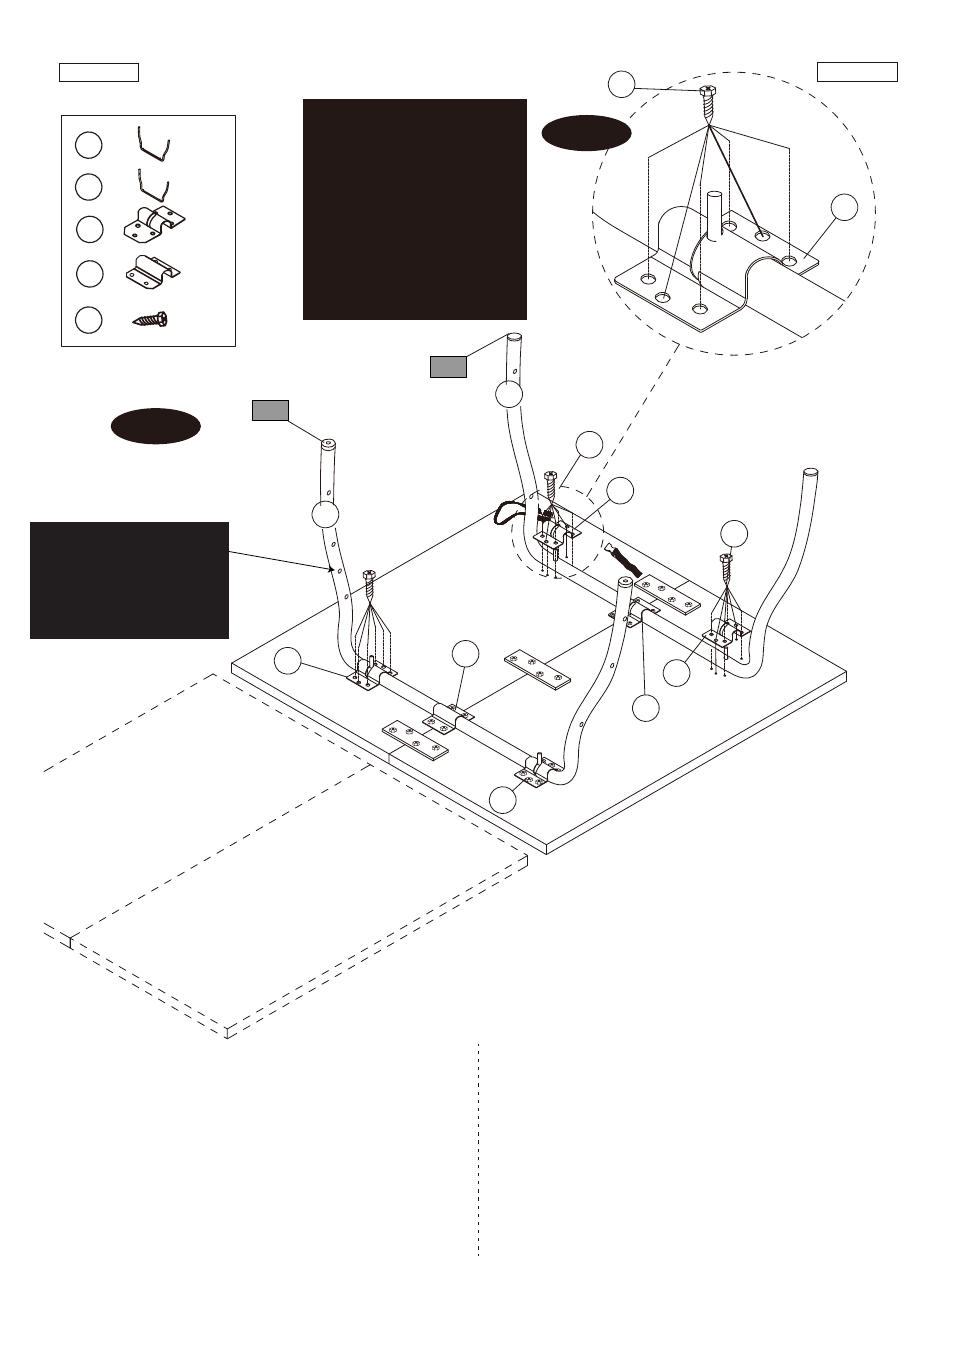
FIG.2
6. Place one Curved Outer Leg with Cap (#5) on the player
end of the table half and one Curved Inner Leg with Cap
(#6) on the center end of the table half.
7. Attach the Leg Bracket (#19 & #20) to the Curved Outer
Leg (#5) and the Curved Inner Leg (#6) using Screws
(#A7). See FIG. 2A.
8. Repeat the above steps for the other table half.
FIG.2
6. Coloque la Pierna Exterior Curvado con Gorra (#5) sobre
el jugador final de la mitad de mesa y una Pierna Interior
Curvado con Gorra (#6) sobre el centro final de la mitad
de mesa.
7. Adjunte el Corchete de Pierna (#19 & #20) a la Pierna
Exterior Curvado (#5) y la Pierna Interior Curvado (#6)
usando Tornillos (#A7). Vea la FIG. 2A.
8. Repita dichos pasos para la otra mitad de mesa.
www.themdsports.com
1344120
6
(Continúe en la siguiente página.)
(Continued on the next page.)
Español
English
5
6
X 2
X 2
Player
/ Jugador
Player
/ Jugador
Center / Centro
NOTE: Make sure that the
oval cut-out in the Leg
Bracket are facing the
center of the table for
proper installation.
NOTA: Asegúrese que el
recorte oval en el Corchete
de Pierna está cara hacia el
centro de la mesa para una
instalación apropiada.
A7
19
19
A7
19
19
6
A7
5
P2
P1
FIG. 2
FIG. 2A
A7
X 64
19
X 8
20
X 4
20
19
20
This is hole for “Gravity
Lock” assembly.
/ Este agujero es para
montar la “Cerradura
de Gravedad”.