Medal Sports AM1351500 User Manual
Page 6
www.themdsports.com
1351500
5
(Continúe en la siguiente página.)
(Continued on the next page.)
Español
English
1
1
2
2
X 2
X 2
3
3
3
X 1
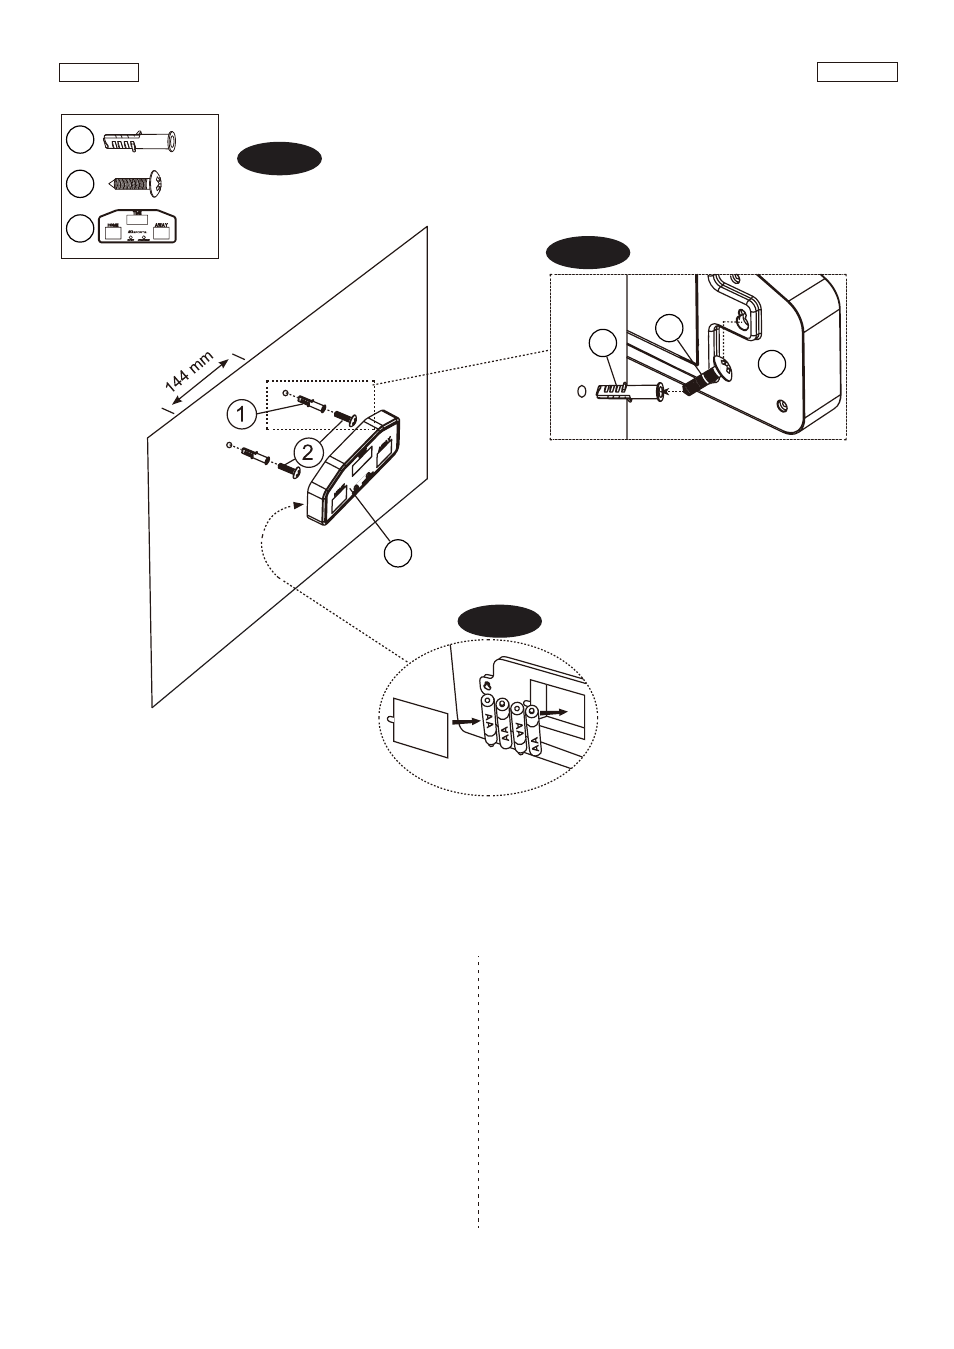
FIG. 4
FIG.4
7. Drill holes from the markers, then insert the Plastic
Screw Anchors (#1) into the holes as shown
in FIG. 4 & 4A.
Note: Do not drill holes on a cement wall or a wall
made with metal studs.
8. Insert two Screws (#2) into the Screw Anchors (#1) and
place the Scoreboard (#3) onto the Screws as shown in
FIG. 4 & 4A. .
Note: The Screws must partially stick out in order to
hang the Scorer.
9. Insert 4 AA batteries (not included) into the backside of
the Scoreboard. Batteries must be installed according to
the correct polarization required as shown in Fig.4B.
FIG.4
7. Perfora agujeros desde las marcas, luego inserte los
Sostén de Tornillo Plástico(#1) a los agujeros como
mostrado en la FIG. 4 & 4A.
Nota:Que no perfores agujeros sobre pared de
cemento o pared hecho con tachones metálicos.
8. Inserte los Tornillos (#2) a Sostén de Tornillo (#1) y
coloque el Marcador (#3) sobre los Tornillos como
mostrado en la Fig. 4 & 4A.
Nota:Los Tornillos deben sobresalir parcialmente
para colgar el Marcador.
9. Inserte 4 baterías AA (no incluido) a la parte trasera
del Marcador. Las baterías deben ser instalado a su
correcta polarización como mostrado en la Fig. 4B.
FIG.4A
FIG.4B
Rear View/Vista Trasera
Wall/Pared
WALL\P
ARED