How to choose your pattern, Straight stitching and needle position, Sewing basics – Silvercrest SNMD 33 A1 User Manual
Page 82

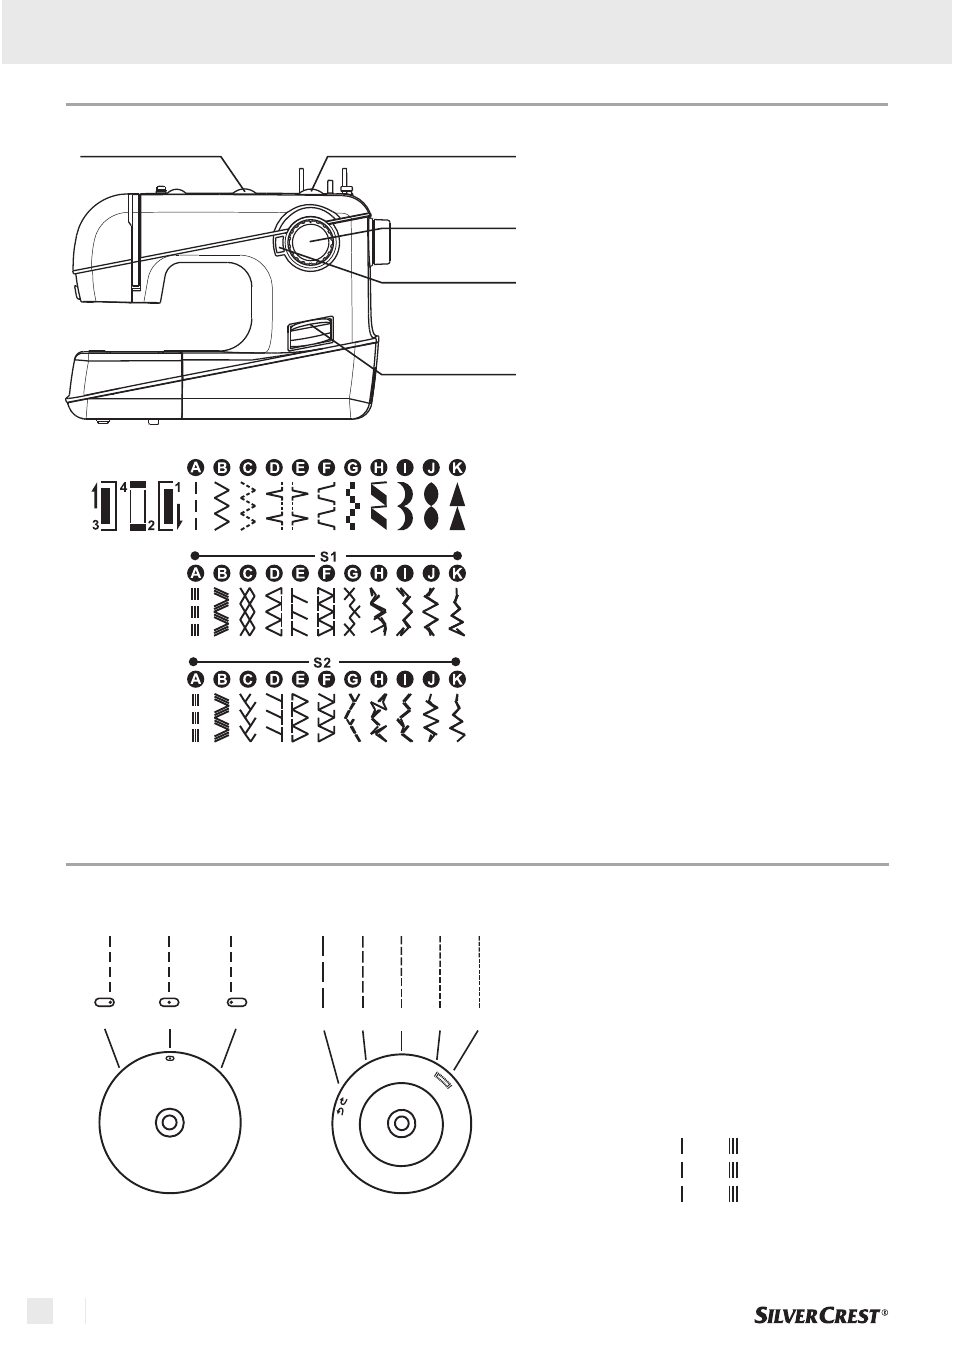
Stitch length dial S1-S2 (5)
A
82
GB / IE
How to choose your pattern
Stitch width dial (4)
Pattern
selector dial (7)
Reverse
sewing lever (8)
Stitch display (6)
For
, turn the stitch
selector dial (7) until it required letter "A"
appears in the stitch display (6). You can
adjust the needle position from left to
central by turning the stitch width dial (4).
Use the stitch length dial (5) to set the
stitch length.
For
, turn the stitch selector
dial (7) until the required letter "B"
appears in the stitch display (6). Adjust
the stitch length and stitch width
according to the fabric being used.
To obtain any of the other
on the stitch
selection panel, turn the stitch selector
dial (7) until the selected letter appears in
the stitch display (6). Adjust the stitch
length and the stitch width with the
control dials according to the result
desired. To obtain best possible results
for the decorative stitches G-K in the first
row, the stitch length should be set
between 0.3 and max. 0.5.
To obtain any of the
, turn the stitch length dial (5)
to "S1". To obtain any of the
, turn the stitch length dial
(5) to "S2" and turn the stitch selector dial
(7) until the desired letter appears in the
stitch display (6). Set the stitch length as
required.
straight stitch
zigzag stitch
patterns
shown in the upper row
stitches on the
second row
stitches on
the third row
Straight stitching and needle position
Stitch length dial (5)
0
1
2
3
4
S
1
S
2
4
3
2
1
0.5
Stitch width dial (4)
5
0
1
2
3
4
5
2.5
0
S1
Turn the stitch selector dial (7) to "A"
(straight stitch).
Generally speaking, the thicker the fabric,
thread and needle, the longer the stitch
should be.
Select the needle position from left to
right by changing the stitch width dial (4)
from "0" to "5".
Sewing basics
