Canfield, Standard ceiling installation, Close-to-ceiling installation – Kichler 300103 User Manual
Page 9: Finishing the installation
8
Canfield
TM
Fig. 17
Fig. 18
Fig. 19
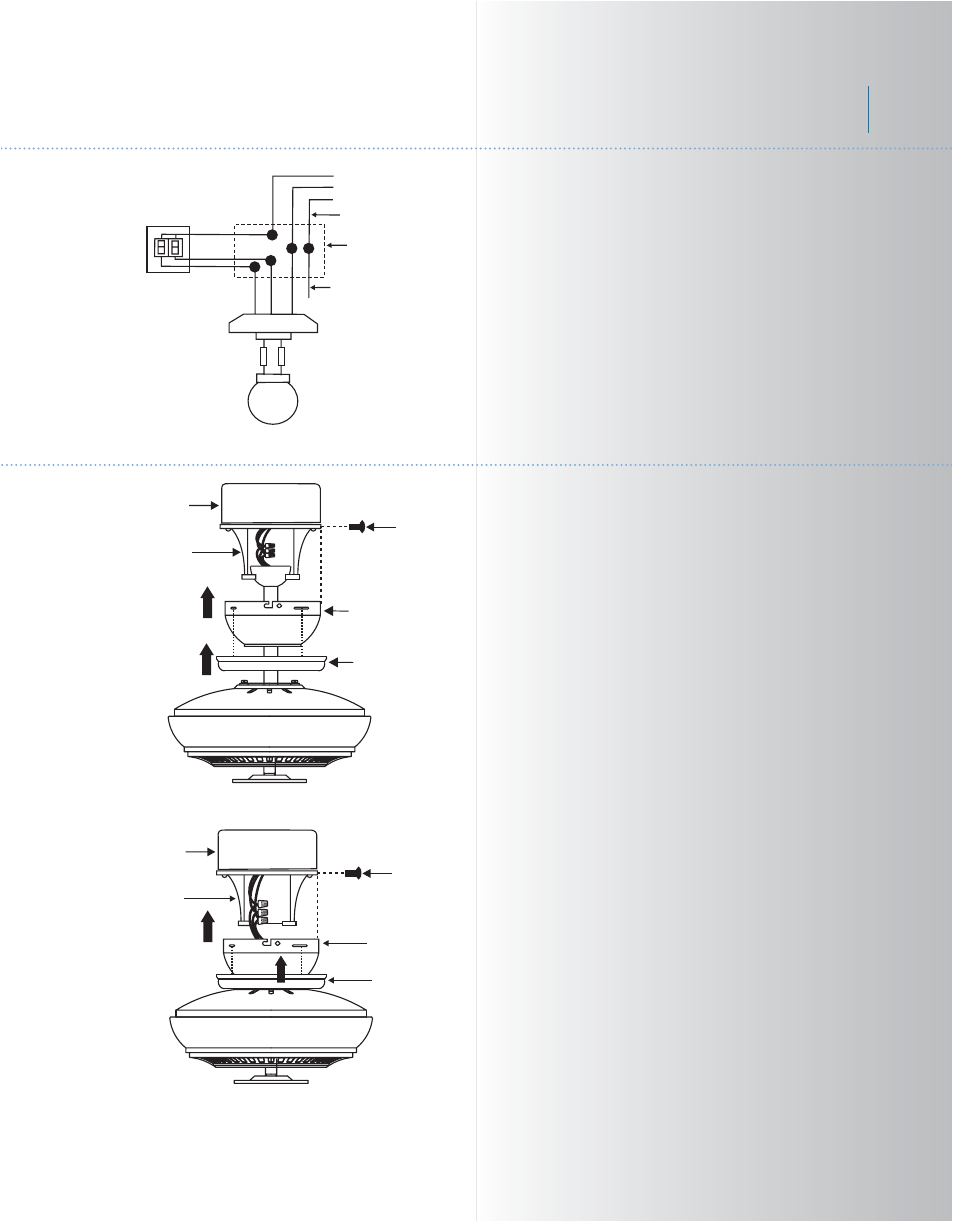
STANDARD CEILING INSTALLATION
Slide canopy up to the ceiling as shown in Fig.
18. Make sure you place the wires safely into
the outlet box. Secure the canopy to the
hanger bracket with the four screws with your
fan. Raise canopy ring up against canopy and
secure it to canopy until snug.
CLOSE-TO-CEILING INSTALLATION
Remove the fan from the hook on the hanger
bracket. Secure the canopy to the hanger
bracket as shown in Fig. 19 with four screws
included with your fan. Secure the canopy to
the hanger bracket with the four screws with
your fan. Raise canopy ring up against canopy
and secure it to canopy until snug.
Figures 16 and 17 illustrate the wiring
connections for optional wall control (The wire
color out of wall control may vary, see wall
control's installation manual for correct wire
connections.)
WARNING: TO REDUCE THE RISK OF FIRE,
ELECTRIC SHOCK, OR OTHER PERSONAL
INJURY. MOUNT FAN ONLY ON AN
OUTLET BOX OR SUPPORTING SYSTEM
MARKED ACCEPTABLE FOR FAN
SUPPORT.
8. FINISHING THE INSTALLATION
GROUND TO
MOUNTING
BRACKET
OR DOWNROD
POWER LINES 120V
GREEN
GROUND
WIRING
BOX
WH
BLUE
BLK
BLK
WH
FAN
LIGHT
WH
WH
BLUE
BLK
LIGHT
FAN
Outlet box
Hanger
bracket
Screws
Outlet box
Hanger
bracket
Canopy
Screws
Ceiling canopy
Canopy ring
Canopy ring