Scanning to a card, Placing your original document – Epson CX6400 User Manual
Page 31
Scanning to a Card
31
Scanning to a Card
Follow the instructions in this chapter to scan your photos and other documents
directly to a memory card. See these sections:
■
“Placing Your Original Document” (below)
■
“Scanning to a Card” on page 32
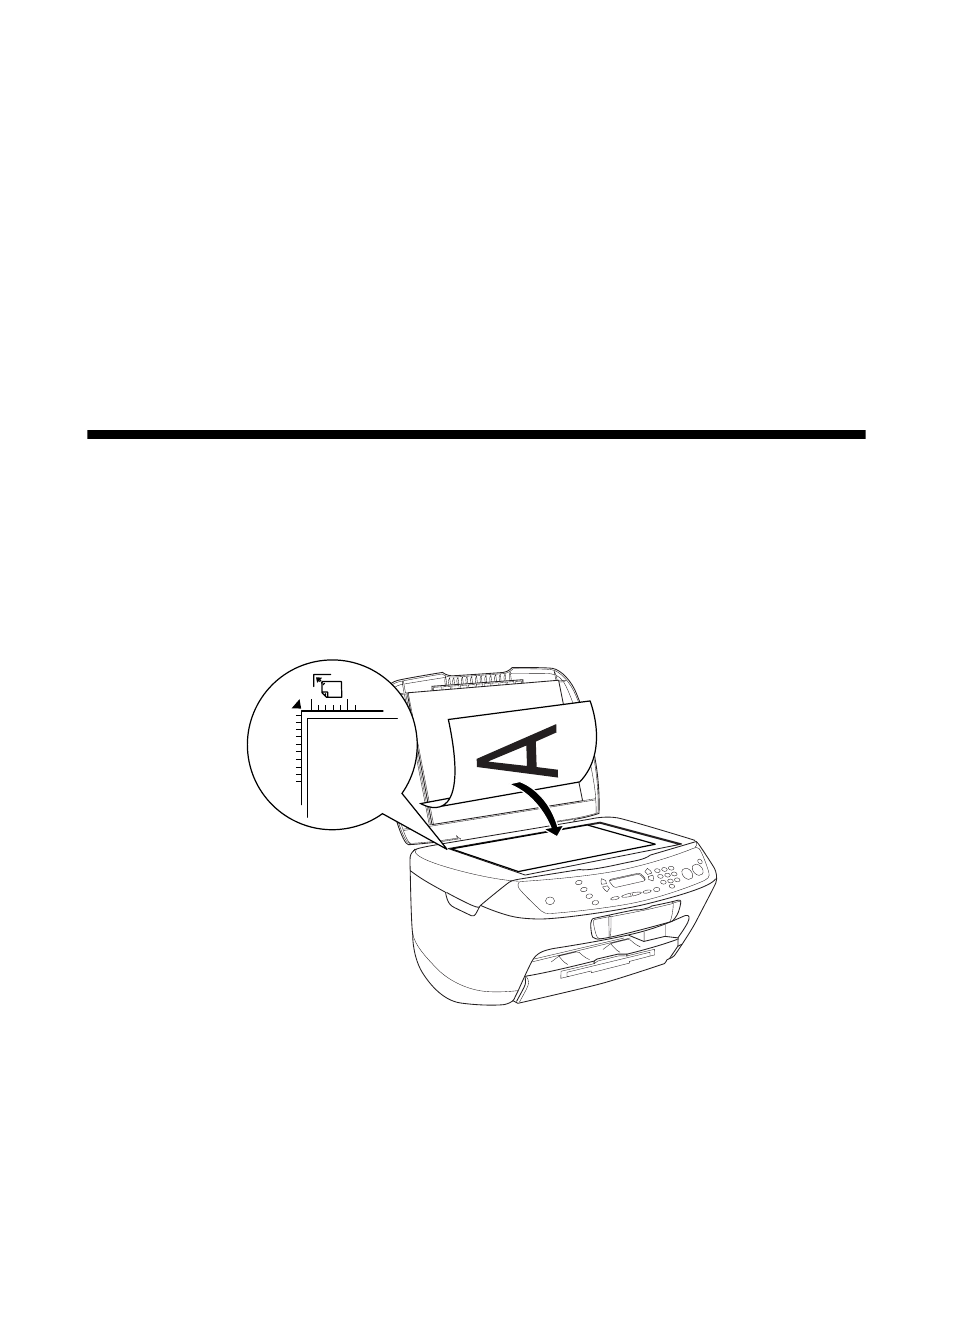
Placing Your Original Document
1. Open the scanner lid.
2. Place your document face-down on the glass, in the upper left corner. Move
your document about 1/8 inch from the top and side edge so your entire
document is scanned.
3. Close the scanner lid.
Note:
If you place your document against the guides, the edges next to the guides won’t be
scanned.
If you need to scan a thick document, such as a book, you can remove the scanner lid
to scan. Gently press down the original to keep it flat on the document table. Be sure to
replace the scanner lid when you’re finished.
Move the document
about 1/8 inch in
from the edges
- Stylus Pro 7800 (11 pages)
- Stylus Pro 4000 (49 pages)
- Stylus Photo R300 (2 pages)
- Stylus Pro 7000 (147 pages)
- AcuLaser C3000 (316 pages)
- Stylus Pro 7900 (24 pages)
- Stylus Pro 4450 (21 pages)
- 1000 (272 pages)
- T034120 (4 pages)
- T580300 (4 pages)
- 300 (91 pages)
- B 510DN (218 pages)
- B 510DN (190 pages)
- Stylus NX510 (8 pages)
- Stylus Photo RX580 (95 pages)
- T549300 (4 pages)
- B 500DN (168 pages)
- AculaserCX11NF (5 pages)
- 480SXU (24 pages)
- 4500 (317 pages)
- STYLUS RX500 (99 pages)
- 2100 (13 pages)
- Stylus NX215 (2 pages)
- T098320 (4 pages)
- T041020 (4 pages)
- R210 (8 pages)
- All-In-One Stylus Photo RX600 (164 pages)
- 777I (53 pages)
- T033120 (4 pages)
- Stylus CX7000F (8 pages)
- 60 (113 pages)
- T034220 (4 pages)
- WorkForce 40 Series (36 pages)
- T054220 (4 pages)
- Stylus CX3200 (11 pages)
- Stylus CX7800 (18 pages)
- T060220 (4 pages)
- 2500 (180 pages)
- AcuLaser CX11N (32 pages)
- AcuLaser CX11N (4 pages)
- 2000P (16 pages)
- T606600 (4 pages)
- Stylus CX6000 (18 pages)
- FS-4000DN (2 pages)
- MSDS T544700 (4 pages)