Casio PX-760 User Manual
Page 40
EN-38
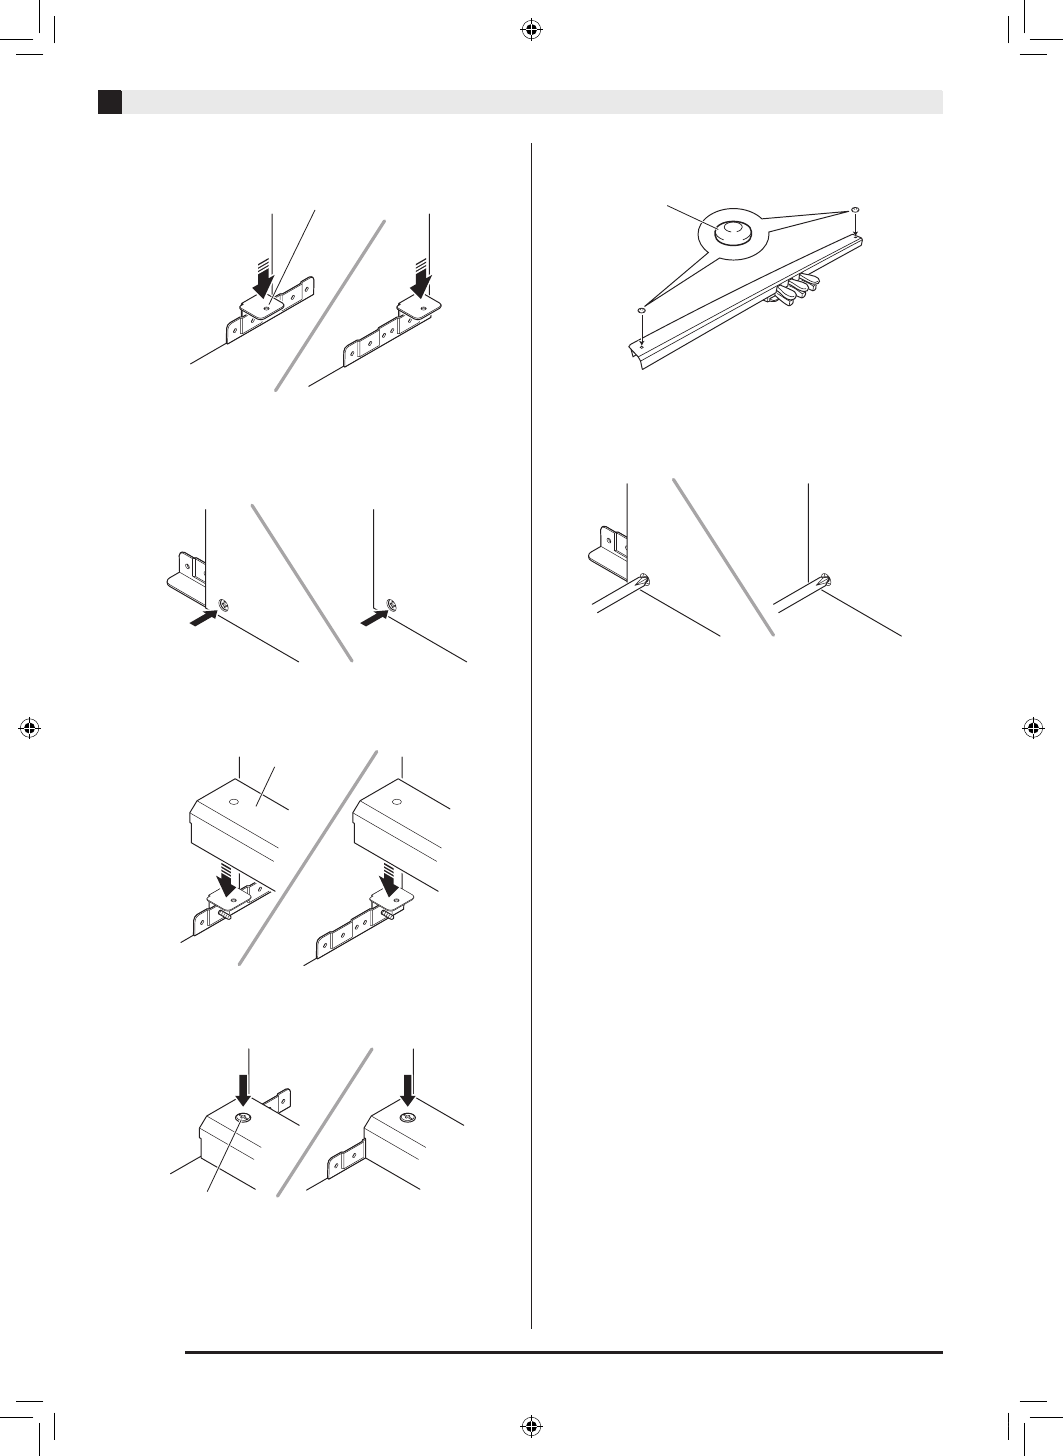
Assembling the Stand
4.
Insert angle brackets
H
into the gap between
the anti-tipping bracket and the side panel.
5.
From the outside of side panels
A
and
B
,
temporarily tighten the screws you loosened
in step 3, above.
6.
Mount pedal unit
E
onto angle brackets
H
,
which you installed in step 5, above.
7.
Use two
F
screws to secure both ends of the
pedal unit
E
to the angle brackets.
8.
Cover the heads of the
F
screws with screw
caps
I
.
9.
After adjusting the position (height) of pedal
unit
E
, fully tighten the screws that you
temporarily tightened in step 5, above.
H
E
F
I
PX760-ES-1A.indd 40
2014/06/24 10:35:16
This manual is related to the following products:
See also other documents in the category Casio Musical Instruments:
- wk 200 (80 pages)
- AP-80R (49 pages)
- AP-80R (53 pages)
- PL-40R (34 pages)
- CTK-591 (83 pages)
- CTK-591 (83 pages)
- MZ-2000 (51 pages)
- Privia PX410 (100 pages)
- LK300TV (74 pages)
- CTK-471 (46 pages)
- keyboard PX-320 (62 pages)
- CTK800ES1A (69 pages)
- PX200 (50 pages)
- AP-24 (36 pages)
- CTK810 (71 pages)
- LK-50 Troubleshooting (96 pages)
- privia PX-120 (38 pages)
- PX-310 (39 pages)
- LK-220 (45 pages)
- CTK-900 (116 pages)
- CTK-900 (122 pages)
- PS-20 (40 pages)
- CTK-671 (98 pages)
- LK-50 Troubleshooting (96 pages)
- LK90TV (81 pages)
- AP-500 (57 pages)
- CTK710 (48 pages)
- PX410R (100 pages)
- PX700 (26 pages)
- LK-50 Connections (46 pages)
- LK-50 Connections (51 pages)
- LK-50 Connections (59 pages)
- LK-45 (44 pages)
- LK-50 Connections (33 pages)
- LK-50 Connections (48 pages)
- LK-50 Connections (32 pages)
- PX-800 (53 pages)
- PX500L (36 pages)
- AP-38 (54 pages)
- LK210/215ES1A (59 pages)
- LK70S (59 pages)
- LK50 (7 pages)
- PX720 (37 pages)
- LK93TV (79 pages)
- LK-50 MIDI Implementation Chart (54 pages)