Track 2 contents after step recording, Editing data while step recording – Casio LK-50 Memory Function User Manual
Page 6
E-30
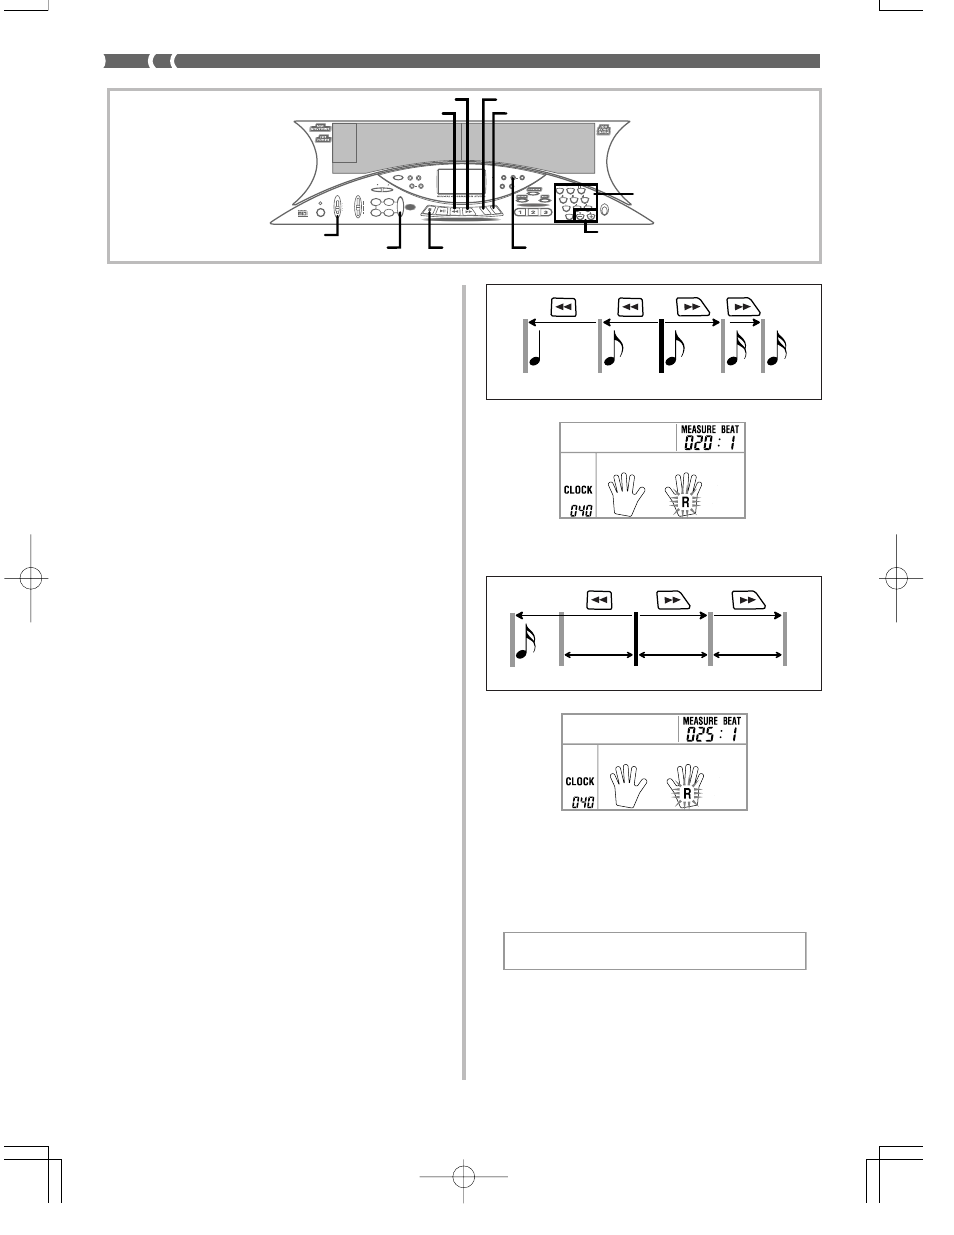
• If notes are not recorded, each press of FF or REW moves the
input point to the next successive beat.
Input point
1 beat
1 beat
1 beat
Input point
• If you move from an area that contains note data to an area
that does not contain note data, each press of FF moves the
input point to the next beat. Pressing the REW button, how-
ever, causes the input point to jump back to the location of
the first note or rest to the left.
2.
Press [+] and [–].
R
i e
w
e
?
t
r
474A-E-032A
7
8
9
4
5
6
1
0
2
3
POWER
MODE
VOLUME
MAX
TEMPO
INTRO
STEP 1
STEP 2
STEP 3
DEMO
NORMAL/
FILL-IN
VARIATION/
FILL-IN
SYNCHRO/
ENDING
FULL RANGE
KEY LIGHT
KEY LIGHT
TOUCH
RESPONSE
METRONOME BEAT
TOUCH
TRANSPOSE/
TUNE/MIDI
MEMORY
STEP
SPLIT
LAYER
GM
MEMORY
STEP
RESPONSE
ACCOMP
VOLUME
CHORD
FINGERED
CASIO CHORD
NORMAL
MIN
START/
STOP
STOP
PLAY/PAUSE
REW
FF
LEFT/TRACK1 R
IGHT/TR
ACK2
SONG BANK CONTROLLER
3-STEP LESSON
REST
(TIE)
MODE
START/STOP
MEMORY
STOP
LEFT/TRACK 1
RIGHT/TRACK 2
FF
REW
[+]/[–]
Number buttons
5.
Use the keyboard keys or the [+] and [–] buttons to
input notes, and the [0] button to input rests.
• When touch response is turned on, the amount of pressure
you use to press keyboard keys is also recorded. You can
also use keyboard keys to input chords.
• With [+] and [–] button input, a staff appears on the display
showing the note you are inputting. The loudness or soft-
ness of a note input using these buttons is the same as the
note immediately before it.
• To cancel input of a rest, press [0] again.
6.
Use number buttons [1] through [9] to input the length
of each note or rest.
• After input the length of a note or rest, the keyboard stands
by for the next input.
7.
Repeat steps 5 and 6 to input all the notes you want.
• If you make a mistake during input, you can make correc-
tions using the procedures under “Editing Data While Step
Recording” on this page.
8.
After you are finished inputting notes, press the START/
STOP, MEMORY, or STOP button to quit step record-
ing.
❚ NOTES ❚
• During step recording of a melody, the entire keyboard is a melody key-
board, regardless of the MODE switch setting.
• During step recording you can use FF and REW to move the input point
forward and back. See “Editing Data While Step Recording” on this page
for details.
Track 2 Contents After Step Recording
In addition to notes, tone numbers can also be recorded.
Editing Data While Step Recording
Memory data can be thought of as a musical score that progresses
from left to right, with the input point normally at the far right of the
recorded data. The following procedure describes how to move the
input point to the left in order to make changes in data you have
already input. Note, however, that moving the input point to the left
and changing data automatically deletes all of the data to the right of
the input point.
To edit data while step recording
1.
While a step recording operation is in progress, use
the FF and REW button to move the input point to the
location where you want to edit the data you have
already input.
• If notes are already recorded, each press of FF or REW moves
the input point to the next successive note. The data record-
ed at the current input point appears on the display.