Rn . c e 1 o – Casio LK-50 Memory Function User Manual
Page 2
E-26
2.
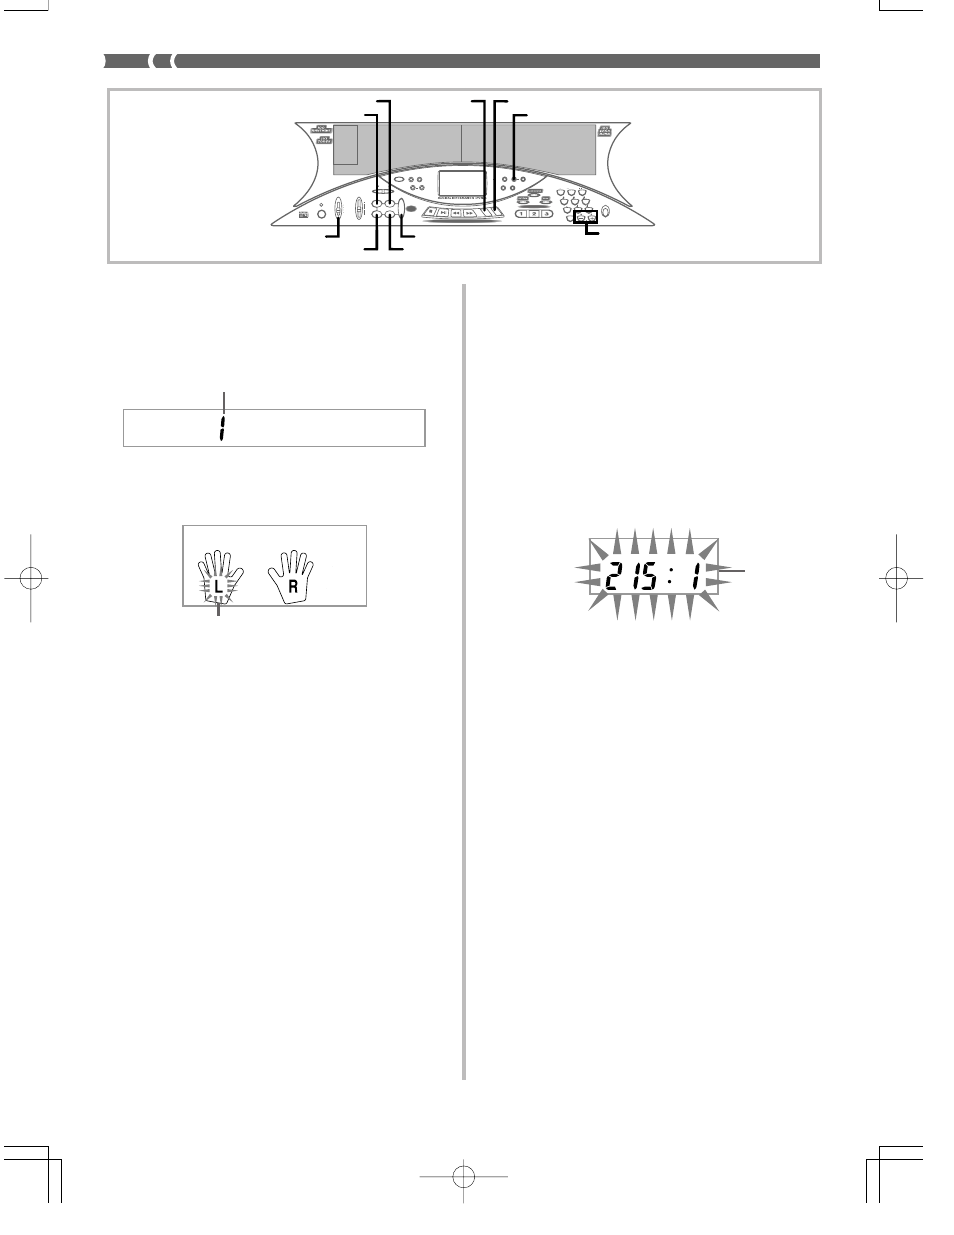
Use [+] and [–] to select 0 or 1 as the song number.
• The track is not yet selected at this point.
• The above song number screen remains on the display for
about five seconds. If it disappears before you have a chance
to select a song number, use the MEMORY button to display
it again.
3.
Press the LEFT/TRACK 1 button to select Track 1.
• The “L” flashes on the display to indicate the track that will
be recorded to.
4.
Make any of the following settings if you want.
• Tone number (page E-14)
• Rhythm number (page E-16)
• MODE switch (page E-16)
• If you are not confident about playing at a fast tempo, try
using a slower tempo setting (page E-16).
5.
Press the START/STOP button to start real-time re-
cording to Track 1.
6.
Play something on the keyboard.
• Any melody and accompaniment you play on the keyboard
(including Auto Accompaniment chords played on the ac-
companiment keyboard) is recorded.
• If you use a pedal during recording, pedal operations are
also recorded.
7.
Press the START/STOP button to end recording when
you are finished playing.
• If you make a mistake while recording, stop the record operation
and begin over again from step 1.
❚ NOTE ❚
Using real-time recording to record to a track that already contains record-
ed data replaces the existing recording with the new one.
R
N .
c
e
1
o
.
Song number
Track 1 Contents After Real-time Recording
In addition to keyboard notes and accompaniment chords, the fol-
lowing data is also recorded to Track 1 during real-time recording.
This data is used whenever Track 1 is played back.
• Tone number
• Rhythm number
• INTRO, SYNCHRO/ENDING, NORMAL/FILL-IN, VARIATION/
FILL-IN button operations
• Pedal operations
Memory Capacity
The keyboard has memory for approximately 5,200 notes. You can
use all 5,200 notes for a single song, or you can divide memory be-
tween two different songs.
• The measure number and note number flash on the display when-
ever remaining memory is less than 100 notes.
• Recording automatically stops (and Auto Accompaniment and
rhythm stops playing if they are being used) whenever memory
becomes full.
Memory Data Storage
• Anything previously stored in memory is replaced whenever you
make a new recording.
• Memory contents are retained as long as the keyboard is supplied
with electrical power. Unplugging the AC adaptor when batteries
are not loaded or when loaded batteries are dead cuts off the key-
board’s electrical power supply, causing all data stored in memory
to be deleted. Be sure to plug the keyboard into an electrical outlet
with the AC adaptor before replacing batteries.
• Turning off the keyboard while a record operation is in progress
causes the contents of the track you are currently recording to be
lost.
Track 1 Real-time Recording Variations
The following describes a number of different variations you can use
when recording to Track 1 using real-time recording. All of these vari-
ations are based upon the procedure described under “To record to
Track 1 using real-time recording” on page E-25.
To record without rhythm
Skip step 5. Real-time recording without rhythm starts when you press
a keyboard key.
To start recording with synchro start
In place of step 5, press the SYNCHRO/ENDING button. Auto Ac-
companiment and recording will both start when you play a chord
on the accompaniment keyboard.
474A-E-028A
Flash
7
8
9
4
5
6
1
0
2
3
POWER
MODE
VOLUME
MAX
TEMPO
INTRO
STEP 1
STEP 2
STEP 3
DEMO
NORMAL/
FILL-IN
VARIATION/
FILL-IN
SYNCHRO/
ENDING
FULL RANGE
KEY LIGHT
KEY LIGHT
TOUCH
RESPONSE
METRONOME BEAT
TOUCH
TRANSPOSE/
TUNE/MIDI
MEMORY
STEP
SPLIT
LAYER
GM
MEMORY
STEP
RESPONSE
ACCOMP
VOLUME
CHORD
FINGERED
CASIO CHORD
NORMAL
MIN
START/
STOP
STOP
PLAY/PAUSE
REW
FF
LEFT/TRACK1 R
IGHT/TR
ACK2
SONG BANK CONTROLLER
3-STEP LESSON
REST
(TIE)
MODE
NORMAL/FILL-IN
START/STOP
VARIATION/FILL-IN
MEMORY
RIGHT/TRACK 2
SYNCHRO/ENDING
LEFT/TRACK 1
INTRO
[+]/[–]
Flash