Casio ClassPad 300 User Manual
Page 9
E-8
20031201
2 Using the ClassPad Add-In Installer
9
. Tap [OK].
10
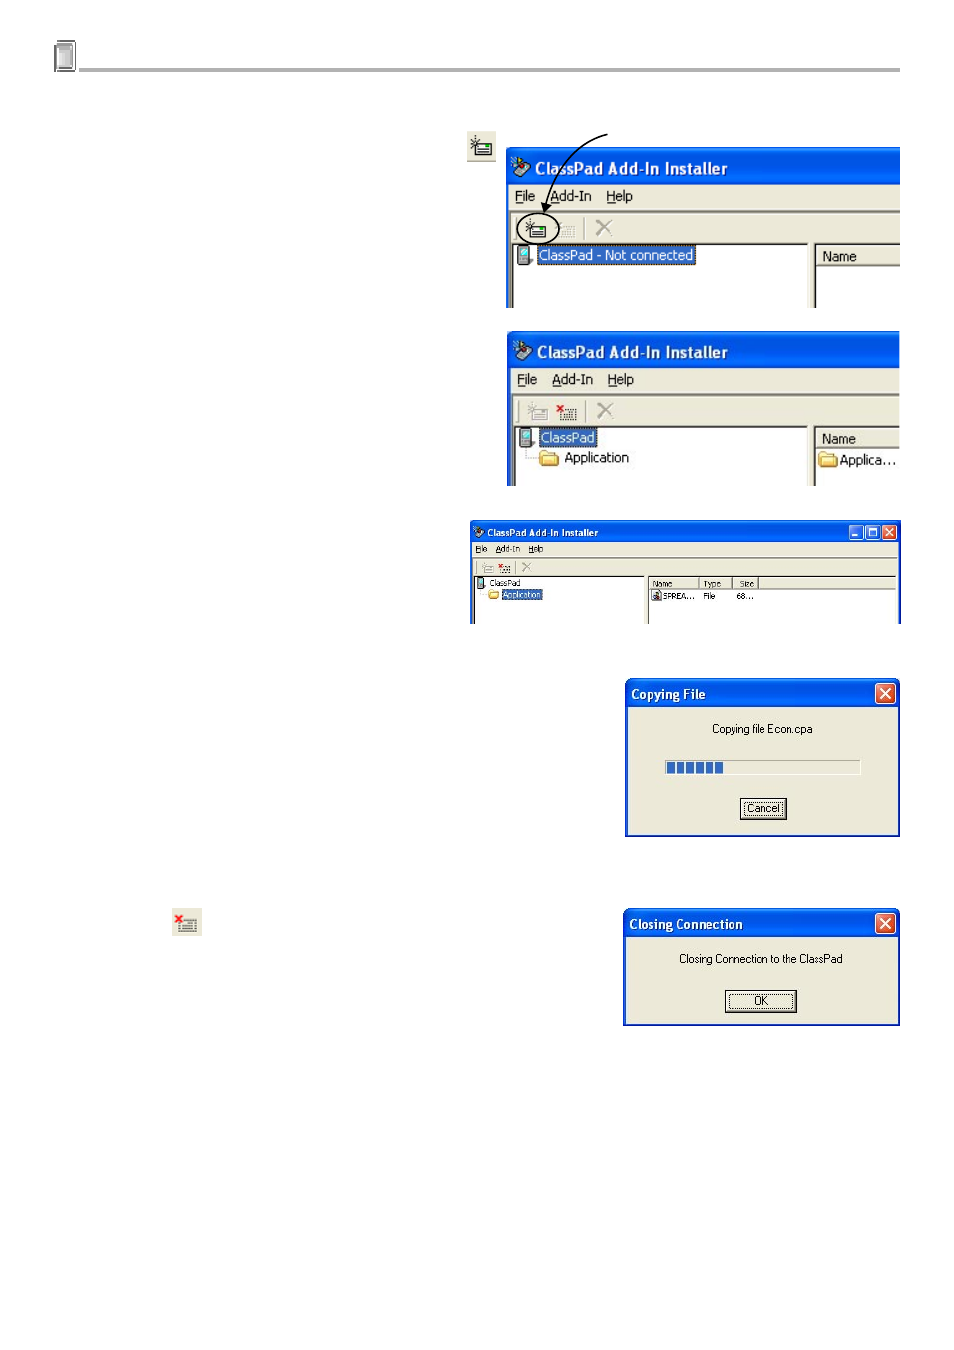
. On the ClassPad Add-In Installer window, click
.
• After a connection is successfully established
between your ClassPad and computer, the
“ClassPad - Not connected” on the left pane will
be replaced by the add-in applications that are
currently installed on your ClassPad.
11
. Click “Application” in the left pane.
• This causes the add-in applications currently
installed on your ClassPad to appear in the
right pane. If the right pane remains blank, it
means your ClassPad does not have any
add-in applications installed.
12
. Drop the add-in software you want to use onto the right pane.
• This starts installation of the add-in.
• You can also use the following steps to install a single add-in
application.
(1) On the ClassPad Add-In Installer window, click [Add-In] and
then [Application].
(2) On the file selection window that appears, click the file you
want to install.
(3) Click [Open] and then go to step 14.
13
. Click the
icon.
14
. Click [OK].