Edelbrock 1905 User Manual
Page 3
Page 3 of 6
Rev. 10/01
2001 Edelbrock Corporation
Brochure No. 63-0018
©
FINISH INSTALLATION
1.
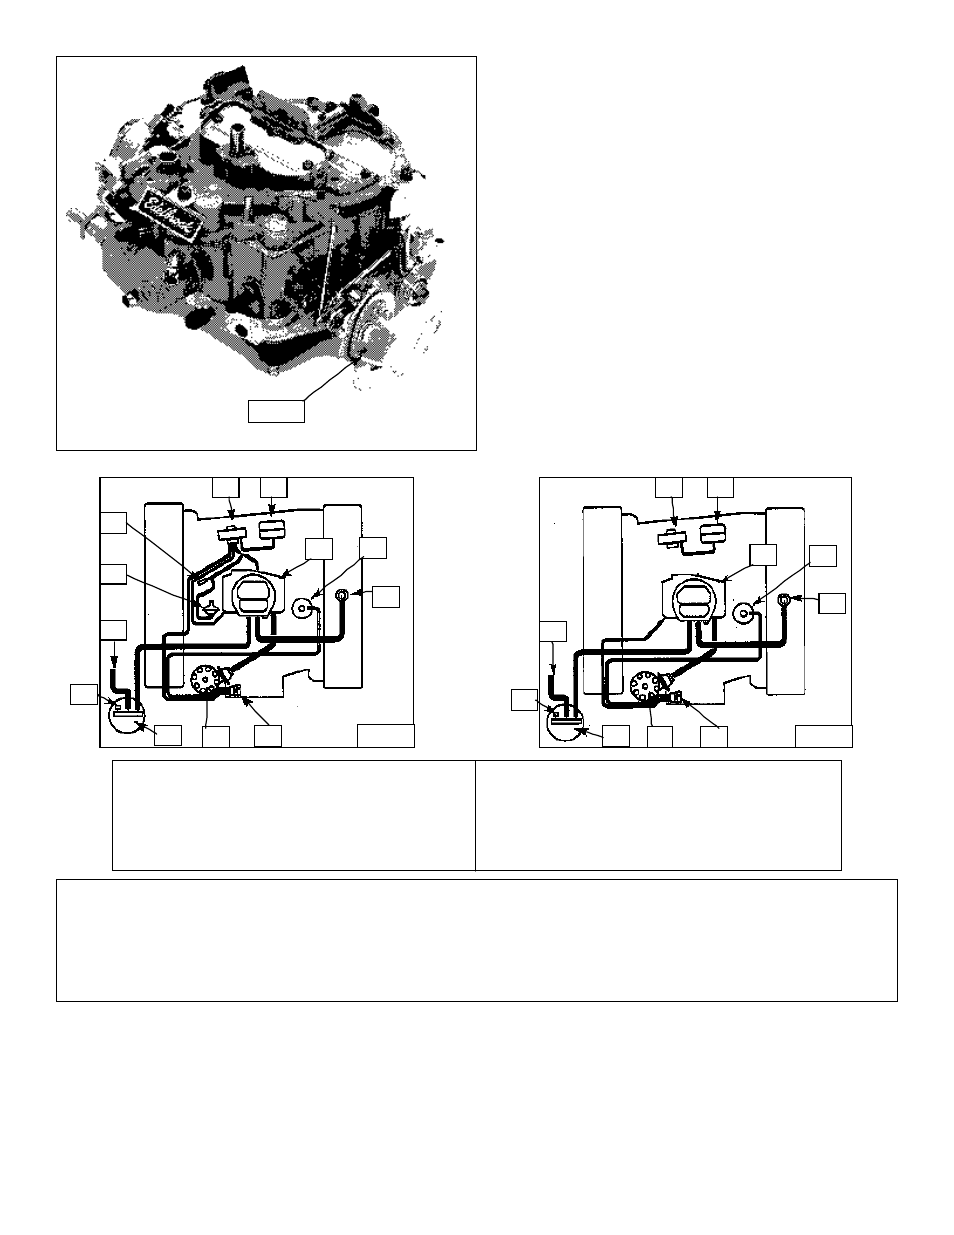
Re-connect throttle linkage, wires, hoses, etc. Your
Edelbrock carburetor may have more vacuum outlets
than the original. Leave the caps on those outlets
which won't be used. It is also required for proper
operation that you bypass the vacuum amplifier and
vacuum reservoir as seen in figure 3 & 4 . The
throttle positioner may also be removed on some
applications.
2.
Re-connect the air cleaner being careful not to over-
tighten the mounting nut which could damage the
carburetor. Install a new air filter (if needed) and re-
connect all hoses.
3.
IMPORTANT NOTE: With engine off make sure
that there is no interference when opening and
closing the throttle. Be sure that there is no binding
or hanging up between idle and wide open throttle
as this could cause the throttle to stick, resulting in
loss of engine speed control.
4.
Re-connect the negative battery cable to the battery.
SMOG INFORMATION
Regarding the 1905 carburetor that is installed on your Chrysler engine. The original thermoquad carburetor relied on
the vacuum amplifier to operate the EGR Valve. Using the new Edelbrock carburetor, the vacuum amplifier is not needed.
The EGR can be rerouted using the (port “D”) ported vacuum port. The throttle positioner may also be removed since it
is not applicable to the new carburetor. This was how Edelbrock tested the vehicle when they were granted the VC27156
exemption.
CARBURETOR TESTING
1.
NOTE: Be wary of fuel leaks! If a fuel leak occurs, stop immediately and repair the leak. Failure to do so could
result in engine fire and serious injury.
NOTE: The following adjustments can affect vehicle emissions. Laws in your area may govern these emissions.
a.
Set idle adjustments per factory recommendations for your vehicle.
b.
The choke system is pre-set at the factory, however, minor adjustments may be required. Adjust using factory
specifications for your vehicle.
Fig. # 2
1. Vacuum Amplifier
7. Dist ributor
2. Vacuum Reserv ior
8. ECS Canistor
3. Carburetor
9. Caped Same as OEM
4. EGR Valve
10. To Fu e l Tan k
5. PCV Valve
11. Throttle Positioner
6. CC EGR Valve
12. Solenoid Delay Valve
9
10
11
12
7
6
1
2
3
4
5
8
1
2
3
4
5
8
10
9
7
6
Fig. # 3
Fig. # 4